Are your pedals already worn out that you hear squeaking noises with each crank, or maybe it already looks outdated? Addressing either concern is hassle-free if you know how to remove and install bike pedals.
Many factors can contribute to noisy pedals, including worn bearings and loose axles. While it is tempting to replace these parts, a more practical solution is to remove bike pedals altogether.
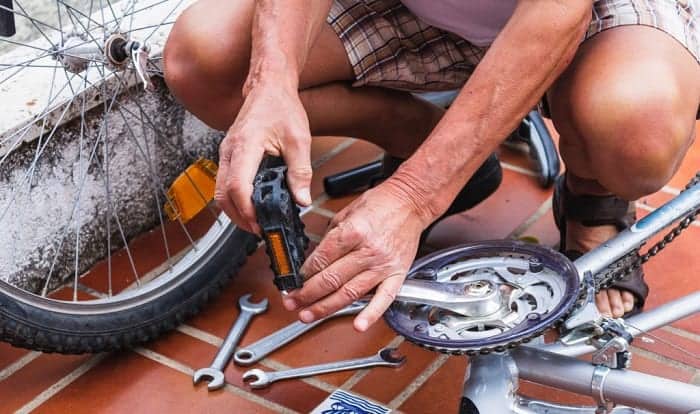
Thankfully, removing bike pedals is a straightforward process that includes no more than one or two tools. I will describe to you the process of replacing your pedals so you can continue with your biking adventures.
Things You Need for This Tutorial

If you have squeaky pedals, how to remove and replace them is an obvious question. There are not many things you need to change bicycle pedal. Pedal removal and installation are pretty straightforward; you can complete the installation within minutes.
1. Pedal Design
One thing you need to know about pedals is that the left hand threading counters precession. It is a mechanical phenomenon that causes the axle to rotate or spin in the opposite direction as the crank arm.
That is why you tighten the spindle of the left pedal every time you pedal with your left foot. Its thread design is opposite the natural direction of the axle.
As such, the correct way of loosening the left pedal is by rotating the threaded spindle to the right or clockwise. Conversely, the ideal method of loosening the right pedal is counterclockwise or to the left side.
Normally, we loosen screws and bolts by turning them to the left and tighten them by rotating the wrench to the right. The natural direction of the threads is to the right side. That is why we always tighten screws towards the right with a wrench.
However, this is not the case with the left pedal. The thread is leftwards. Inserting the wrong side pedal into a crank arm can damage the spindle threads. You can strip the threads and render the side pedal worthless.
Hence, it would be best to remember the opposite when working with the left pedal. Always tighten the left hand side pedal to your left hand or counter clockwise. Loosen it by turning the left hand pedal towards the right.
You can observe the usual procedure for loosening and tightening bolts and screws on the right pedal.
2. Other Tools and Materials
You will also need other materials and tools to complete pedal removal and installation. First, it’s essential to have wrenches or any fastening tool, depending on the pedal design.
- Most pedals require an Allen wrench or a hex wrench, although some products come with a pedal wrench.
- Another necessary thing is an appropriate lubricant to protect the threads and other threaded pedal elements.
- Lastly, you will need a brand new set of pedals. If you want to install pedals, I recommend buying a high-quality and heavy-duty set. You can search online or visit your local bicycle shop. I prefer going in-store because I can physically inspect the pedals before buying them. Unfortunately, the shop may have a limited selection of pedals. That is why most owners prefer performing an internet search.
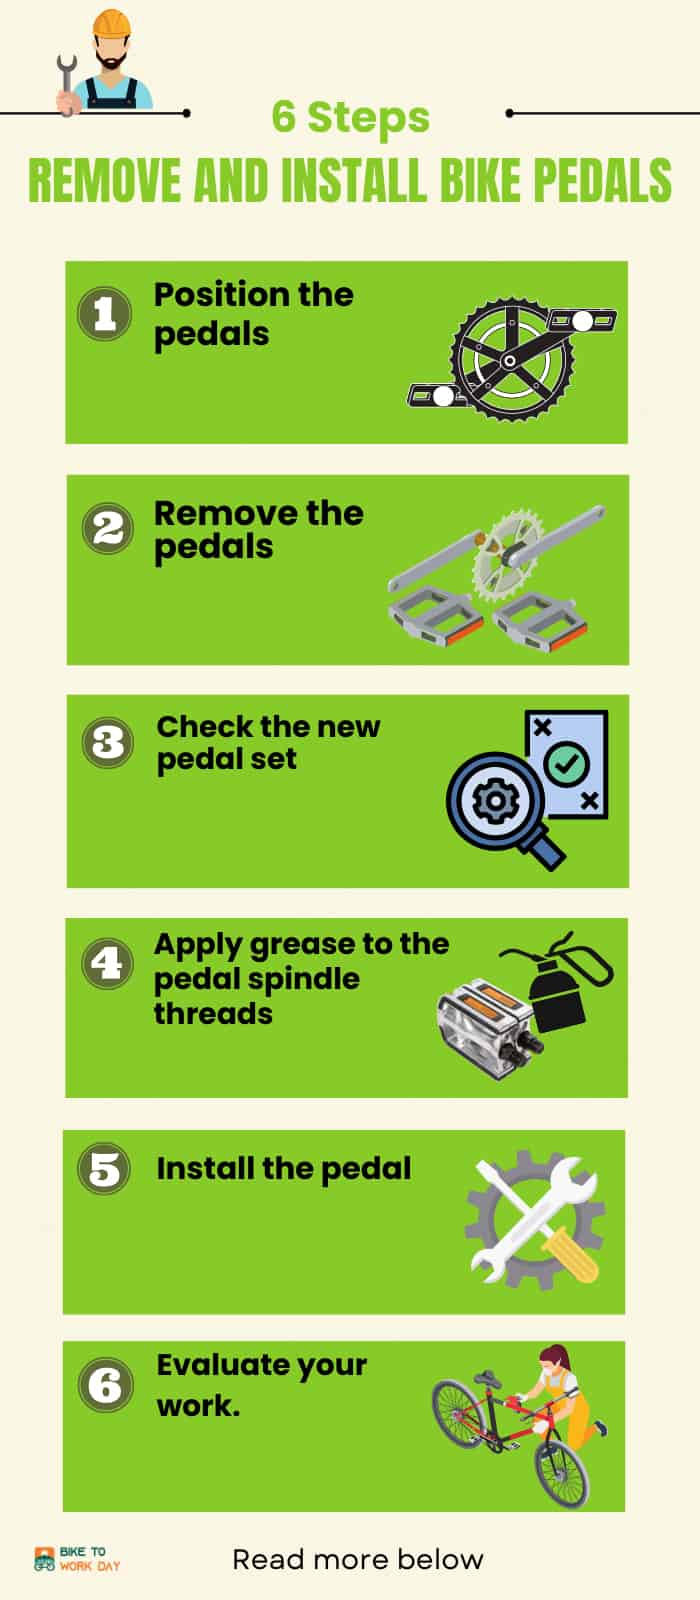
Steps to Removing and Installing Pedals
Step 1. Position the pedals.
Some people prefer propping their bikes on a bike stand when removing pedals because it is more convenient and efficient. It also facilitates more efficient turning of the crank on its axle.
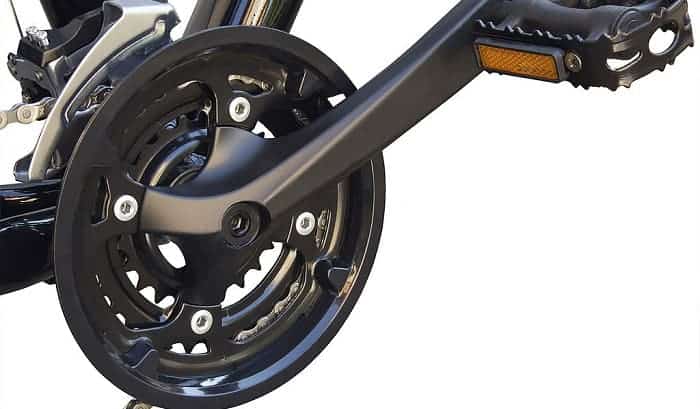
It would be best to position the crank arm of the pedal you want to remove for leverage and easy access.
Step 2. Remove the pedals.
To remove pedals from bike, locate the pedal’s spindle flat or flats and use a pedal wrench to loosen the pedals. Some pedals also have a clip you must remove. Alternatively, you can insert a hex wrench or Allen wrench into the crank arm’s inside port.
Push the Allen wrench to the right side (clockwise) if you are removing the left pedal; turn to the left side (counter clockwise) if it is the right pedal you wish to remove. You might have to leverage the crank arm to loosen the spindle.
Loosen the spindle by rotating it until the pedal pops out of the crank arm. Repeat the same procedure on the other pedal on the opposite side. This method is how you take off bike pedals systematically.
Step 3. Check the new pedal set.
Remove the brand new pedals set from its packaging and look for the engraved letters “R” and “L” on the right and left pedals. These markings represent the right and left pedals, respectively.
If you cannot see these indicators, you can check the spindle’s thread pattern. A left pedal will always have a leftward thread, while a right pedal will have the threading in a right-up orientation.
Step 4. Apply grease to the pedal spindle threads.
Most pedal manufacturers lubricate their products before packaging. However, it is advisable to apply bike grease onto the bike pedal threading before you install pedals.
Adequate lubrication of the pedal threads ensures optimal mechanical performance of the new pedals.
If you are unsure which lubricant would be best for your pedals threads, I recommend the Park Tool PolyLube 1000. Not only does this product has excellent anti corrosion properties to protect your pedals threads. It also has exceptional shear strength to withstand the forces of continuous pedaling action.
Step 5. Install the pedal.
The next step to replace bike pedal involves inserting the correct pedal into the hole of the corresponding crank arm. Always insert the spindle at a 90-degree angle.
Remember, an “R”-marked spindle goes to the right crank arm; “L” pedal to the left.
Insert your hex wrench or Allen key into the crank arm port. If your bike does not have a port, you can use a pedal wrench on the pedal spindle flats.
Push your wrench to the left side (counter clockwise) if you are tightening the left pedal. Rotate the pedal wrench to the right side (clockwise) if you are fastening the right pedal. Make sure it is tight.
Be careful when using the wrench to avoid over-tightening the spindle. If it is too tight, you might strip or damage the thread. If loose, you risk losing your pedal mid-ride because. You might want to check the pedal’s correct torque.
Use your wrench to turn the spindle about 1/8 further to ensure proper fastening if you do not find manufacturer-recommended torque settings.
Step 6. Evaluate your work.
An essential step to a successful bike pedals removal and replacement is evaluating one’s work.
Try wriggling them to ensure they are secure in the crank arms. Crank it up and listen for any creaking or squeaking noise. If you hear any, you might want to repeat from Step 2.
Loosen them with an Allen wrench, hex wrench, or a pedal wrench. and apply more bike grease onto the pedal threads.
Go for a ride and check the overall pedal function. If you are unsatisfied with the results, you can always bring it to a professional. A mechanic can recheck and evaluate other mechanical problems, while adjusting the pedals with a wrench.
Global Cycling Network has an educational video on removing and replacing pedals using a wrench.
Conclusion
Knowing how to remove and install bike pedals is every rider’s responsibility. It ensures a safer and more comfortable biking experience by eliminating annoying noises and safeguarding optimal pedal function.
Did this article give you confidence in replacing your pedals? If yes, you might have social contacts who might benefit from it, too. You can share this how-to guide with them if you wish. I will be happy to hear your comments and feedback, too.

“Bike commuting should be the trend for the next few years, and it is a convenient and eco-friendly way for us to travel. And we are here to make it a bit less troublesome for people who want to maintain their vehicle for a long time. So, the content I expect to put out here is offering help for bikers who are facing issues with parts of their bikes once in a while. Let’s have fun and protect the environment together!”