
Are you no longer happy with your bicycle saddle? Do you feel your rear end burning every time you hit cracks or bumps on the road? You can ensure a more comfortable ride if you know how to install a bike seat. After all, bike saddles are not as durable as your bicycle frame.
Installing a bike saddle is a straightforward process because manufacturers designed it that way. You only need several minutes and a few tools, then follow my detailed step-by-step guide to replace your worn or outdated seat with a classy, butt-comforting saddle.
Table of Contents
- Things You Need for This Tutorial
- Steps to Installing a Bike Seat
- Step 1. Unfasten the old saddle’s clamp bolts.
- Step 2. Remove the old bike seat.
- Step 3. Clean the clamp.
- Step 4. Prepare the new saddle.
- Step 5. Set the saddle on the clamp.
- Step 6. Secure the clamp bolts.
- Step 7. Determine the ideal bike seat height.
- Step 8. Measure the saddle post’s height.
- Step 9. Loosen the saddle post bolt.
- Step 10. Adjust and secure the seat post height.
- Step 11. Adjust and secure the saddle position.
- Conclusion
Things You Need for This Tutorial
There are only a few things you need to install bicycle seats.
Most bicycle seats have a hex bolt securing the seat rails to the clamp. The same is true for the seat post clamp or metal ring. That is why it is a good idea to have a hex wrench on hand.
You can purchase a new bike seat from your local bike shop or order one online. Ensure the saddle is the correct size for you. Otherwise, biking will not be a comfortable ride.
You might also want to prepare cleaning materials, such as paper towels. A carpenter’s level and plumb bob will also come in handy when adjusting the seat. A bike lube is also necessary.
Steps to Installing a Bike Seat

Step 1. Unfasten the old saddle’s clamp bolts.
Bike seat installation starts with the removal of the old saddle. Get your wrench and unscrew the bolt that secures the metal clamp to the seat post. Turn the bolt about two to three times.
If there are two bolts, you must unfasten them simultaneously to avoid stripping the thread. You do not need to remove the hardware completely, just enough to wiggle the clamp around.
Pro Tip: No bolts? Check your seat post. You might find a knob or bolt at the connection between the frame and the seat.
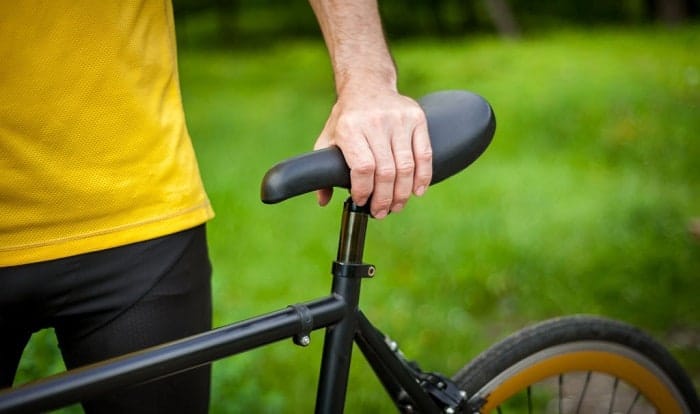
Step 2. Remove the old bike seat.
Your saddle has thin metal rails underneath it, which sit between the upper and lower clamp jaws. Lift the upper clamp jaw to free the saddle rails. Pull the old bike seat straight up.
If the clamp has two bolts and you find it difficult to disengage the jaws, you might want to completely remove one of the bolts.
Step 3. Clean the clamp.
Before you put on a bike seat, it would be best to free the clamp of dust, grime, grit, dirt, and other particles. You will want the new saddle to sit on a clean clamp and prevent creaking or squeaking during a bike ride.
Use a moist paper towel to clean the surfaces. Ensure to wipe all clamp channels and sides of both clamp jaws.
Step 4. Prepare the new saddle.
Get your new saddle and lubricate the rails and bolts. Spread the bike lube over the threading with a paper towel. Insert the bolts through the clamp holes to lubricate the holes’ insides.
I recommend the Park Tool PolyLube 1000 because of its high-shear strength and moisture resistance. It should keep your bike saddle squeak-free.
Step 5. Set the saddle on the clamp.
Position the new saddle’s rails on the bottom clamp jaw’s channels. Ensure the seat’s front-end points to the handlebar and is in line with the bicycle frame.
Place the upper clamp jaw over the rails, ensuring a perfect fit. Align the holes on the top and bottom jaw clamps while holding the saddle.
Step 6. Secure the clamp bolts.
Insert the bolt through the bottom and top holes and tighten it with a wrench, turning clockwise. If the saddle has more than one bolt, it would be best to secure the hardware evenly to avoid damaging the threads.
Continue tightening the bolts until the bike seat no longer moves on its own. However, you should still be able to wiggle the saddle around for adjustment.
Step 7. Determine the ideal bike seat height.
Installing a new bike seat also requires adjusting the bike seat post. You will want the height to be just right for safety and comfort.
First, measure the length of your pants’ inseam. Stand up straight against a wall, hold a ruler or stick between your legs, and pull it up towards the groin. Check your comfort level with the ruler in your groin. Mark the level’s top edge on the wall with a pencil and measure the distance from the floor.
Second, multiply the inseam measurement by 0.887 to determine your bike’s ideal seat height. For example, if your inseam measurement is 30 inches, your bike saddle height is 26.61 inches (30 inches x 0.887).
Step 8. Measure the saddle post’s height.
Get a tape measure and place the tip at the center of the sprocket – the teethed disk connecting the pedals. Extend the tape measure onto the saddle’s top surface and secure it to the seat post with adhesive tape. You can also ask someone to hold it for you.
Step 9. Loosen the saddle post bolt.
Check your bike frame where it connects to the seat post. You should see a clamp or metal ring with a bolt that keeps the saddle post from sliding.
Use a wrench to loosen the bolt by turning it to the left. It should allow you to wiggle the seat post to make the height adjustment.
Step 10. Adjust and secure the seat post height.
Raise or lower the seat post according to your inseam measurement.
In our example, you must lower the seat post if the saddle height is higher than 26.61 inches and raise it if it is lower than the computed inseam height.
Secure the seat post bolt to prevent it from sliding when riding your bike.
Step 11. Adjust and secure the saddle position.
If you install bike saddle, it is always best to achieve optimum riding comfort.
Wiggle the saddle so that it is parallel to the ground. Tilting it backward will make pedaling more challenging. Angling the seat forward can strain your arms when biking. You might want to place a carpenter’s level on the bike seat to ensure parallelism to the ground.
Sit on the saddle and move the pedals to the same height. Get a plumb bob and hold it just behind the kneecap. Check if the string lines up with the pedal axle (the sprocket’s center). Adjust the bike seat forward or backward until you get the perfect alignment.
You can secure the saddle bolts once satisfied with the bike seat position.
Here is an excellent video from Clint Gibbs about replacing or installing a bike saddle.
Conclusion
Learning how to install a bike seat lets you ensure optimum comfort and safety when riding your bike. It also gives you the chance to put on a better and more elegant saddle if that pleases you.
Was this tutorial helpful? I would love to hear your thoughts about it and, if you have questions, I would be more than happy to answer them. You might also have friends who would also like to know how they can install a bicycle saddle. You might want to share this tutorial with them, too.

“Bike commuting should be the trend for the next few years, and it is a convenient and eco-friendly way for us to travel. And we are here to make it a bit less troublesome for people who want to maintain their vehicle for a long time. So, the content I expect to put out here is offering help for bikers who are facing issues with parts of their bikes once in a while. Let’s have fun and protect the environment together!”