An overriding quality that cyclists should always prioritize is comfortability. Whenever on long or short ride duration, proper configurations on your bike are significant to achieve the best experience. Likely, the adjustments necessary to fit in with the bicycle saddle.
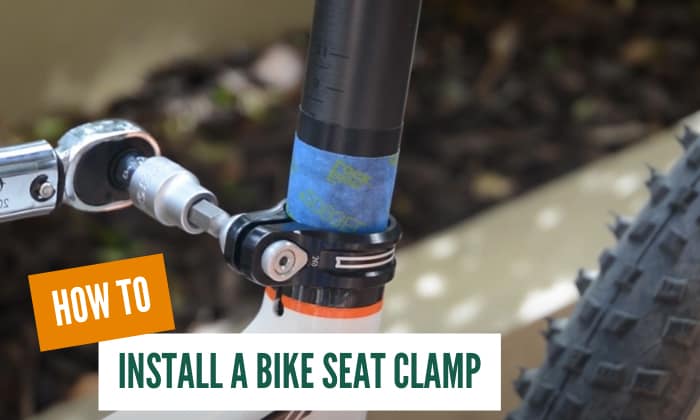
So if you have to modify your seat post now, you might ask how to install a bike seat clamp. This article will help you just right, beginner or not, to easily do the procedure wherever you are.
Table of Contents
Step-by-step to Install a Bike Seat Clamp
A bike seat clamp resembles a metal ring collar above the seat tube that secures the seat post, available in different diameters due to variations of each bicycle tube.
It clamps down tightly on the seat post, preventing the seat post from sinking into the bike frame and keeping the saddle in place.
As a vital accessory to attach a bike seat to a post, ensuring you install one correctly will help you with easier bike seat assembly, critical to adjust in any riding style you prefer.
Here’s a step-by-step guide to get you started.
What to prepare?
- Bike Seat Clamp (Quick-Release or Allen)
- Allen Key
- Carbon Paste or Grease
- Lever
- Hex Wrench/Set
- Torque Wrench
- Seat Binder Bolt
- Torque Key
- Caliper (Digital or Vernier)
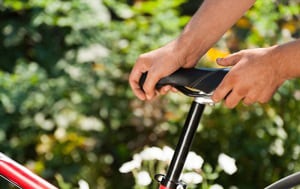
Step 1: Check your tube diameter
Bike seat installation begins with a precise measurement of each component necessary to assemble it correctly.
With different bicycle saddle clamp variations available, you should confirm the correct size of the clamp that will fit on the bike seat tube. You can check out its outer diameter to know what will work best for your bicycle.
To do so, you can gauge its width with either a vernier or digital caliper.
Step 2: Unfasten the lever
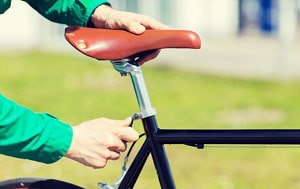
There are two bike saddle clamp types available in the market that you can choose from:
- A quick-release seat clamp
- An Allen bicycle seat post clamp.
While the former requires a lever to tighten bike seat clamp, the latter needs an Allen key.
Gradually unscrew the lever until it comes loose, then remove the seat post from the bike frame. With the disassembled parts, you’ll notice a cutout section in the tube, which is crucial in helping the clamp function.
To start the installation, place the bicycle seat post clamp on the open section of the seat tube.
Step 3: Tighten bike seat clamp
After setting down the bicycle saddle clamp, you can secure it in the seat tube by screwing the seat binder bolt using a torque wrench.
Note that it’s easier to install a quick release seat clamp since it does not require additional tools and bolts when doing the procedure, unlike a standard-type bike seat clamp which will also require you to use Allen keys.
Ensure that the lever and the bolt are tight to avoid issues such as slipping seat posts. Adequate tightness will allow you to close the lever without the seat post wiggling.
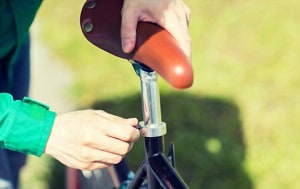
Step 4: Connect the seat post
Once you tighten the bike seat clamp and lever to its position, you can put the bike seat back together.
Ensure the bike seat rail adapter is connected correctly to the saddle and the seat post. Doing so will allow you to safely and efficiently bind the seat.
Apply a light grease to the seat post and attach it to the tube. To finish the procedure, adjust the seat post according to your desired height and lock it with the lever, putting it in place firmly.
Other Tips When Installing a Bike Seat Clamp
The bike seat clamp is a crucial accessory to put a seat on a bike. Considering these tips will help you work on installing bicycle seat and bicycle seat post clamp with ease.
- The foremost thing you should consider when installing a bike seat clamp is its tightness, which is crucial to ensure the rider’s safety. Moreover, to avoid mishaps related to slipping seat posts.
- Due to variations in size and diameter, tightening bike seat clamps do not require a definite torque. There is a maximum torque mark indicated in the seat clamp area that you can follow when calibrating one.
- Whether you use a bicycle seat post extender or not, keep in mind that its minimum insertion depth is 150mm to securely hold it in place.
- Several factors affect ride comfort and performance, such as saddle positioning necessary to control the bicycle. You can always search for bike seat fitting instructions provided by the manufacturer to assist you.
Helpful Tips/FAQs
How to install a bike seat for a child’s bike?
Prepare your bike seat mounting hardware to install bike seat for child, to be connected to either the bike frame or the rear rack based on the mechanism of your chosen child’s bike seat brand.
Follow the bike seat fitting instructions from the manufacturer for the adjustments necessary to install the bicycle seat properly.
Always align the bicycle seat on the rear rack and tighten the knob to secure it after replacing a bicycle seat.
Check out the following videos from bicycle seat brands like Shotgun to get started.
Conclusion
Beyond the idea of comfort, safety comes to priority when riding a bicycle. It is achievable with suitable adjustments and components integrated with your bike, such as your bike seat.
A significant part of any bike seat is the clamp. The component securely connects each segment, which is necessary to ensure that the rider can work with optimal performance.
With the efficient steps posted above, we hope you learned how to install a bike seat clamp through this article.
Always remember to keep your seat clamps tight. Enjoy riding, and thank you for reading!

“I ride my bike to work for years, but is that enough? Our carelessness towards our surroundings has taken a toll on the environment. And now, everyone is responsible for changes; even the most minor contribution is counted. With this hope and spirit, I started with my partner to establish Biketoworkday to help more individuals commute to their work sites on their bikes.”