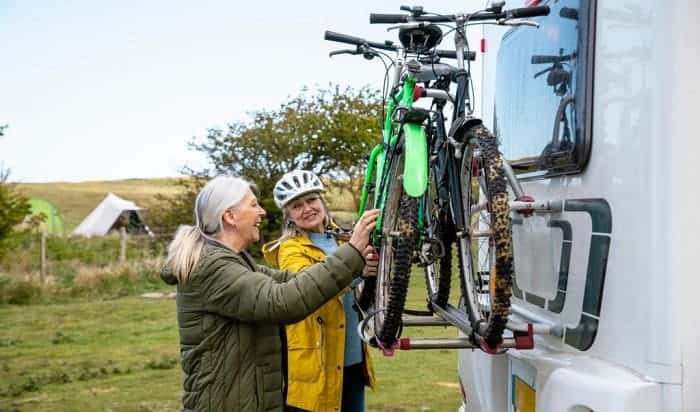
Do you love to go on cross-country trips and take your bike with you? Well, you can conveniently bring your bicycle anywhere with the help of bike racks. Install the bike rack first and mount your bike.
However, issues are common when it comes to installing the bike on the car. Common questions like “What if it falls off?” can be heard. But do not worry because we will help you know how to put a bike on a bike rack safely and securely.
This way, you can keep your bike locked up as you travel to another city.
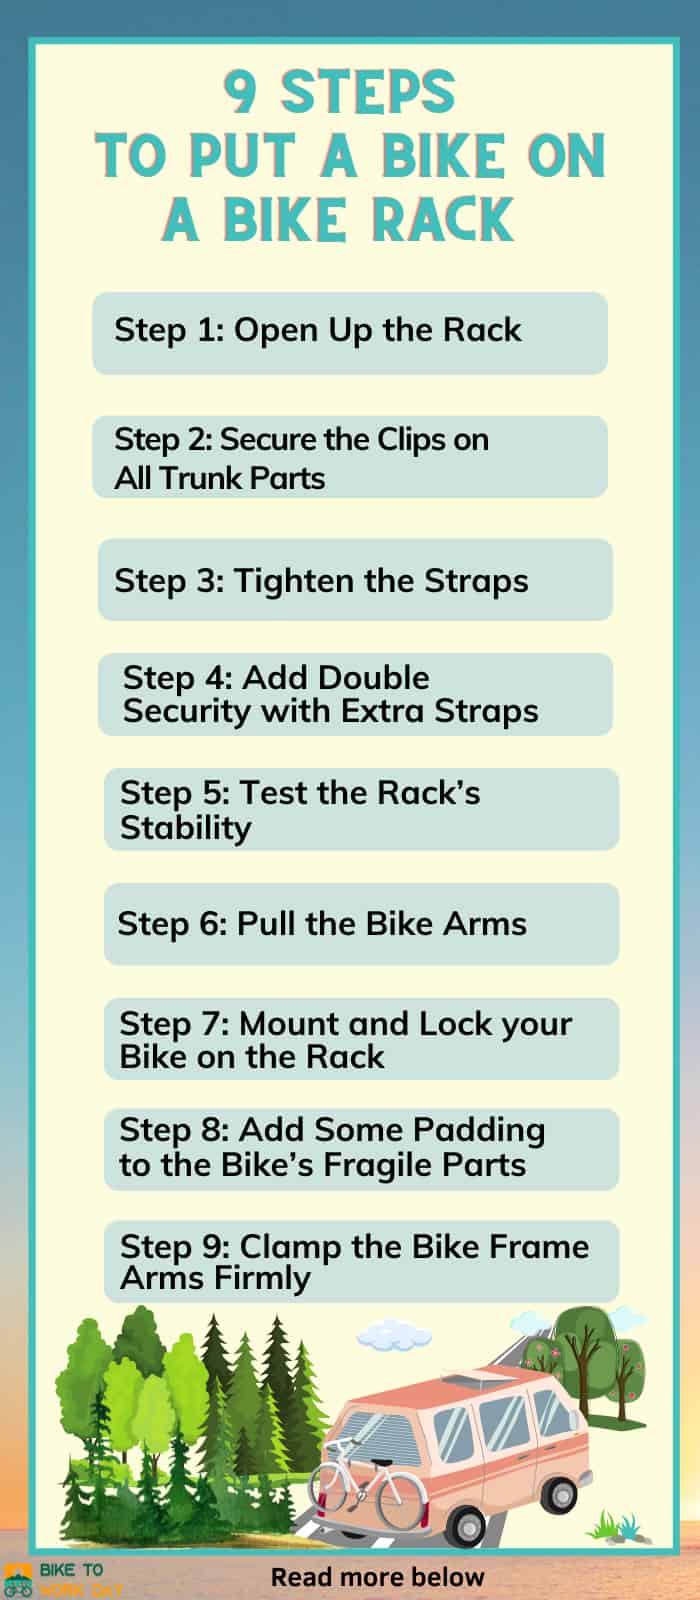
Table of Contents
- Prepare the Things You Need
- Guide on How to Put a Bike on a Bike Rack
- Step 1: Open Up the Rack
- Step 2: Secure the Clips on All Trunk Parts
- Step 3: Tighten the Straps
- Step 4: Add Double Security with Extra Straps
- Step 5: Test the Rack’s Stability
- Step 6: Pull the Bike Arms
- Step 7: Mount and Lock your Bike on the Rack
- Step 8: Add Some Padding to the Bike’s Fragile Parts
- Step 9: Clamp the Bike Frame Arms Firmly
- Second Alternative
- Conclusion
Prepare the Things You Need
The traditional method will not require any tools, but it is good to have the following for your convenience.
- Straps
- Frame Adapter (for Method 2)
Guide on How to Put a Bike on a Bike Rack
Follow these steps to put bike on bike rack. I will discuss method 1 first, where you will not need any tools to mount the bicycle.
Step 1: Open Up the Rack
The first thing to do is to open the bike rack. The result will be an arc shape, but this varies depending on the model.
When you put a bike on a Thule bike rack on SUVs, you will notice that one side attaches against the back window, while the other end goes against the trunk.
If you have sedans and coupes, the bike rack likely mounts above the car and at the trunk’s behind.
It’s normal to face issues when you attach a bike rack. And the most common is knowing which side faces upwards. In this case, you just have to look for the clamps that secure the bicycle in place and position them upwards.
When you do this, the rest of the bike rack will follow the proper orientation.
Step 2: Secure the Clips on All Trunk Parts
The next step is to hook the areas where the bike trunk actually splits from your car. Ensure that you do not force or push the clips in to avoid damaging your bike rack and your bicycle. All you have to do is to look for a spot where the bike clip easily attaches.
You will see writings on each clip guiding you on where to put or install the particular clip. Words like “top,” “side,” and “bottom” can be seen. Hooks and clips are one of the most critical tools, so make sure not to lose any.
Step 3: Tighten the Straps
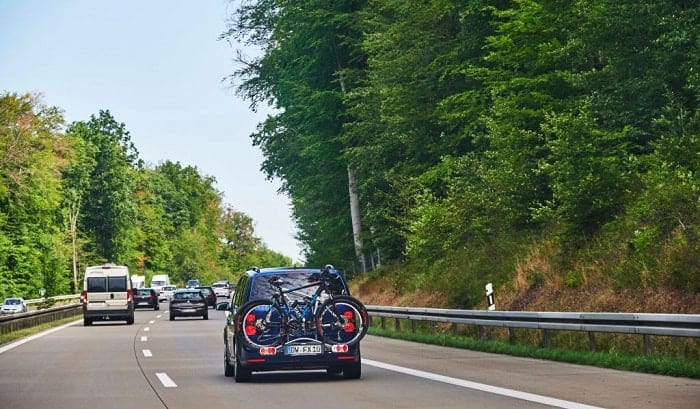
The next step is to secure and tighten the straps to put the rack in place. Most bands are tightened by pulling on the extra strap that protrudes from your clip.
Do this step carefully because you will be driving with this bike rack that holds your bike in place. And I am sure you don’t want to lose your bike on the way.
If there are instances that the clip would not tighten and fails to secure the rack properly, it is best not to use it. The wobbly frame may pose unwanted outcomes on the road, which may affect you and other riders.
Step 4: Add Double Security with Extra Straps
Lash your bike to the rack using additional straps for optimum security. All you have to do is to mount the tube above the bike rack. You can use the excess straps for this.
If you have no extra, you can always use an old toe band as long as it does not scratch the paints of your bike rack and bike.
Then, anchor the lower parts of the bike into the rack. This will lessen all swinging and bouncing during the trip. Turn the bar sideways and strap it into the top cylinder.
You can then use a taped bag or a saddle cover to protect your leather saddles. Also, immobilize the front and back wheels so they would not spin around, minimizing distraction when you look at your back-view mirror.
Step 5: Test the Rack’s Stability
After tightening the straps, I highly suggest testing the rack’s stability by jolting it in all directions. Grip the frame using both hands and shake it on all sides. You will know if the bike rack is secured in place if it moves along with the car’s side.
For instance, if you take turns, speed up, or step on the brakes, the bike rack will not wriggle on your car’s rear. If it does, it’s time to reevaluate each strap and check if they are firmly fastened.
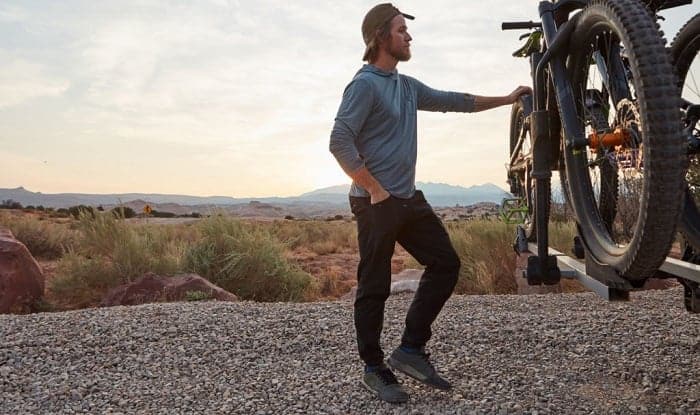
Step 6: Pull the Bike Arms
Get your bike’s arms. Do note that each model locks uniquely, but when they’re pulled up, there should be a screw for tightening or everything should just fall into the right position.
Angle the bike arms in a slightly upward manner when they come away from your vehicle. This way, the gravity will secure your bike upwards if the rack’s straps failed, giving you time to replace or fasten them again.
Step 7: Mount and Lock your Bike on the Rack
The next step is to load bikes on bike race. Place the top side of your bike frame on the rack carefully so you will not damage your vehicle or your bicycle.
Always ensure an even weight distribution for your bike.
Step 8: Add Some Padding to the Bike’s Fragile Parts
You can add some pads to keep your bike safe in case of a rough ride. Protect the sensitive areas from contacting the bike’s metal parts.
A good alternative is to insert a clean cloth between your bicycle and the bike support item so the paint would not be scratched off.
You can also remove the front bike wheels for a more compact bundle. This tip can also come in handy if the bike won’t fit on bike rack. Remember to keep your bike from protruding too much to steer clear of inconvenience such as traffic.
Carefully install a foam stretch between the tusk and the tube above the rack. Put one rack tusk through the back wheel or the triangle to lessen any frame damages. You must not hinder the exhaust tube.
Step 9: Clamp the Bike Frame Arms Firmly
Tighten down the frame to secure it. If you have a clamp, you can conveniently push and lock the rack in place.
It’s always better to do a follow-up check on the bike frame and rack’s stability. Once you’ve secured everything, you are good to go.
Second Alternative
The second method will involve the use of a tool called a Frame Adapter. The steps are pretty much the same, and the difference lies in the use of the gear.
This alternative is most ideal when you mount female bike on bike rack because a lady’s bike often doesn’t come with a horizontal crossbar where you can attach the bicycle firmly to the frame.
There are countless incredible options in the market, like the SportRack Alternative Bike Adapter, which comes at a great deal.
This bar adapter efficiently snaps in place to give you a top-tube, allowing you to attach the cruiser to your bike rack just like other bicycles.
Once you installed the crossbar correctly, all you have to do is follow the previous steps I mentioned in this article. Fit the bike rack to your car first, then carefully mount your bicycle on it.
Pro Tips:
- Always invest in the best lock for your cruiser.
- I suggest registering your bike with the local police section. This poses a lot more benefits than you could imagine. You can file a report to the cops in case your bike was stolen. You can also call your insurance firm quickly.
- When loading two or more bicycles on your bike rack, it is best to change each bike’s direction. This will avoid conflict on each handlebar.
Conclusion
And that’s it! Did you have fun following the tutorial? If you do, tell us more about it in the comments and help us by sharing this article with your friends.
Learning how to put a bike on a bike rack may be challenging, but all you have to do is follow the steps. You’ll never have to worry about loose attachment again.
It’s also handy to bring a frame adapter, like the SportRack Alternative Bike Adapter, anywhere you go. This will allow you to adjust and mount in no time.
Lastly, don’t forget to enjoy your trip. Happy biking!

“Bike commuting should be the trend for the next few years, and it is a convenient and eco-friendly way for us to travel. And we are here to make it a bit less troublesome for people who want to maintain their vehicle for a long time. So, the content I expect to put out here is offering help for bikers who are facing issues with parts of their bikes once in a while. Let’s have fun and protect the environment together!”