
Did you have trouble removing your bike cassette? Well, it’s not an easy job to do, and much harder without special tools. Do not worry, though. We will tell you all the steps on how to remove bike cassette without special tools.
That way, you can remove it at home or on the side of the road. Be wary though, doing this requires extreme strength, skill, and focus. Otherwise, it may seriously damage your bicycle.
The use of your own bike chain may suffice. But if you want to be safe, then at least wear gloves before turning the cassette.
Table of Contents
Things You Need for the Process
Needle Nose Pliers – No home toolbox is complete without this type of plier. It has a pointy or long nose and is ideal for cutting and holding objects.
Needle Nose Pliers are also known for giving excellent controls during your work. This tool also allows you to reach narrow areas easily.
If you do not have this type of plier, you can use an ordinary one. You can also get your own Needle Nose Pliers.
Your Bike Chainset – your bike chain aside because it is one of the crucial tools that will make your cassette removal a piece of cake.
Gloves (optional) – we must prioritize safety at all times, which is why I highly recommend wearing gloves while working. However, if you use Needle Nose Pliers, you will not touch the sharp edges of the cassette.
You can remove your bike cassette like how you do a freewheel removal without tool. With this, you can save bucks from spending too much on tools.
How to Remove Bike Cassette Without Special Tools
Needle nose pliers will go into the grooves of the locking ring, where you will turn the cassette to free it.
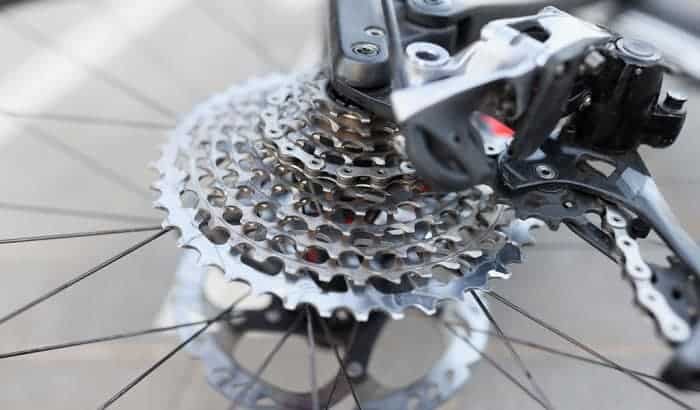
A modern cassette lockring system usually comes with snugged splines. The components glide to the freehub frame, where they’re held together with a locking ring. You will see that the lock ring rests outward from the tiniest cog.
Knowing these parts and the initial step is crucial before proceeding. Now, let’s go on to the detailed process of removing cassette without tool.
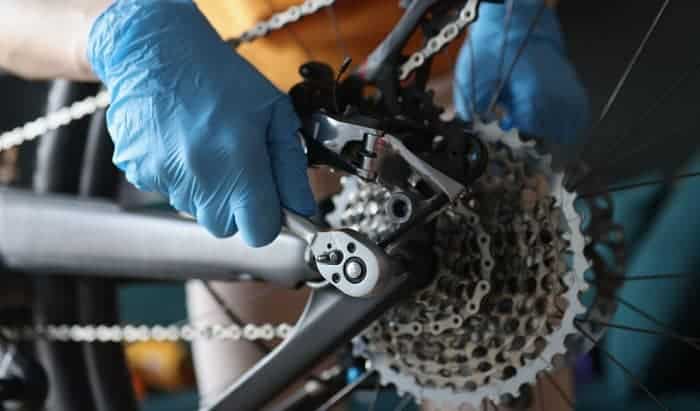
Step 1: Wear Gloves
It’s advisable to wear gloves to avoid hurting or getting your hands dirty while you remove Shimano cassette without tool.
The bike cassette is pretty sharp, so it could leave a rather deep cut if we do not have protective gear.
But if you’re on the road, you’re most likely to wear cycling gloves, which can be used as an alternative to safety gloves.
Step 2: Get Rid of the Rear Wheel
Remove rear cassette without special tools by detaching your bike’s back wheel first. The back wheel is where the bike cassette is located.
Step 3: Lean Your Bike Wheel and Look for the Arrow Direction
Lean your bike wheel and ensure that it comes with firm support. You can even use stacked up storage boxes for your bike wheel’s support.
The next step on how to remove cassette without tool is to search for the “LOCK” word on the lock ring that comes with an arrow.
This arrow’s direction indicates the correct way to rotate your cog for locking. Usually, you have to turn it counter-clockwise, which is the opposite direction of the arrow. This way, you can loosen the locking ring effortlessly.
Step 4: Wrap Your Bike’s Chain on the Cassette
It is surprising that you can remove bike cassette without chain whip using your own bike chain as an alternative tool. Bike chains hold a lot of impressive functions, don’t they?
Take your bicycle chain, which you removed earlier. Put your foot on the side of the bike chain that lies on the ground. Firmly step on the chain to ensure that it does not slip off.
Wrap the bike chain around your bike’s sprocket. After you have done this, you will notice that the wheel will sort of turn up against your foot that holds down the bike chain. This will prevent unwanted and unnecessary motion of the bike cassette.
Step 5: Stick the Pliers into the Grooves
Now that you put the cassette in a stable placement, it’s time to stick your needle-nose pliers into the grooves of your bike cassette. Slowly turn the pliers. Note that this method will require extreme strength.
Keep applying strength while turning until you hear a clicking noise as the baring teeth of your bike’s locking ring detach away.
If you have extra pliers of any type, you can also use them to grip the needle nose pliers and give them another boost of strength while turning.
You know that you successfully loosened the cassette when a blaring noise is released. You can also notice some knurling beneath the lock ring, which aids it in place. This knurling makes noise when you loosen or tighten the ring.
If you can ask someone for help with removing your bike cassette, the better because this bike gear is known for its pretty tight placement on your bike. You would need strength and patience to blow it off.
Pro Tips:
- Do all steps with utmost care to avoid damaging the whole bike cassette, unless you’re going for a destructive method.
- All processes require strength and focus to fully remove the cassette. It’s vital to be in good condition when you remove your bike cassette.
Video Tutorials
There are many helpful tutorials on YouTube, too. Watching them may help you remove your bike cassette with no worries.
Check out one of my favourite improved video tutorials that highlight easy cassette removal. The guy in the video also talked about the Needle Nose Pliers, which is the most ideal simple tool to use. It is worth checking out.
Conclusion
So, how was the tutorial on how to remove bike cassette without special tools? Did you have fun following it?
Learning how to remove bike cassettes without special tools is a handy skill to practice. You can save a lot from shop expenses. Be wary though, if you don’t follow the steps with cautiousness, you might end up destroying the gear.
Tell us your experience in the comments. You can also share this tutorial with your friends if you like. It would help us a lot.

“Bike commuting should be the trend for the next few years, and it is a convenient and eco-friendly way for us to travel. And we are here to make it a bit less troublesome for people who want to maintain their vehicle for a long time. So, the content I expect to put out here is offering help for bikers who are facing issues with parts of their bikes once in a while. Let’s have fun and protect the environment together!”