Comfort is a big part of making the biking experience pleasant, but many people have a hard time finding the correct handlebar position. This requires bicycle adjustments and knowing how to raise handlebars on a road bike or any type of cycle.
The way to adjust its height is dictated by the type of stem you have on your vehicle. We have the threadless type, which is the current standard, and the quill stem, which is usually found on old bike.
We’ll cover both types, so keep reading to learn more.
Table of Contents
What You’ll Need
- Allen key or wrench
- Torque wrench
- Spacers for handlebars (number depends on the desired height)
- Handlebar height extender (optional)
Threadless System Handlebar Height Adjustment
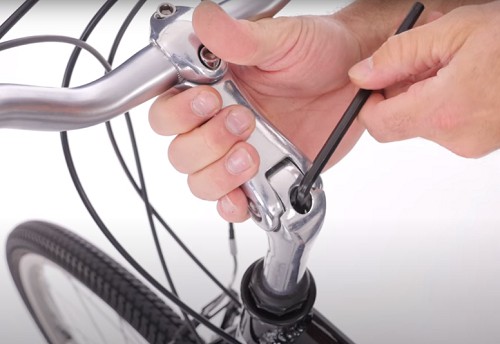
Step 1: Loosen the fastening bolt for the stem
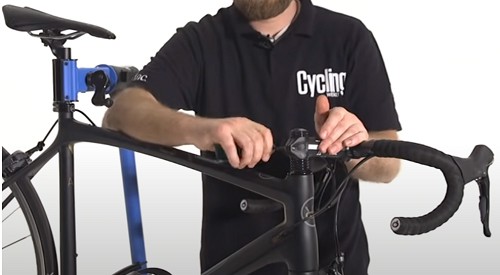
On most road bike threadless systems, the stem is secured by two bolts: a top cap screw and a horizontal fastening on the steerer tube. We start by loosening the horizontal bolt, although the order is not strict.
Preparing both an Allen key and a torque wrench should cover most bicycles. Some only need the Allen key, and that may even come with the bike upon purchase.
Unfasten the bolt just enough for the stem to get loose; it is not necessary to remove it completely. This will be enough for adjusting the stem height.
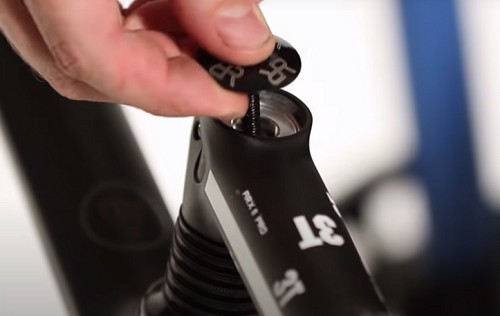
Step 2: Remove the cap and headset
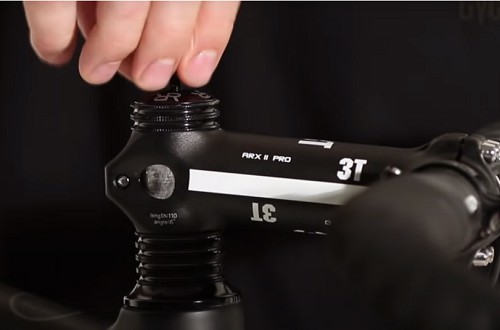
Move to the cap and loosen the bolt. Unlike the first one we unfastened, you will need to take this bolt off completely along with the cap.
If you are hanging your bike as you are working on it, take care to hold on to the fork or it may fall off, as there may not be anything left there to hold it in place. If you’re working on it with the wheel on the floor, you’re safe.
Step 3: Add or remove spacers
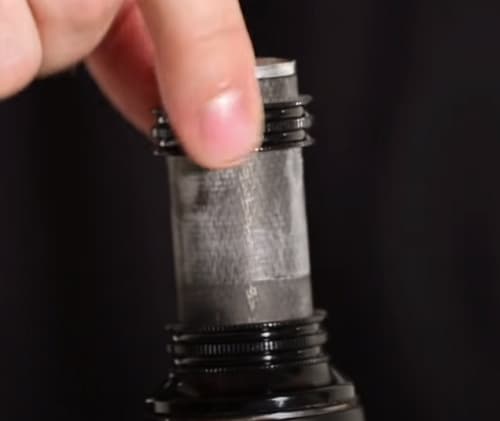
Now you can remove the stem and handlebars. You’ll find the spacers left on the tube; these are what dictates the height. You can lower the height by removing spacers.
Raise bicycle handlebar height by adding more spacers or using an extender. However, there is also a limit to how high you should set it, and it is best to limit it to 30mm worth of spacers.
If there is too much height, there will be too much of a gap between the tube top and the stem once it comes back on, which will be a problem. This is also the space for the top cap to slot into.
Make the adjustment you want, and let’s move on to putting everything back together.
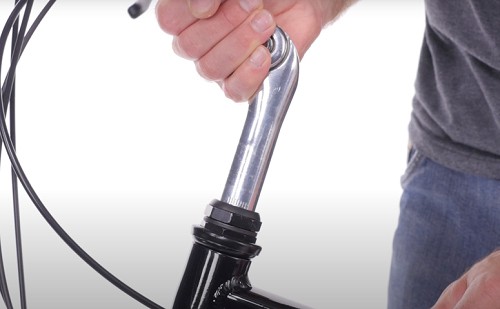
Step 4: Reattach the stem and secure it
Place the stem and handlebar back onto the tube. Replace the cap, but before tightening the bolt, make sure that everything aligns with the front wheel. Locking the bolt in while there is misalignment will cause the bike to veer in one direction and cause problems for you.
Once everything is lined up properly, secure the top cap and bolt, but do not tighten it too much or you’ll risk damaging the bearings inside. Tighten the horizontal bolt at the side as well. Finish up and make sure to test whether the handlebar is fully secure.
Raising Handlebars on Bike With Quill Stem
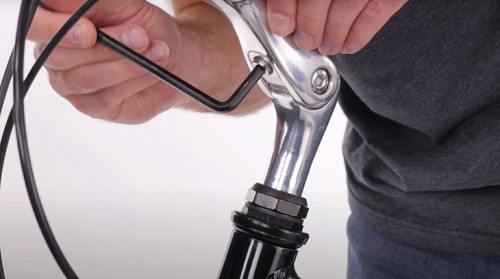
Step 1: Loosen the bolt
Working to adjust handlebar height on a bike with a quill stem is not that different from threadless ones but may even be simpler. This time, we only need to work on one bolt to adjust the height setting.
Use an Allen key once more and loosen the top bolt. This type of stem tends to get stuck, especially on older bikes that have not been tinkered with for a while. You may need to pound on the top a bit to get it loose.
Step 2: Adjusting the stem
Once the stem tube is loose and moving, all you need to do is to lower or raise bike handlebars according to your preference. Watch out for a marker on the side of the tube though, which indicates the minimum insert height. You should not raise the bar to the point that this marker is visible to the eyes.
If you don’t have enough height from the bike stem alone, you will need to use an extender for quill systems. Do note that such items give significant height extensions, so consider your needs well.
Step 3: Lock in the height and tilt adjustment
Once you have your desired height, tighten the bolt once more, but take care not to over-tighten it. Similar to the threadless system, make sure that the handlebar lines up with the front wheel to avoid problems.
You may also find two more bolts near the head and close to the top: one to the side and one under the stem. Loosen the one underneath to allow tilt adjustment for the handlebar. Retighten it to lock the setting into place.
Frequently Asked Questions
Can I raise handlebars on Specialized bikes?
Yes, you can. Even premium cycles like a Specialized or Trek road bike support the use of additional spacers or even longer stems. However, you need to be certain about what sort of adjustment you want.
Specialized offers many different stem options, so make sure to give proper attention to the product details. It’s a good idea to get an expert opinion if you’re not sure what to do or risk spending on something you don’t need.
How do you measure handlebar height?
This is measured relative to seat height. Beginning with the seat height, measure the distance of the vertical drop until you reach the handlebar.
The recommended drop measurement is 200mm. However, people have different body measurements, and it is still best to see what is most comfortable for you instead of following a standard.
When should you consider adjusting the handlebar height?
When looking for the best fit on a bike, the first thing we adjust is the seat height. This is usually enough to address problems with reach and comfort while riding a bicycle.
Lower or higher bike handlebars can be explored once you find the seat setting has been optimized but you still want more finetuning to your ride.
The general rule is for the handlebars to be level with or above the seat height.
Conclusion
Now you know how to raise handlebars on a road bike. Even if it’s to raise mountain bike handlebars or those on child’s bike, you should be able to adjust the setting to your liking using what you learned here.
How is your experience when it comes to adjusting your bicycle? What type of adjustment do you find the most troublesome to deal with? Tell us all about it in the comments section below.
Always ride safely.

“I ride my bike to work for years, but is that enough? Our carelessness towards our surroundings has taken a toll on the environment. And now, everyone is responsible for changes; even the most minor contribution is counted. With this hope and spirit, I started with my partner to establish Biketoworkday to help more individuals commute to their work sites on their bikes.”