Cycling is fun because it’s an easy way to travel around while having a good ol’ exercise. Professional cyclists know it already, but even as biking is straightforward, there are many technical aspects to make your two-wheel pal even better. The ideal cycling journey probably starts when you know how to adjust your bike seat.
Biking, after all, is not just about reaching point B from point A but doing so with ease. So, learn more about bicycle seat adjustment to ensure efficiency and comfort while avoiding injury.
Table of Contents
Common Ways to Adjust Bicycle Height

Adjusting the bike seat is more than just getting the correct height. You should also know how to tighten bike seat correctly.
What to prepare
Not much is needed to adjust bike seat height, and for a bicycle with a lever, a wrench is not required at all.
- Measuring tape
- Wrench
- Hex key
- Two rulers or wood blocks
- Tape
- Plumb bob
- Bike stand
Step 1: Set bike seat height

First-timers often overlook the importance of knowing their height when buying a new bicycle.
Luckily, the bike seat adjustment mechanism is not rocket science, and it can be done in a jiffy.
First things first: ensure the proper bicycle seat height.
Do so by getting your pubic bone height (PBH), and you will need a friend for this one.
First, sandwich the measuring tape between the rulers or the wooden blocks, and secure it with any tape.
- Afterward, stand barefooted on even ground with your feet 10 inches apart. Next, tightly pull the frame up against your pubic bone.
- Your friend then helps by measuring the distance between the gadget you’re holding and the ground. Do it more than once for an accurate reading.
- Once you have your PBH in centimeters, multiply it by 0.67. That’s the common way to get the saddle height, or the LeMond formula, based on the book of cycling champion Greg LeMond.
It would have been easier to just base the height of the seat on your guts or rough estimation, but accuracy will go a long way – figuratively and literally for bikers. After all, seat comfort and flawless pedaling are the aim.
You can use other methods to measure saddle height
- Heel method
You just need to put your heel on the pedal, making sure your knee is straight at 6 o’clock position while pedaling backwards.
If your knee bends, you need to increase the height, or lower it when your heel escapes the pedal. It’s like trial and error, and no equipment is needed.
- Hamley and Holmes methods
With the former also measures the inseam but from the pedal then multiplying it by 1.09, while the latter is focused on the knee angle (ideally between 25-35 degrees).
These methods have different techniques but with the same goal: giving you the perfect fit for a better biking experience.
Read more: How high should your bicycle seat be?
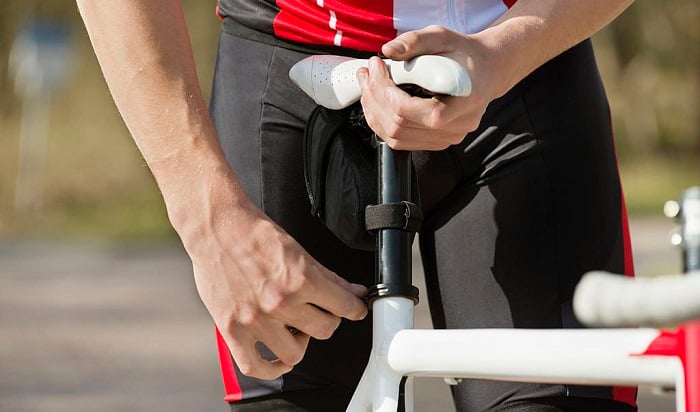
Step 2: Loosen and adjust the seat post

Modern bikes now have levers without key so anyone, even beginners, can easily adjust the height of the seat.
Just raise the lever and adjust it accordingly using the measuring tape, with your saddle height as reference.
The post moves up and down easily so you can mount it to check if the height is right. After that, you can lock the lever again.
Step 3: Adjust the saddle
After fine-tuning the seat post, it’s time to adjust the saddle. A common phrase bikers use when adjusting this part is the fore and aft. It corresponds to the angle and positioning between the handlebars and the saddle. You can rework it with a hex key or wrench that will loosen the seat.
There is no standard on the correct bike seat position because every cyclist’s frame is different. Even so, one generally accepted method for saddle realignment is the Knee Over Pedal Spindle (KOPS). You need your friend again for this part.
- First, mount the bike with the pedals at 3- and 9 o’clock positions.
- After that, ask your friend to grab the plumb bob and position it below your kneecap (or in front; it’s not strict).
- The line should bisect the pedal spindle and when it falls forward or back, adjust the saddle rear- or forward, respectively. Do it twice or thrice for accuracy.
The key is to achieve comfort and a good angle; the method is just a guide, not a strict rule.
Step 4: Tighten then test
After you raise bike seat, you can opt to adjust the seat post if you’re not satisfied with merely prying the lever. Armed with a wrench or the hex key, you can tighten the bolts to your liking.
After that, test-ride your two-wheeler, especially now that you just finished adjusting the saddle. Expect nothing but comfort, but if you’re being meticulous, you can troubleshoot not just the post but also the saddle.
Be careful, though, because you don’t want to tinker too much, then calibrate the fore and aft again. That’s not a problem, though, because bike maintenance is always a learning experience.
Helpful Tips to Adjust Bicycle Seat

As mentioned earlier, there are no strict rules when it comes to bike fitting. Even so, it’s not something that should be dismissed.
- Aside from your frame, you should position your ankle on the pedal when measuring the saddle height.
As such, when using the plumb bob method stated above, it’s recommended that you are positioned as if you’re ready to pedal. It’s also better if you do so with your shoes for a more accurate reading.
- Furthermore, you should mind your body when tinkering with your bike.
Notice if your pelvis is balanced when seated. Otherwise, you might need to lower bike seat; don’t be content to move it forward or backward, thinking that the saddle’s angle should supersede proper posture.
- Aside from your pelvis, take note if your legs, knees, and feet are putting too much pressure when pedaling.
A bike seat with a good angle matched with the proper height will bring wonders, especially for long-haul riders.
It will help lessen common health woes related to poor bike fit, such as pain on the knee, back, hips, legs, hand, wrist, ankle, or even neck; numbness; soreness; and the usual pressure.
Conclusion
Knowing how to adjust your bike seat makes you a better cyclist, but not because of formulas and rules. It means you know your body well and how to adapt to your biking needs.
Adjusting the bike seat is a must for all types of cyclists. Proper height and positioning are most important for competitive bikers.
Daily commuters and weekend bikers need not overlook this aspect because the right saddle height lessens discomfort and makes for a satisfying pedaling adventure.
Also, it can benefit those with back, leg, or knee injuries yet still want to feel the thrill of biking. A bike is home, too, so riding it should be hassle-free.

“I ride my bike to work for years, but is that enough? Our carelessness towards our surroundings has taken a toll on the environment. And now, everyone is responsible for changes; even the most minor contribution is counted. With this hope and spirit, I started with my partner to establish Biketoworkday to help more individuals commute to their work sites on their bikes.”