What are two of the best things in the world? Pizzas & bicycles! And that’s exactly why pizza delivery on a bike was invented!
Whether it’s for a job, setting up your own business, or just for fun, knowing how to carry pizza on a bike safely and smoothly goes a long way. It trains your mind, and with the pizza safely getting to its destination, you make others plus yourself happy.
With that, let’s get started on how to transport pizza on a bike. Here’s everything you need to know.
Table of Contents
Different Methods of Carrying Pizza on a Bike
To keep your hands free for maneuvering the vehicle, transport pizza on a bike using a bicycle pizza rack.
Carry Pizza on a Bike Using a Rack Accessory
Here’s how to do it:
- Step 1: Pick out a pizza rack you prefer.
- Step 2: Install the pizza rack on your bike accordingly.
- Step 3: Test it out if it’s stable enough for transportation.
- Step 4: Place your pizza, wrap and secure if necessary, & you’re good to go.
You may already notice, but to secure pizza transportation, you should ensure that it is put on top of a pizza rack. Do you know that there are many different racks you can use to place your pizza in?
Types of Rack Accessories
Here are some examples:
1. Bike-Front Rack Basket
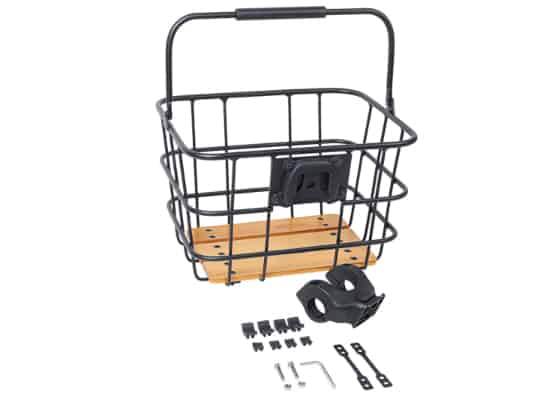
Usually made up of aluminum and wood, this rack is probably something you’ve seen before. It doesn’t only carry pizza but other different things that can fit its size.
If you’re carrying a pizza small in size, this does the job pretty well. It’s also removable and allows you to clip it on handlebars if you prefer it that way.
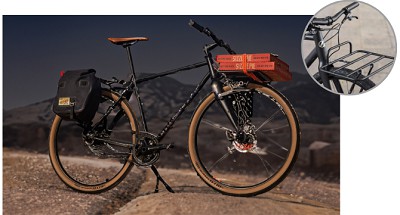
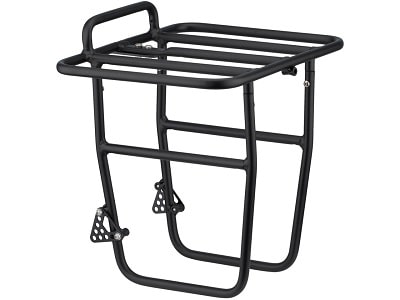
2. Bike Porteur Rack
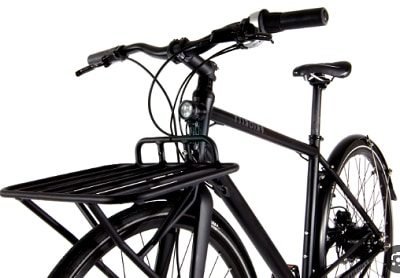
A bike front rack basket is placed on the front of the bike. Similarly, the bike porteur rack is also placed at the front. The only difference is that it has a bigger surface and carries much more weight.
It’s great for items that are on the heavier side because its support comes from the front wheel, instead of just hanging on a handlebar.
3. Bike Pannier Rack
A Bike pannier rack is basically a bag attached to a rack that is placed at the rear or the front part of a bike frame. You may get a large pannier or a small one. For pizzas, a large one is much more suitable.
It’s usually used for carrying a biker’s essentials along a trip. However, anything can be placed inside it, even pizza! It has roomy storage and protects the items inside from the weather.
4. DIY Front Bike Rack
If you’re on a tight budget, you can get away with making a DIY front bike rack. Here’s a quick guide on how to build one yourself.
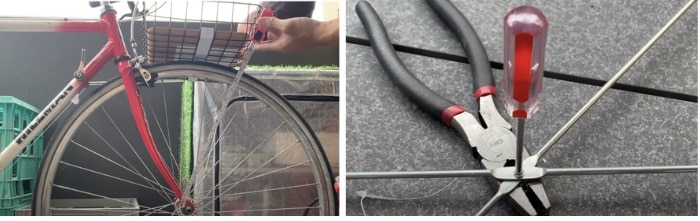
- Step 1: Put your basket on the decided location of the bike. Measure where your rack will go using a measuring tape.
- Step 2: Put the rivet’s bolts between your pliers, screwdriver the hole, and simply hammer it down. You should see that the two will disassemble after doing this.

- Step 3: Take out your measurements again, alighn them with your rivet, and mark your measurements on it.
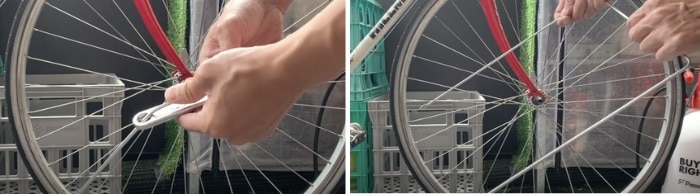
- Step 4: Bend where you marked it using your shifter. Just push down on it until it bends. Bend on both sides until it makes a U-shape.
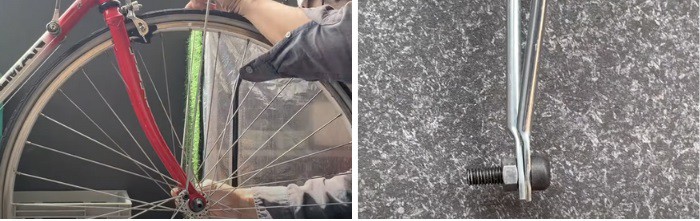
- Step 5: Place them on your bike using m5 bolts or whichever bolts you prefer to remeasure them.
- Step 6: Repeat the same process for the other rivet. Combine the two rivets together by putting the bolt right through. Don’t forget to knot a spacer nut to it to avoid hitting your bike’s forks upon installation.
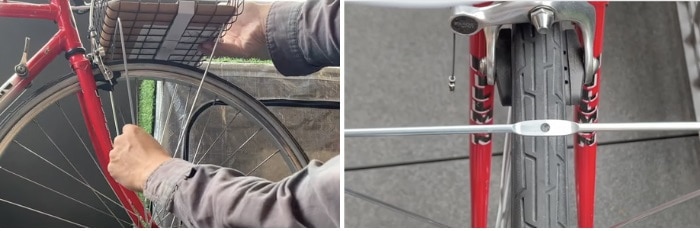
- Step 7: Screw your DIY rack eyelets to your bike’s forks. Once they’re settled, ensure that your rack’s eyelet holes on top are centered on the wheel.
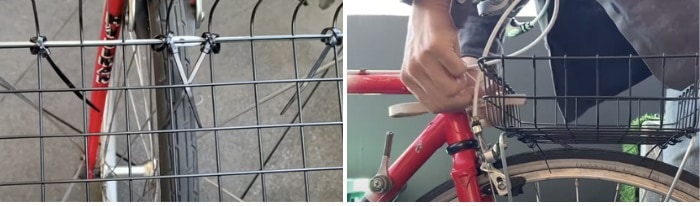
- Step 8: Begin to zip tie your basket on to your DIY rack. About 8 zip ties will do but you can use as much as needed to ensure that it’s perfectly stable.
- Step 9: Wrap a strap to stabilize the basket from the head tube.
- Step 10: Bend your plate and place your now L-shaped bracket in between the head tube and basket, replacing the strap’s purpose. Then, insert the washer then screw it in place.

- Step 11: Slip the plate underneath the basket and align it to the eyelet’s holes. Next, insert a zip tie inside the hole and you’re done.

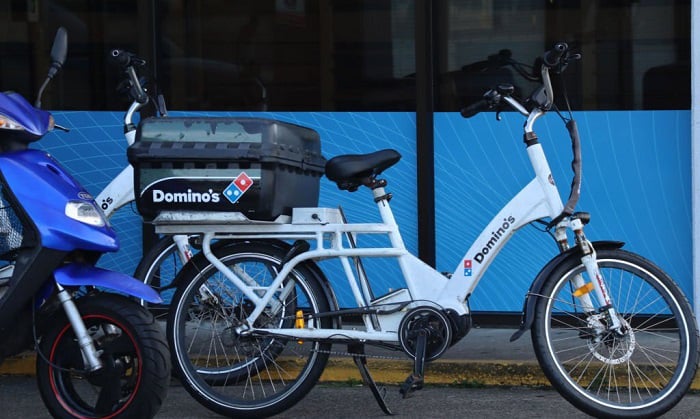
5. Specialized Pizza Rack
A specialized pizza rack is exactly what you’ll need if you really want to ensure that your pizza is safe & sound as you travel–it’s basically a pizza carrier for a bike that is specifically designed to be able to keep your pizza still.
Other Ways to Carry Pizzas on a Bike
Not fancy the idea of using a rack to transport your pizzas? Here are some worthy alternatives to check out:
- Bungee Cords or Cargo Net: You can use bungee cords or a cargo net to secure the pizza box directly to your bike’s front handlebars. Wrap the cords of choice tightly around the box to ensure it’s held firmly in place. However, this method should just be applied to transport smaller pizzas over short distances.
- Pizza Bag with Strap: If you can get your hands on a pizza delivery bag with a shoulder strap, simply sling it across your body while riding the bike. This method is a great alternative to keep the pizza flat and stable in case you don’t want to use a rack.
- Insulated Container: For those who prefer their pizzas warm, consider using an insulated container for transportation. However, the container can be more challenging to install than a simple rack.
Safety Considerations When Carrying Pizzas While Cycling
Follow the precautions below to ensure safety:
- Always wear a helmet and proper safety gear.
- If this is for your business, ensure proof of insurance before outsourcing delivery.
- Both hands must be on the handlebar and not one on the pizza
- Before cycling, assess the bike’s parts if there’s anything that is concerning and immediately address if there is.
Tips for Ensuring the Pizza Stays Intact During Transport
- Tip #1 – Choose a rack that is sturdy and fit for your bicycle.
- Tip #2 – Ensure that it is properly secured and will stay still along the ride. Check the rack, the pizza box, and the bike itself.
- Tip #3 – Avoid putting anything on top of the pizza box. The heavier it is, the more risks of damage.
- Tip #4 – Cycle smoothly and slowly.
Conclusion
Planning to ride a bike and carry some pizza along the way? There’s no need to worry! With this article, you now know all the nitty-gritty details of how to carry pizza on a bike.
And once you’ve gotten the hang of it, who knows? You might want to start your own pizza delivery business, or perhaps bigger opportunities may bust open the door!
Share this article with your friends & let them in on the fun of safely carrying pizzas on a bike!

“I ride my bike to work for years, but is that enough? Our carelessness towards our surroundings has taken a toll on the environment. And now, everyone is responsible for changes; even the most minor contribution is counted. With this hope and spirit, I started with my partner to establish Biketoworkday to help more individuals commute to their work sites on their bikes.”