If you’re having issues with your bicycle’s brakes, there is just one sure thing you can do: get them fixed! To get you fully equipped, here’s everything you need to know on how to install brakes on a bicycle.
There are also steps to put back brakes on a bike, which is useful if you want to troubleshoot it.
Get your brakes checked and working properly as quickly as possible to avoid any unfortunate mishaps. DIY your way to success. Why not? Assuming you have the tools, that shouldn’t be a problem at all.
Table of Contents
Step-by-step Install Brakes on a Bicycle
What to prepare
- New brake pads
- Flat head screwdriver or a pad pusher tool
- Paper cloth
- Brake cleaner
- Solvent spray
To make it easier for you, you can always check the bike brake assembly instructions. You can follow the specific steps in the assembly diagram for the particular type of brakes you have.
However, if you don’t have the instructions and have no idea where to start, here are the steps to follow.
Step 1: Unscrew or remove the quick-release on the brake-lever calipers.
Quick-release levers on the brake calipers are often seen on bicycles since they make it easier to change brakes.
However, if your bicycle doesn’t have this feature, you can adjust the adjustment knob, which can be seen on the calipers.
If your disc brake pads are made in place using horizontal screws or bolts, pliers can help by removing the pin or clip and the screw or bolt.
Step 2: Remove the brakes
For disc brakes, remove the tab on the back of the pads. You can also remove them using pliers or even your hands.
Carefully grab thle tabs on the back of the brake pads by pinching them together on the backs of the pads should be carefully grabbed, pinched together, and taken out.
Step 3: Place the new brakes
Once you’re done removing the brakes, the next step is to put brakes on a bike. With this, just replace the brakes by sliding the new brake pads. Completely slide the brake pads into the back of the brake shoe until it’s perfectly settled.
If you feel resistance when you’re inserting the new brake pads, some pliers will help you do the job of getting it in the right position.
Step 4: Tighten the caliper screw
Use the same technique in getting the screw out. For bicycles with a quick-release lever, close the quick-release lever.
For those without a quick-release lever, tighten the caliper brakes on bicycle by screwing and turning it clockwise. Twist until it’s fully secured. Then, repeat the process for all the brake pads.
Then, you need to install bike brake cables
If you also take the cables off when you install the bicycle brake, you can replace them with this simple process.
- Step 1: Remove the nuts or loosen the bolts that hold the connector and the brake line. Remove the connector and screw off the brake line.
- Step 2: Remove all the cable housing from its holder & pull all the remaining cable through the brake. These are typically seen near the brake lever of the bicycle or the bike brake handle. Rotate counterclockwise to remove.
- Step 3: Slide the new cable to the cable housing, put back the cable housing into its holder, and slide the new brake cable into the rear cable housing.
- Step 4: Attach front brake cable on bike by attaching the washer and screw to the brake cable’s end and slide the cable back into the brake lever. Cut off some extra wires and tighten the screws.
Types of Bicycle Brakes
Before you add brakes to a bike, you first have to pick out the type of brakes you want to install. Modern bikes have three systems.
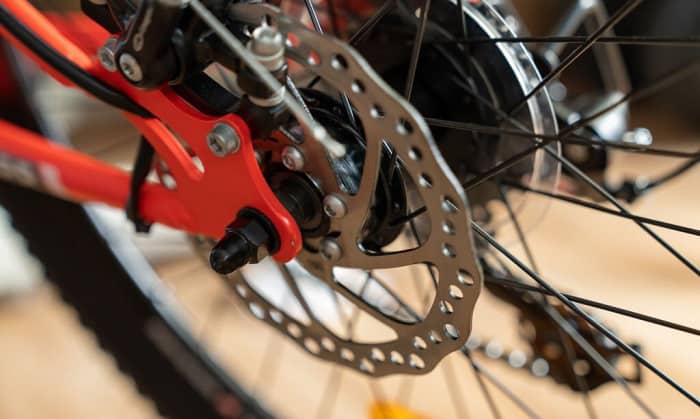
- Disc Brakes – Hydraulic disc bikes are the most common brakes out there. Disc brakes use pushing pads which are held by a caliper. Hydraulic brakes are typically used for road bikes and operate by forcing Hydraulic fluid into the brake hose by a piston in the brake lever.
- Rim Brakes – Rim brakes are usually the primary choice for any bike. It’s lightweight and is efficient in doing its job, and durable in any condition.
- V-Brakes – V-brakes are also known as direct-pull cantilever brakes. They work by bolting the two pieces to bosses welded to the frame. Others install rear v brakes because they’re good for touring bikes.
Be reminded of how V-Brakes are set up, making it incompatible with road levers with no cable pull cantilever. This means that not all bikes work for v-brakes.
Related: The detailed comparison between V-Brakes and Disc Brakes, click to learn more now!
FAQs
Why push the brake caliper back?
To install brakes on a bike, pushing back the brake caliper is essential because not doing it can cause damage to the pistons of your bike. Push it using a pad pusher tool to ensure that you’re doing it the right and safe way.
What should I do if I did not feel the brake lever?
If you’re riding your bike and suddenly, you no longer feel your brakes. What you should do is to first stay calm, stay steady in the ground, and alert those around you. Manage to stop the bike using the pedals softly and once you’ve got it to stop, inspect what went wrong with the brakes.
You can go to a professional to seek expert help. If the issue can’t ever be resolved, it’s time to start installing bike brakes that are perfectly functioning.
When is the best time to change my brake pads?
Once you’ve taken a 5,000 to 10,000 km ride, you can already change brakes or brake pads if you want to. If the remaining brake pad materials are only 1.5mm or less, that’s also a good indicator that they’re due for changing.
However, it still depends on the lifespan of your brake pads, how they are used, and the type of bike you have.
Conclusion
Safety is always a top priority so if you’re often on the road with your bicycle. Make sure your brakes are in good condition; if not, don’t wait too long to replace them.
Once you get the hang of it, you’ll easily follow the instructions on how to assemble bike brakes. If you have someone in your life who bikes daily, share this article to give them a hand in case they need to say hello to new bicycle brakes.
Hopefully, now you know how to install brakes on a bicycle without having to bring your bike to the repair shop!

“I ride my bike to work for years, but is that enough? Our carelessness towards our surroundings has taken a toll on the environment. And now, everyone is responsible for changes; even the most minor contribution is counted. With this hope and spirit, I started with my partner to establish Biketoworkday to help more individuals commute to their work sites on their bikes.”