
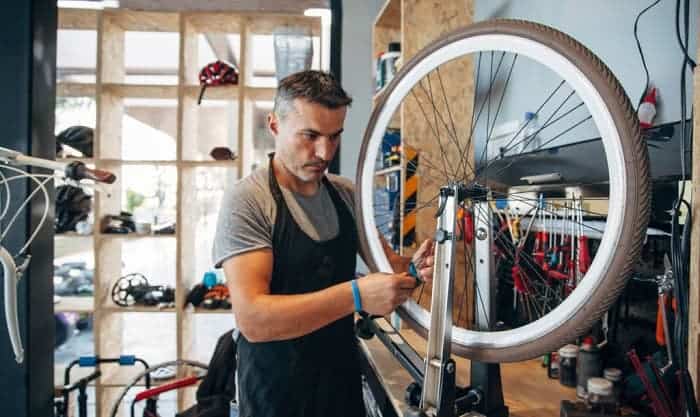
Removing your rear bike wheel is a normal feat for most bikers. However, there are incidents where you need to fix a flat tire, pack it inside your car, or do a regular maintenance check. With a quick-release mechanism, it has become a hassle-free task without any tools required.
But what if your bike does not come with a quick-release system? Well, here are some ways to learn how to remove rear bike wheel with no quick release. It can be done by properly preparing your bike, disengaging brakes and derailleur gear, and loosening the nuts. Then you can gently remove the bike wheel off the frame. To know better and more clearly how to do those steps, just continue to read our guide.
Table of Contents
What is a Quick-Release Mechanism

First, let’s get to know what a quick-release system is and how it works on a bike.
A quick-release system is a convenient and most effective mechanism to remove a wheel from the bike frame. It utilizes a cam mechanism that allows bike wheels to be removed quickly without requiring any tool. In addition, it is simple to operate and will never give you a hard time removing your wheel.
It has a hub axle with a shaft, a lever that serves as a cam system, and an adjusting nut. The cam mechanism helps to put tension on the shaft and pull the cam and adjust nuts against the dropouts. With this system, you just need to pull the lever to an open position and loosen the nut on the next side. And yes, you can now remove your bike wheel that instant.
But without a quick-release, will removing your bike be more challenging?
Well, removing a rear bike wheel with no quick-release is not next to impossible. It is still feasible to remove a wheel without having to rely on quick-release. You just need to follow these five easy-to-follow steps:
- Prepare your bike (Pro tip: use a bike repair stand)
- Disengage brakes and derailleur gear (gives chain more slack, making wheel removal easier)
- Work on the nuts and loosen them using a spanner (Pro tip: use a spanner with the exact size of nuts)
- Gently remove the rear bike wheel
- Completely remove the derailleur chain and lift your bike off the ground
Step-by-Step Instructions
- Preparation
The first but the most important part of achieving an effortless removal of the rear bike wheel with no quick release is preparation. If you have a bike repair stand, you need to put the bike steady on that for convenience when working on the bike. However, if you don’t have a stand, you can lay down your bike.
The position of your bike is required not only to give you convenience but a good angle when removing your rear bike wheel. So, I think it’s better to use a bike repair stand when doing this job.
- Disengage brakes and derailleur gear
Second, inspect whether your bike has cantilever brakes (rim brakes) or disc brakes. If your bike has rim brakes, all you need to do is open the breaks. For disc brakes, you need to take extra care so that your bike will not topple over. With this kind of brake, the rear wheel will come out, but it will have the tendency to bend as disc brakes tend to hold your bike wheel more rigidly than rim brakes.
Next, work on the derailleur gear. Most bikes have derailleur gear that you need to disengage when removing a wheel. For this process, you need to select the smallest combination of the ‘sprockets’ and move the pedals while waiting for the chain to drop on the ground. Once the chain dropped, it revealed the nuts holding your rear bike wheel.
This step is important as it will give you a better view of the nuts you need to unscrew. Without loosening the nuts, your rear wheel will keep its hold on the bike frame or body.
- Loosen the nuts holding your bike wheel
Once the nuts are entirely accessible to you, it is now time to loosen them. Your bike wheel usually comes with 15mm nuts on both ends. You need to loosen these nuts to release your wheel from the bike frame.
In this step, you will need a tool to release the nuts. Take note that the tool you need should fit exactly 15mm nuts. Look for a wrench or a spanner that can surround a 15mm nut.
Once you secure a compatible spanner, observe the position of the washers before turning the nuts to their desired degree. Check whether the nut is moving, and slightly move it to a direction where it will be unscrewed. Afterwhich, you can now unscrew the opposing nut, as well.
- Remove the rear wheel
After the nut is wholly loosened and released, you can now stand behind the bike with your head on its center-line. It will give you a better angle of the wheel before removing it. In this step, the wheel is not entirely removed from the bike.
You need to gradually release the bike frame from the wheel by grabbing the left side of the bike while your right thumb is securing the end of the nut on the other side. Your left hand should give you stability while you are pulling the derailleur body completely from the wheel.
- Lift the bike off the rear wheel
Once the derailleur rotates out from under the rear wheel, you can now lift the body of your bike while the wheel stays on the ground. In this step, you will notice that the wheel is already detached from the bike’s frame, yet the chain is not completely removed. You need to completely unhook the chain with your right hand and lift the bike body with your left.
After lifting, the rear wheel is now fully removed from the bike. Hang your bike after, and inspect the rear wheel that you removed. At this point, you already removed the rear wheel from your bike.
Conclusion
Now that you went through the step-by-step process of removing your rear bike wheel without quick release, I hope you find that it is not as challenging as it seems. With this guide, we believe it clearly explains the steps and gives you confidence in doing the job. Furthermore, if you are confused about how much it cost to true a bike wheel, please check out this article for more detailed cost.

“Bike commuting should be the trend for the next few years, and it is a convenient and eco-friendly way for us to travel. And we are here to make it a bit less troublesome for people who want to maintain their vehicle for a long time. So, the content I expect to put out here is offering help for bikers who are facing issues with parts of their bikes once in a while. Let’s have fun and protect the environment together!”