Are you not getting any faster despite pedaling your bicycle with all your might? Do you see uneven wear in your bike’s brake pads? There is a good chance your bicycle already has brake rubbing. Knowing how to adjust bike brakes rubbing should address this concern.
Ensuring a functioning brake system is crucial to safe biking. It allows you to stop or slow down to avoid hitting obstacles on the road. While there are many bicycle brake problems, rubbing is the most prevalent. The good news is that this issue is relatively straightforward to fix.
You only need a few things to adjust your bicycle’s brakes to address the rubbing issue: an appropriate wrench and knowledge of your bike’s brake system.
Table of Contents
Things You Need for This Tutorial
1. Knowledge of Bicycle Brake Systems
Modern bicycles can have one of three primary brake systems: caliper, disc brake, and V-brake.
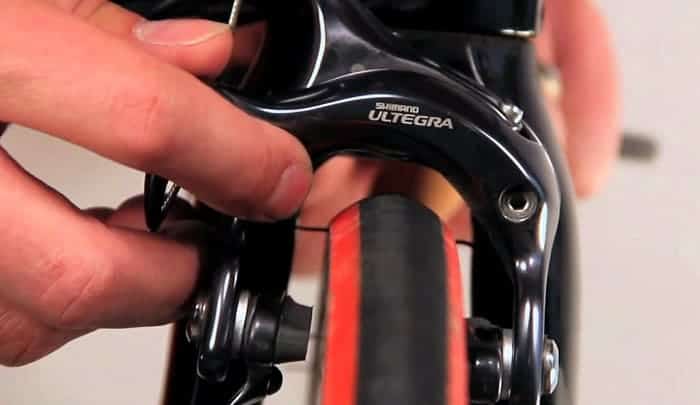
Caliper brakes require a cable to activate the system. You can see this brake type in road bikes.
V-brakes are almost similar to caliper brake systems because they also require cable action for activation. However, these brakes are popular among mountain bikers, particularly those with suspension systems.
Disc brakes are like the brakes we have in modern cars and motorcycles. This brake system consists of a rotor and a caliper that squeezes the metal disc (rotor) to slow down or stop the bike. You can see this type of brake system in hybrid, touring, and off-road bikes.
2. Brake Adjusting Tools
There are several hand tools you need for this project, including a pair of pliers, a ring spanner, an adjustable wrench, and Allen keys.
You may need other tools depending on your bicycle’s fastener specifications. Some bikers also recommend anti-seize grease to improve the function of threaded components.
Steps for Adjusting Caliper Brake Pads on Bikes
Step 1. Check the brake pads.
It would be wise to assess the brake pads before making any bike brake adjustment.
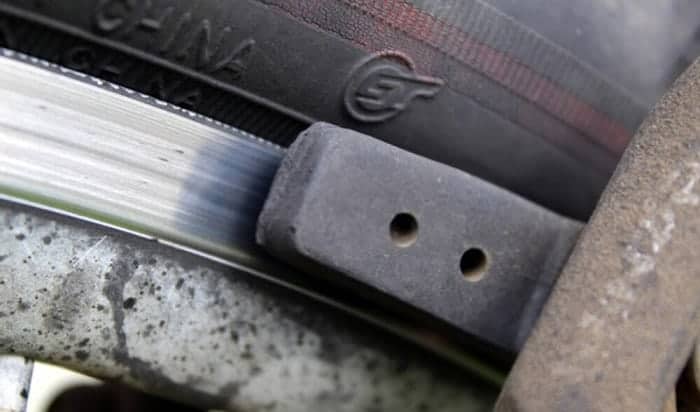
You can look at the rubber pads attached to each tip of the calipers. The surface should still have grooves to grip the rim. If the brake pads have a smooth surface, you must replace them immediately. Biking with a bald brake pad is risky.
Pro Tip: Some brake pad manufacturers integrate a wear line in the pads, similar to tread wear indicators on car tires.
Step 2. Assess the brake pads’ grip on the rim.
Prop your bike on a stand and turn the front wheel to check for bike front brake rubbing. If one of the pads rubs against the rim even without applying the brakes, your pads are not in the center position.
Apply the brakes while turning the front wheel. Note the location where the pads contact the rim. Ideally, they should grip the center of the bike rim simultaneously.
You might also want to check if one pad pushes the rim towards the opposite pad. It is a clear indication of bike brakes rubbing on one side.
Perform the same procedure on the rear brake system.
Step 3. Center the brake pads.
If you notice bike brake pads rubbing on either front or rear rims or both, you must loosen the bolt securing the brake pads to the caliper by turning the wrench to the left.
Adjust the brake pads until they are at the center of the rim. It is advisable to check the space above and below each brake pad, ensuring they are similar.
Once centered, hold the brake pads in place while you tighten the bolt to the right.
Re-check the brake system by squeezing the brake lever while turning the front or rear wheel. You must see the brake pads clamping down on the center of the rim simultaneously. It should address your issue of bicycle front brake rubbing or rear brake rubbing.
Step 4. Check the bike brake cables.
Sometimes, adjusting the brake pads does not fix brakes on a bicycle. That is why it would be best to assess the brake cables, too.
Testing brake cable tightness is a straightforward process. Squeeze the brake lever and check how far it goes relative to the handlebar.
If you notice no less than 1.5 inches of space between the brake lever’s lower edge and the bike handle grip’s top surface, you do not have issues with brake cable tension.
However, if the brake lever almost touches the handle grip, you might want to adjust the cable tension.
Step 5. Adjust the brake cables.
Look at your bike’s brake lever assembly and note a barrel adjuster near the connection between the cable and the lever. Turn the barrel adjuster to the right to increase the brake cable tension. Do the opposite if your brake cable feels too tight.
Pro Tip: Turn the barrel adjuster in quarter-circle increments, checking the brake cable tension with each adjustment.
Step 6. Assess the brake calipers.
Ideally, the brake calipers should move simultaneously every time you squeeze the brake lever. If only one caliper moves towards the rim, you must reposition the caliper.
The brake caliper will have a spring-like device that allows the two opposing ends to move towards the rim. Check this part if it is in the correct position. Sometimes, rough-riding the bike can dislodge the spring from its seating.
Step 7. Adjust the calipers.
Loosen the caliper bolt using an Allen wrench or any suitable tool by turning it to the left two to three times. Do not remove the bolt, just enough to wiggle the bolt in its place.
Pull the brake cable outward and hold it in place using your free hand. This maneuver will tighten the caliper and brake pads against the bike’s rim.
Once satisfied with the cable tension and caliper position, you can tighten the bolt by turning it to the right. It is challenging to execute this part if you remove the bolt.
Step 8. Test the bike brake system.
Testing the brake system is the last step to adjust brakes on a bike.
You might want to ask someone to crank the pedals and apply the brakes on your signal. Meanwhile, you can position yourself in front of the brake calipers to observe the brake pad, cable, and caliper action.
Pro tips: Do not forget to assess brake lever play.
Here is an educational video from Park Tool on adjusting caliper-type brake systems on bikes.
Steps for Adjusting Bike Disc Brakes
The process for tightening bicycle brakes with mechanical discs is slightly different from adjusting caliper brake systems.
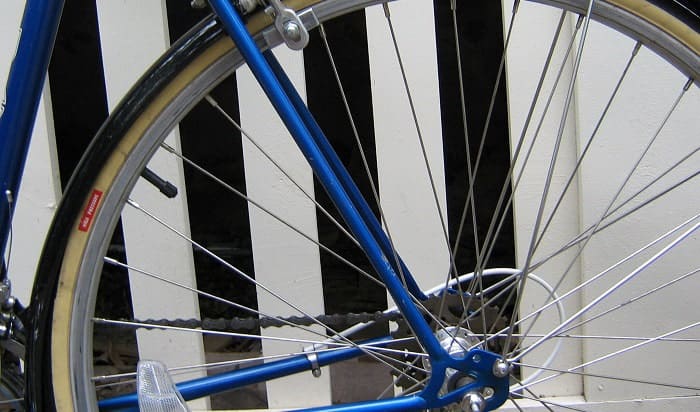
Step 1. Assess the wheel.
Prop your bike on a stand and check if the wheel is in perfect alignment relative to the dropouts. You might want to disengage the quick-release skewer first
It is wise to have an assistant crank the wheel so you can focus on its placement.
Step 2. Reposition the quick-release skewer.
If the wheel is not in a straight sitting position in the dropouts, you must reposition the quick-release skewer.
This step should help address the issue of brake rubbing. If not, you can start checking and adjusting the disc brake calipers.
Step 3. Loosen the disc brake calipers.
Bicycles with disc brake systems also have calipers. You can find these on the bike’s fork, a frame post, or a dedicated disc brake adaptor. It would be wise to check your bike’s manual to determine the caliper’s location.
Loosen the disc brake caliper by turning its bolt to the left. I do not recommend removing the bolt. You only need some degree of bolt movement to allow for disc brake caliper adjustment.
Step 4. Adjust the disc brake calipers.
Press on the brake lever while wriggling the disc brake caliper. Maintain a firm squeeze on the lever while retightening the disc brake caliper bolt.
Spin the bike wheel to ensure there is no contact between the disc brake and the wheel. Sometimes, you may need several attempts before you get the correct caliper position.
Park Tool also has a video you can watch to align the disc brake of your bike.
Conclusion
It is not uncommon for bike brake systems to fail. When they do, it can lead to serious harm or even death. Thankfully, learning how to adjust bike brakes rubbing can lower your risk of biking-related accidents. You will feel safer every time you go biking.
I hope you found this tutorial beneficial. If you did, maybe you have friends and acquaintances who would also benefit from the knowledge. Why not share this article with them? Moreover, I would love to hear your thoughts and comments about this tutorial.

“Bike commuting should be the trend for the next few years, and it is a convenient and eco-friendly way for us to travel. And we are here to make it a bit less troublesome for people who want to maintain their vehicle for a long time. So, the content I expect to put out here is offering help for bikers who are facing issues with parts of their bikes once in a while. Let’s have fun and protect the environment together!”