Riding a bicycle is a great way to stay fit while having fun. It is an excellent opportunity to improve your locomotor skills and simultaneously enjoy full control of your ride. Using a bike brake allows you to manage your ride in different kinds of terrain. You can ride on rocky roads, unstable road altitudes, and other conditions without having to worry about losing control.
The brake is a crucial component of your bike that enables you to slow down or stop cycling in a controlled and manageable way. So, it is always extremely vital that the brake is at its ideal state to perform.
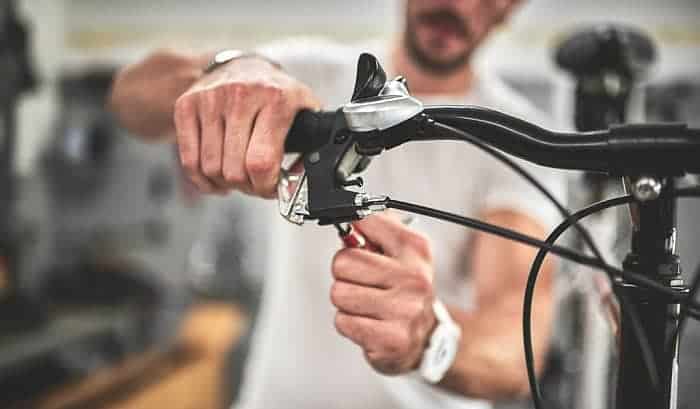
One of the most common problems that you can face with brakes is broken and bent bike cables. It means your brake may not deliver well, which causes you to lose control while riding. Good thing, you can learn how to fix bike brakes cable. Simple ways include proper cleaning and lubricating of the cables, replacing them successfully, and testing for biking.
Table of Contents
What is a Bike Brake Cable?
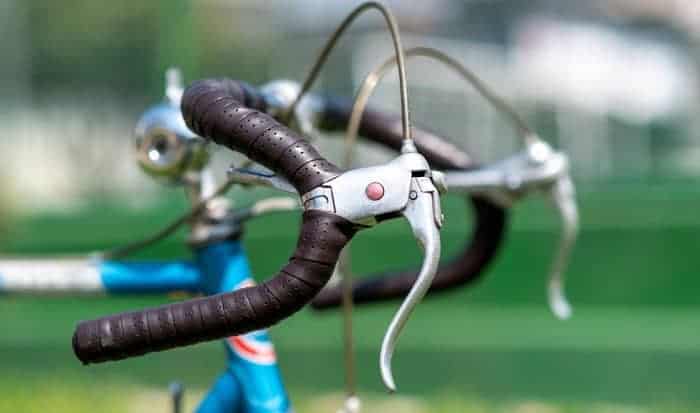
Brake cables are significant elements of your bike, responsible for converting the force employed by the biker to the wheel braking mechanism. It allows you to manage your ride by giving you the option to slow down, especially on rough and rocky roads.
The cables are used intentionally for braking on bicycles with the help of cable-pull brakes. These usually consist of an inner cable made of stainless wire and outer cable housing. Both work together to provide a better braking system for your bike.
The inner cable is a thick steel wire capped on the edge with a pear-shaped or round-shaped material connected to the brake lever. It is in charge of how the bike converts the force applied by the user to stop the front wheel from moving.
The cable housing is just as essential as the wire itself. It protects the inner cable from dirt and other corrosive particles. It also gives the inner wire a smooth and secured coverage for the cable to engage well with the brake.
These two work together where the inner cable receives the tension from the biker, and the cable housing compresses the force to stop the wheel from moving further.
What Causes Brake Cables Failure?

There are several reasons why the brake cable fails regardless of bike brake types. It can be:
- Unsecured anchorage of the cable
- Bike brake cable detached
- Housing cable bent
- Rusting and seizing up of both cable and housing
- Worn and torn cables
Most cables break at the edge of the area where they pass over a pulley. Or they fray near the clamp that connects them directly to the brakes, terminal, or along the path in the sheath. It can also happen when you do not frequently use your bike.
The cable can dry up and be unlubricated. As a result, the brake becomes difficult, and the lever will be more challenging to operate. When these occur, you can follow the tips below:
- Cleaning and lubricating
- Replacing bike brake cables
- Inspecting for final checking
How to Fix Bike Brakes Cable?
Clean and lubricate
The first thing that you should do is inspect whether your inner cable is clean or building up dirt. In some instances, your brake cords are crudely functioning because particles hinder the smooth transition of energy to the brake pads.
To clean your brake cable, follow the steps below:
- Step 1. Pop the cable housing out of the stops, then slide the inner cable off the house. At this point, you can slide the housing up while the inner cable is down. Once the inner cable is visible, inspect the part thoroughly.
- Step 2. Look for frayed cables, dirt, and corrosion build-up. If you find any, it is an indication that you need to replace the brake bike cable.
- Step 3. If you cannot find any form of deterioration, the inner cable is good to go. Therefore, you can proceed to the outer cable or cable housing.
- Step 4. Clean the cable housing using a spray degreaser until it drips out of the edge flawlessly. Then, I suggest cleaning the edges of the cable housing to ensure that no unnecessary particles are building up. It is also to make sure that the cable housing is not jagged, which results in poor cable performance.
- Step 5. If you see jagged edges, you must remove the cable housing, then you should smooth the edges using a file or Dremel tool.
- Step 6. After cleaning both the inner and cable housing, apply a thin layer of lubricant on the cable.
Replace the bike brake cable
If cleaning and lubricating your bike brake cable did not resolve the problem, you may now consider replacing bicycle brake cables. Here are the quick and easy steps of replacing the bike brake cable.
- Step 1. It is important to remove a frayed or bent bike brake cable to prepare for bicycle brake cable repair and replacement. Using the Allen keys, you need to twist the cable to turn the pinch bolt and loosen it. You must do it counterclockwise to loosen the bolt. Once it is loosened, slide the brake cable out.
- Step 2. Then, focus your attention on the handlebar where the cable connects to the lever. You will see a small barrel securing the cable to the lever. You must slide the cable out from the brake lever. This step will first prepare for the removal of the outer cable housing from the bike, then the inner cable.
- Step 3. Then, get the measurement of the old cable and cut the new one with the same length.
- Step 5. You are now ready to insert the new cable into the cable housing. To do this, ensure that the new cable will fit perfectly in the old housing by gently sliding the cable through the entire length of the outer casing.
- Step 6. You can now proceed to the brake lever, where you slide the new cable inside it.
- Step 7. Secure the cable to the casing by sliding the caps at the edges of the cable housing into its proper position.
- Step 8. Once secure, test out your new bike brake cable.
Final testing
- Step 1. To test your new bike brake cable, pull the brake lever on the handlebar and inspect the resistance and brake system. If you find that everything is working smoothly and you have already reattached the bike brakes, you can confirm that your new brake cable is installed correctly.
- Step 2. If you experience minor issues with the cable, you can repeat the process and ensure that you installed the new cable successfully. You may find that there is an excess cable length that needs to be cut. Reduce the length and place it back into the cable housing.
- Step 3. Then, double-check again for the final result. You can slowly pedal forward, so the cables can regain tension. It is now ready to be ridden again!
Conclusion
Bike brake cable is one of the most important components of your bike. Without it, you would not have absolute control of your ride. It allows you to slow down or speed up depending on the road you are passing.
Thus, it is very crucial to know when your bike brake cable is not functioning well. It will prevent any form of accident and ensure a smooth and enjoyable biking experience.
May the quick guide on how to fix bike brakes cable provided above help you if your bike brake cable does not run well. In case you have any more questions and thoughts, you can leave a comment below, and we will help you out.

“Bike commuting should be the trend for the next few years, and it is a convenient and eco-friendly way for us to travel. And we are here to make it a bit less troublesome for people who want to maintain their vehicle for a long time. So, the content I expect to put out here is offering help for bikers who are facing issues with parts of their bikes once in a while. Let’s have fun and protect the environment together!”