
Cycling is one of the most enjoyable hobbies one can have. It does not only keep you fit and athletic but can also take you to places you have never been. However, as much as it is a fun and enjoyable activity, it requires technical skills to sustain cycling.
You should have some repair and maintenance know-how to keep your bike at its optimal performance. Meaning, you must determine whether your bike wheels are running fine, the chain is not loose, and the gear shifts smoothly.
Of course, one of the most common problems you have to face is the bike chain issue. Chains normally wear out and become loose. You are also required to shorten the chain so that your bike can deliver excellent performance.
Thus, we are giving you this guide on how to shorten a bike chain without a chain tool. It includes removing the chain, shortening the chain, and reassembling the chain back again.
Table of Contents
Knowing the Process

Before you proceed to the step-by-step process, it is important to gather all the things you need for this tutorial. These are following:
- Bike stand
- Chain cleaner or chain degreasers
- Hammer
- Plier
- Thin nail
- Lubricant
Then, you are now ready to shorten your bike chain without a chain tool. (Click here to learn more about the features and functions of the top-rated chain breaker tools.)
Shortening a bike chain without a chain tool is a complicated process. It is one of the most tedious repair activities that you need to do to your bike. You will have to undergo three major steps to be able to shorten your bike chain properly.
It involves the removal of the bike chain, the shortening of the chain, and the reassembling of the chain. These steps are divided into sub-steps that includes the following:
Removing the chain
- Determining whether the bike chain needs replacement
- Positioning the bike on a stand
- Cleaning the chain
- Locating the master link
- Rotating the pedals
- Opening the master link
Shortening the chain
- Measuring the number of links to cut off
- Clamping the next link
- Pushing the pin
- Repeating the process for additional links to be removed
Reassembling the chain
- Placing the master link on both sides of the chain
- Reconnecting the chain
- Loosening the chain
- Applying high-quality lubricant or oil
- Finals inspection of your bike
Step-By-Step Process
Removing the chain
- Knowing whether your bike needs replacement
The purpose of shortening your bike chain is to ensure that the bike runs optimally. Most of the time, you will inspect your chain to know whether it needs a replacement. You should count the links from the first pin to the last pin.
You must ensure that the gap between the pins corresponds to 12 inches. If it extends to more than 12 ⅛ inches, it is time to replace your bike chain or shorten the chain.
If you counted the links right, you just need to loosen the back wheel by pulling it backward. Doing this can quickly fix your chain issue.
- Position the bike on a bike stand
Once you determine that the chain needs to be shortened, then you have to prep your bike by mounting it on a bike stand. If you do not need a bike stand, you can lean your bike against a wall upside down. This will give you a better angle to work on your bike chain.
Then, start cleaning the bike chain by removing dust and debris attached to it. You can use high-quality chain cleaner that can help reduce grease and lubricants from the chain. Then, you can tap dry the chain, if necessary.
- Locating the master link
Now that you already have a cleaner bike chain, it is easy for you to locate the master link. The master link allows you to disassemble the chain easily. The link looks different compared to the rest of the chain link, it can be darker or lighter, so that you can instantly locate it.
- Turning the pedals and opening the master link
After you are certain that you already located the right master link, you can turn the pedals until the master link becomes accessible to you. If your bike lacks the master link, you can just pick any link where you can break the chain, and eventually shorten it.
In order to shorten the bike chain, you need to open the master link first. It will give you access to the rest of the chain links you want to be removed.
Shortening the chain
- Determine the number of links to be removed
Now that you have access to the rest of the chain links, you should now identify how many links you want to take off. You must be careful in performing this step, as this will greatly depend on how your bike will run after.
The number of links you will remove must be enough to keep your bike chain tight while keeping a smooth and easy ride.
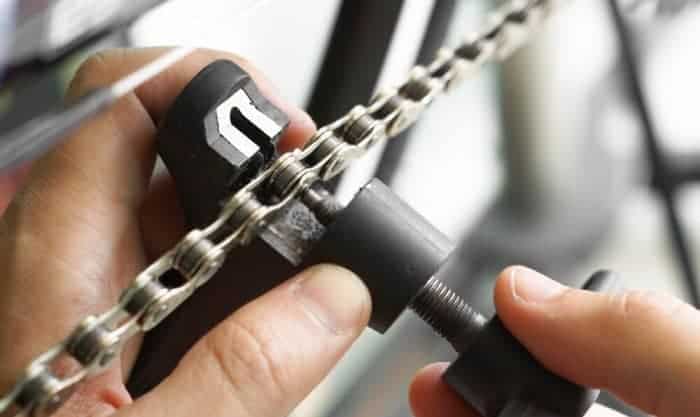
- Push to pin
In order to shorten the link without a chain tool, you need an alternative tool like a hammer, pliers or thin nail. They will assist you in pushing the pin easily. You can position the chain over a socket, and hit it with a hammer. Then, you can now pass the bolt all throughout the open holes.
- Repeat process until you already remove the links you need to take off
After pushing the first pin, you can now repeat the process for the other pins. Remember, you just need to put the pin on the socket and hit it using a nail and a hammer. Remove the link one at a time until you reach the desired chain length.
Reassembling the chain
- Tie together the end of the chain with a master link
Identify both ends of the chain where you can put the masterlink back. In this step, you have to get a screwdriver to push the links back together. You will hear a clicking sound after you have placed the master link on both ends of the chain.
Ensure that you have already reconnected the chain. Then, keep the chain steady by pushing more pressure to the masterlink using a screwdriver.
- Put the chain back on to the bike
After you already connected the ends, you can now put the entire chain back to the bike. Ensure that the chain is not too tight to prevent an uncomfortable ride. If you feel that the chain is too tight, you need to loosen it a bit.
- Apply oil and lubricant
After the chain is completely set on your bike, you can apply oil and lubricant to enhance its smoothness and performance. Using a lubricant can prolong the life of your chain, and improves the quality of its performance. You must not take this important step for granted, as it helps to shift your gear more easily.
- Test and inspect
After performing all these steps, you can now test and inspect your bike for a ride.
Conclusion
Shortening a bike chain without a chain tool is a long and complicated process. You need to follow the steps thoroughly in order to improve your bike performance. A chain tool may make the process easier, but you can use alternatives like pliers, a hammer and a thin nail.
You need not make the process more complex, as we made the process much easier for you. You have to keep in mind the three major steps – removing, shortening and reassembling. Then, follow each sub-steps properly to get your chain back on its optimum performance.
Next, if you have something in mind, we love to hear your thoughts. So, do not hesitate to comment below for additional insights and suggestions. Also, if you find this article helpful, you are very much welcome to like and share.

“Bike commuting should be the trend for the next few years, and it is a convenient and eco-friendly way for us to travel. And we are here to make it a bit less troublesome for people who want to maintain their vehicle for a long time. So, the content I expect to put out here is offering help for bikers who are facing issues with parts of their bikes once in a while. Let’s have fun and protect the environment together!”