Painting a bicycle can take a lot of time, and not taking it apart will save you a lot of effort. You may also find that you’re not sure about disassembling the vehicle yourself. But is it even viable to skip disassembly?
It is doable, and for this article, we’ll look at how to paint a bike without taking it apart. Let’s go through the process step by step. Keep reading to learn more.
Table of Contents
What You’ll Need
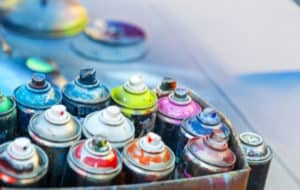
- Spray paint (your color of choice)
- Primer
- Sandpaper (high grit)
- Cleaning cloths
- Cleaning solution
- Paint stripper
- Covering for painting (aluminum foil, paper)
- Painting tape
- Safety goggles
- Mask
Spray Paint a Bike Without Taking It Apart – Procedure
Before starting, try to research some bike spray paint ideas aside from preparing all the necessary items for your project. It will be easier to work if you know what you want as a result. It is also a good idea to secure your workspace for painting before starting.
Step 1: Cleaning

The first step for any painting job is cleaning; this is very important because anything that obstructs the paint from taking hold on the bike surface may cause a problem down the line.
Remove any stickers and start with a thorough cleaning of the bicycle. Wash it with a cleaning solution and make sure to dislodge any patches of dirt.
Pay extra attention to areas with stains or grease, as it is essential to remove these as well. It may be easier to use a degreaser to get rid of grease and grime faster, although some cleaning solutions have this covered.
Wipe the entire bicycle and dry well.
Step 2: Sand surfaces to paint
Use high-grit sandpaper and scruff up the entire surface area to be painted. Not doing this step when you repaint a bike may result in the paint coming off, so just do it right from the start instead of trying to skip over it.
When you can coat without sanding, the result won’t be as good as something that went through sanding first.
Not all of the paint needs to be removed, but you need to make sure to sand evenly. Expect to take a lot of time doing this, since it will need to be done manually, and sandblasting is only an option if you take the bicycle apart.
Step 3: Cover unnecessary sections
The next step is to cover everything that we do not want to coat. A clean painting job is one where the paint stays only where we want it to be, so this is important for getting that professional look.
Usually, we only want to paint the frame, so it is necessary to cover everything else.
You can use foil or paper for larger sections like the chainring and cassette. However, the paint may eventually seep into the covering, so make sure to use paper that is not too thin. Foil may work better since liquid won’t soak into it.
Use tape for smaller sections such as bolts and screws if you feel up to it, but expect it to take a lot of time. It’s fine for some people to paint over these parts, but if small details bother you, it’s better to cover them because they will look better overall.
Step 4: Apply primer
Before you start using any paint, check to see if everything is in order.
Wear safety equipment and protective clothing, and avoid clothes you’d rather not be ruined; cover your surroundings if necessary. The ideal place for this is an open area that is well ventilated as paint fumes can be strong and harmful.
Apply the primer as indicated on the product you chose to go with. Try to spread it out as evenly as you can, and don’t go too fast or too slow.
Allow enough time for the paint to dry. While the time for each product may vary, allow 30 to 60 minutes at least.
Step 5: Paint
Whether you paint a mountain bike or a road bike, it is important to keep the application even, similar to what is ideal for applying primer. It is recommended to spray in an even motion from side to side.
Keep the first coat light and allow at least 30 minutes for drying before proceeding with the next one.
Painting the bicycle will involve up to three coats. Repeat the process for the second coat; you will be left with a more solid color afterward. Use a third layer to give the paint more durability and protection against scratching.
For a DIY custom bike paint idea, you can make use of stickers for the final coat to apply designs and markings on the frame. Make sure to allow at least 30 minutes of drying time after each coat for better results.
Step 6: Remove covers and clean
Remove the covering after painting and ensure that everything turned out fine. This is also the time to clean splatters if there are any.
Use a paint stripper to remove unwanted sprays.
Let the bike dry overnight to ensure that the paint has properly set. You can polish the newly painted surface to give it a better shine.
Helpful Tips
The bicycle wheels require special attention.
Even when you paint a bicycle while trying to save time, it will be better to pay special attention to certain things; these include the wheels.
Wheels are a special concern because they may present some difficulties if you don’t want to take anything apart. Another problem is how much time it can take to cover everything properly.
Covering the spokes can be especially time-consuming if you tape each one. It may be easier to just use a paint stripper to remove the paint before it dries, but make sure to still cover the tires unless you plan to coat them as well.
The easiest choice is to just detach the wheels for painting, since doing so would not present much trouble nor take a lot of time to do. Most wheels are simple to remove and reattach, and some are designed for quick removal.
Drying the paint overnight is recommended.
Many products indicate a specific drying time and many have a minimum of 30 minutes. However, it is better to allow the paint to dry for 24 hours before using the bike.
This is to ensure that the coloring is stable enough that it does not warp or come off.
On the other hand, it is also a good idea to do your cleaning before the final drying period since the paint will still be easy to remove at this point.
Conclusion
Painting a bike involves a lot of work. You will feel a great deal of satisfaction after seeing the result of your effort. It will be even better when you find that you were able to do a good job that yielded a clean and professional look.
Now that you know how to paint a bike without taking it apart, try it out for yourself. Tell us all about your experience in the space below. We look forward to hearing from you.
Always ride safely.

“I ride my bike to work for years, but is that enough? Our carelessness towards our surroundings has taken a toll on the environment. And now, everyone is responsible for changes; even the most minor contribution is counted. With this hope and spirit, I started with my partner to establish Biketoworkday to help more individuals commute to their work sites on their bikes.”