Matching the color of your bike to your tastes and personality is a satisfying outlet of self-expression for a cyclist. You can go to a bike frame painting service for this or you could go the DIY route. If you pick the latter, you’ll need to know how to paint a bike frame.
We’ll go over the step-by-step instructions for this task, along with certain things you need to pay close attention to. Keep reading to learn more.

Table of Contents
What You’ll Need to Spray Paint Bike Frame

- Paint Primer
- Color Paint
- Clear coat lacquer
- Goggles
- Mask (for fume protection)
- Area for painting with good ventilation
- Sandpaper
- Sticker cover for tube openings
Painting a Bicycle Frame
We’ll make use of spray paint for this guide to keep it simple, and this applies to all three coats. The goal is to color the bike frame carefully and evenly.
Step 1: Prep the bicycle frame
The first thing you need to do is to take the bike apart. Working with the frame alone will make it easier to paint. Make sure to remove everything, including the cables, so you’re left with just the bare frame.
Here are some general instructions for taking the bike frame out:
- Remove the wheels with Allen keys.
- Using a wrench, loosen the bolts on the crank set to take it off.
- Hammer the bottom bracket to push the bearings out.
- Take out the chain using a chain remover.
- Using an Allen key, unfasten the stem. Then, remove the fork and headset.
- Loosen the seat clamp and seat post.
- Now, you should have a detached frame. Make sure to save all the parts you removed for reassembly.
It’s a good idea to clean the frame before proceeding. Remove any stickers on the surface as these can get in the way as you progress. Otherwise, you can end up with an uneven surface, which can ruin the quality of your paint later on.
Step 2: Sand the surface
The next step is to use sandpaper on the frame. This will allow you to have a proper surface to apply the paint. If you do not sand the surface before repainting bike frame, it will be difficult for the paint to set onto the painting surface.
The problem with sanding is that it will take a lot of time to do. Fortunately, you don’t have to sand down until you see the color of the metal; just work on removing the top layer, so your primer will be able to stick to it well.
There’s also the option of bringing your bike frame to a sandblasting service.
If you’re skeptical of whether paying for sandblasting will be worth it, it’s a good idea to weigh the costs. Sanding will cost less, but expect to spend perhaps a whole day to do it, while sandblasting will cost much more, but you will be done in less than an hour.
Step 3: Prepare for coating
Now it’s time to prep the frame for painting. Cover openings in the tube to prevent paint from getting inside; you can make use of stickers for this, but any covering will do. It’s always a good idea to keep the paint only on the areas where it is needed.
It’s also wise to place coverings around your painting area so you don’t accidentally get paint on the surrounding walls or your work table.
Be sure to mask up before proceeding.
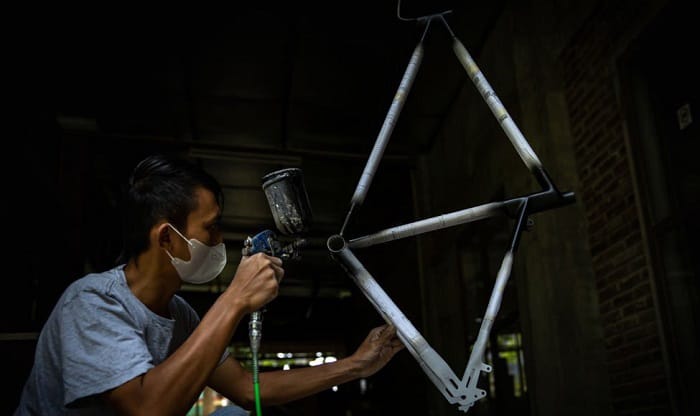
Step 4: Apply primer
The first coat we’ll apply is the primer, and you’ll need two coats for this. Make sure to even out the paint as well as you can for better results. After applying the necessary coats, let the paint dry.
The time needed for drying may vary depending on your paint, but leaving it overnight should do the trick.
It’s also recommended to sand the primer-coated surface lightly. Use 300 grit for metal or 800 grit sandpaper for carbon.
You can just focus on any bumpy sections of the painted surface since, we only want as even a finish as we can get.
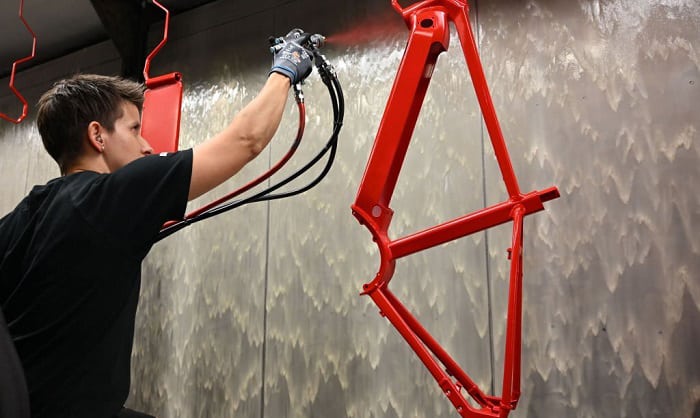
Step 5: Paint the frame
- If you’ve researched custom bicycle paint designs, you probably saw many different ways to do this step. But here, we’ll keep it simple and stick to just a solid color.
- You can apply design stickers before spraying the paint. These allow you to leave a pattern on the frame, and they will be peeled off afterwards. Take extra care when removing the stickers as you can damage the newly applied color.
- Applying the paint will be largely the same as the primer coat. If you’re using something from your research on bike spray paint ideas such as combining different finishes, just be sure to be careful and thorough.
Be mindful of the paint order when applying multiple layers.
- Leave the frame to dry overnight as well and remove the stickers afterward.
Step 6: Finishing up
The final step is to apply a clear coat on the bike frame with lacquer. This will seal in the paint and give us a nice finish.
The more difficult part is safety. The fumes of lacquer are strong, and it is very important to have proper protection and ventilation.
Frequently Asked Questions
What paint should be used for the bike?
There are two main choices: matte and glossy paints. The glossy type has more depth and is easy to clean. The matte type, on the other hand, such as matte black paint, makes scratches less visible but can look chalky.
How much will bike frame repaint cost?
The cost should be somewhere between $40 to $150, depending on how complex you would like the new paint job to be.
Conclusion
Repainting a bicycle frame can be surprisingly simple, although it does take some time due to all the waiting around for paint to dry. However, it is a worthwhile activity, and you’ll be pleased to see the results more than you can imagine.
Now that you know how to paint a bike frame, go ahead and try it yourself.
If you have any comments or suggestions regarding this topic or any interesting colors or designs to try, please drop us a message in the section below.
Always ride safely.

“I ride my bike to work for years, but is that enough? Our carelessness towards our surroundings has taken a toll on the environment. And now, everyone is responsible for changes; even the most minor contribution is counted. With this hope and spirit, I started with my partner to establish Biketoworkday to help more individuals commute to their work sites on their bikes.”