
Do you find it impossible to change your bike tubes without levers? Let me tell you that changing a bike tube doesn’t have to be a chore and is even possible without the help of tire levers.
All you have to do is to move the slack round in one place. Applying a few techniques also helps and can really save you from all the struggles.
To know more about how to change a bike tube without tire levers, follow the steps, and I assure you that you will have your bike tube fixed in no time.
Table of Contents
- Things You Need to Change the Bike Tube
- Start Changing the Bike Tube without Tire Levers
- Step 1: Put on Gloves
- Step 2: Deflate Tire
- Step 3: Loosen the beads
- Step 4: Push the Tire
- Step 5: Push the Rest of the Bike Tire Away
- Step 6: Inflate the Tube a Little Bit
- Step 7: Pop the Valve and Insert the New Internal Tube
- Step 8: Push the Bike Tire Wall Back in the Rim
- Step 9: Do a Final Visual Check
- Step 10: Start Inflating
- Conclusion
Things You Need to Change the Bike Tube
- Gloves (optional)
- Pointed Object (if the tire isn’t deflated enough)
- Inflator Pump/CO2 inflator
Start Changing the Bike Tube without Tire Levers
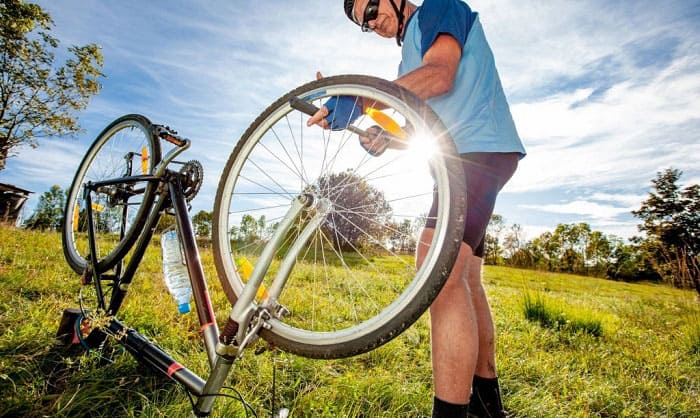
Get ready to change your bike tube without needing those pesky and flimsy tire levers. This technique on how to change a bike tire without tire levers is perfect for mtb tires and other wide-tired bikes.
I do not recommend applying this technique with road bike tires because they are usually tighter to the bike rim, making the tube more difficult to change.
Step 1: Put on Gloves
Safety is our top priority when working with bikes. That’s why I highly encourage wearing gloves when changing a road bike tire or any other tire. However, this is an optional step in the process.
If you’ve got no gloves, then you can do the steps without them. Just be sure to be careful while you follow the process.
Step 2: Deflate Tire
Most bikers usually skip this step because the tire is already flat before changing the bike tube. However, if your tire is not deflated, it’s best to let some air out. You can do this by poking the tire using a small and relatively pointy object.
When you have a deflated tire, it is much easier to squeeze its sides. This will break the tire loose from the bike rim.
Step 3: Loosen the beads
This is the primary key to change bike inner tube without tire lever quickly and systematically.
First, get one tire bead into the center of the rim. You can do this by pushing the tire into the bike rim’s center. Repeat this step on the second bead.
Step 4: Push the Tire
The loose beads you established in the previous step will act as the primary support to ultimately push the tire off the bike rim.
Support the wheels on the floor using your feet. Start using your thumbs to push the tire bead off the bike rim.
After that, use your hand’s palm as a lever by moving it in an outward direction.
Some rim and tire combinations are more difficult to work with compared to other models. So, I highly suggest trying out your specific set-up at home. This will help you the next time you’ll remove tires on a busy road or under pouring rain.
Step 5: Push the Rest of the Bike Tire Away
After getting one section of the bike tire over the rim’s edge, it would be easier to continue and push it off completely.
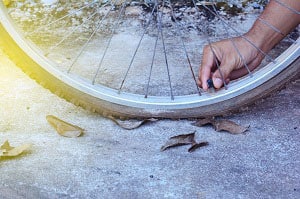
If the reason you have to remove a bike wheel is due to a puncture, it’s time to thoroughly look for the offending thorn, glass shard, or flint inside the tire carcass. Knowing the cause of your flat tire can help you lessen your time at the roadside.
It is essential to be wary of the glass poking through the tube because it can cut through your fingers.
Step 6: Inflate the Tube a Little Bit
Now that you successfully removed the tire from the bike tube, it’s time to slightly inflate the new tube. This is the best tip I can give before you fit the new bike tube. Giving your tube some air inside will definitely help retain its roundedness and proper shape.
This step is a simple process to effectively lessen your chances of constantly pinching the tube while fitting it.
Step 7: Pop the Valve and Insert the New Internal Tube

After step 6, lay the tube over one side of your tire and align the valve bike stem with the stem hole. Then, carefully squeeze the tire where the hole is located and put the valve stem through the valve stem hole.
Then, pull on the bike stem to ensure that most parts of it go through the hole as much as possible. If you noticed that the bike tire doesn’t go over the tubing by itself, you should lift it up and over the tube.
You should be careful not to twist the bike tube. While doing this, you will notice how easier it is to do this step with a partially inflated tube than a flat one.
Then, you must thoroughly check if the internal tube is installed correctly within the bike’s rim bed.
Step 8: Push the Bike Tire Wall Back in the Rim
After inserting the inner tube in the tire, push the tire wall back inside the bike rim. This process is the exact opposite of getting rid of the bike tube. Jam the wheel side and force it over the rim wall.
Use one hand to grip the initial point in place. Then, use your other hand to further get the tire inside the rim.
Step 9: Do a Final Visual Check
After you change bike tires successfully, I highly suggest doing one final check around the whole bead. This will ensure that there is no trapped inner tubing before you do the final inflation.
However, if you put just the right air volume in the tube beforehand, the tire won’t lie flat and this probably won’t be a problem.
Step 10: Start Inflating
You should then be ready to inflate the bicycle tire, which you can do at the roadside quickly using the inflator pump or a CO2 inflator. You can also use a floor pump if you’re changing the bike tube at home.
Now that you have a concrete idea of this tire lever alternative, you can easily change your bike tube without having special tools. In case you have questions regarding the whole process, you can also check out this video tutorial.
Pro Tips:
- A bead that’s at the valve will prevent you from pushing the tire off. The bead must be on the valve’s opposite side.
- You will need to apply technique and a fair amount of force to use the hand as a lever. It is good to do a bit of practice before an emergency.
- Practice doing the steps above. Having a solid thumb may be good, but it’s good technique and not brute strength that makes this process a piece of cake.
- Doing small little steps throughout the process is a good practice. Pushing the tire bead a bit at a time. Do not try to put too much force on a massive part in one go. This will help you avoid having sore and painful thumbs.
Conclusion
How was the tutorial? Did you enjoy this comprehensive guide on how to change a bike tube without tire levers? This handy trick will save you time on the road as you take care of your bicycle during the trip.
You won’t have to worry about getting stuck on the road with a flat tire because you’ll know how to change the tube using your bare hands.
Of course, we love to hear from you. Tell us your experience in the comments and share the article with your loved ones. It would help us a lot.

“I ride my bike to work for years, but is that enough? Our carelessness towards our surroundings has taken a toll on the environment. And now, everyone is responsible for changes; even the most minor contribution is counted. With this hope and spirit, I started with my partner to establish Biketoworkday to help more individuals commute to their work sites on their bikes.”