If bikes have a motto, it’s probably “exposed to the elements” because they are made to work hard. The seat takes so much pressure, while the chain and wheels are forced to give their best since they are the busiest.
All that while facing the challenges of the road or the trails. Bikes, be they used for a daily commute or an intense ride in the backcountry — or not being used at all — will always have issues.
Having a maintenance kit is a must for the usual problems of wear and tear or even serious damage.
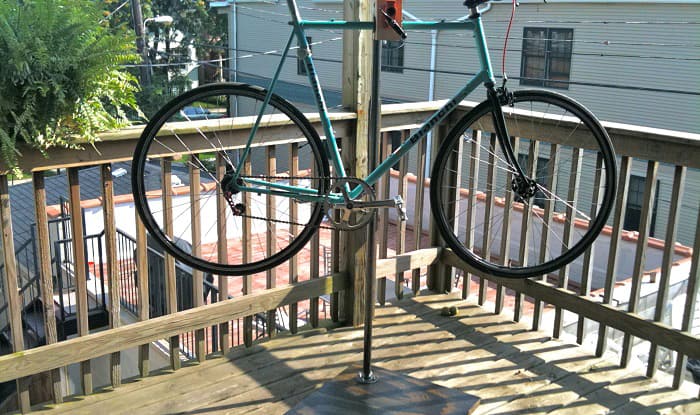
With that, cyclists should know how to make a bike stand for repair, especially if they want their two-wheel pal to last longer and be a better companion.
Table of Contents
Step-by-Step Guide
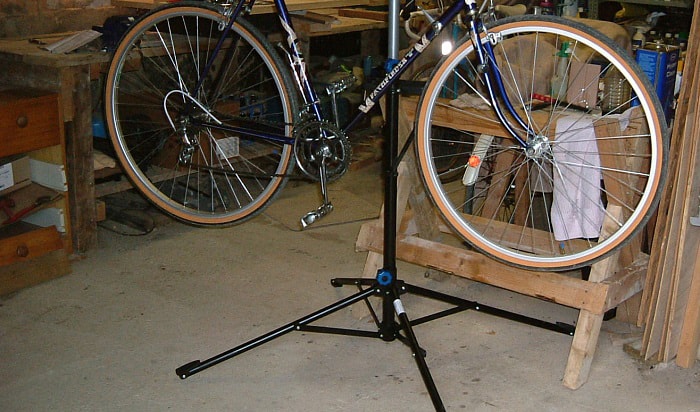
Investing in a good bike maintenance stand doesn’t mean breaking the bank. Sure, owning a bike doesn’t come cheap because even some of its parts are costly.
For bike stands, some go for around $50 and up, while others, like an MTB stand, can cost more than a hundred bucks. Luckily, there are easy ways to make your own bike rack for repair using spare items at home.
Being a biker means being resourceful, anyway.
What to prepare:
- Screwdriver and screws
- Wrench
- Cordless or electric drill and bits
- Flat washers
- Hex nuts
- ¾” x 48” and ¾” x 12” pipes (depending on the height of your stand)
- Elbow joints
- Floor flange
- Clamp
- Wood
- Bolts
- Pencil
Step 1: Prepare the base of the bike rack
Creating a homemade bike repair stand is easy even for beginning bikers. Those who love do-it-yourself projects will have a good time creating a makeshift bike stand because it’s simple yet satisfying.
For a wooden base, it’s recommended to have an even surface, so it’s better to have the thickest plywood you can find.
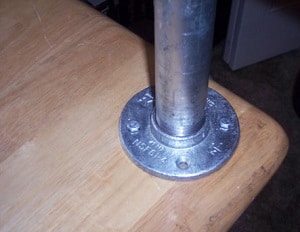
First, decide where to position the flange, then use the pencil to mark its four holes.
After that, drill the first two holes, then insert two bolts so you can accurately drill the remaining holes later.
Step 2: Assemble the pipes
Grab the long pipe and connect it to the short one using a metal elbow joint. Connect it to the flange when it already looks like a letter L.
It’s important to get them as tight as possible because the drilling comes next. Later, you can secure the elbow joint after drilling the bolts.
Having a DIY bike repair stand is not a pipe dream, after all – thanks to your grip strength.
Step 3: Install the bolts
Next, countersink the holes’ underside using a spade bit. With the bolts and flat washers in place, ensure no protrusions. You want a sturdy DIY bike work stand, for sure.
After putting the bolts and flat washers on the countersunk side, it’s time to install the pipe. Put the flat and lock washers, then get busy twisting the hex nuts.
Your grip strength will be put to the test once more because the installation of the pipe needs to be tight. Once satisfied, you can also adjust the elbow joint to make it more secure.
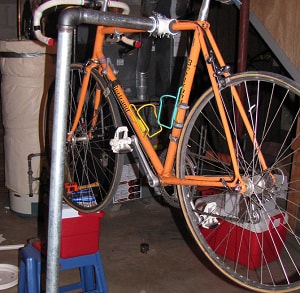
Step 4: Install the clamp
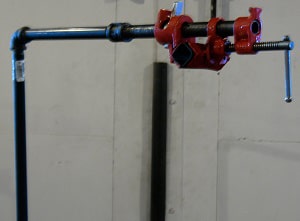
If you’re already pleased with the outcome of your twisting and the position of the pipe, you now need to install the pipe bar clamp fixture.
Put it on the short pipe by first attaching the tail stop (the smaller part of the clamp.) After placing it in your desired position, you can screw the stationary head (the larger part of the clamp) on the end of the pipe.
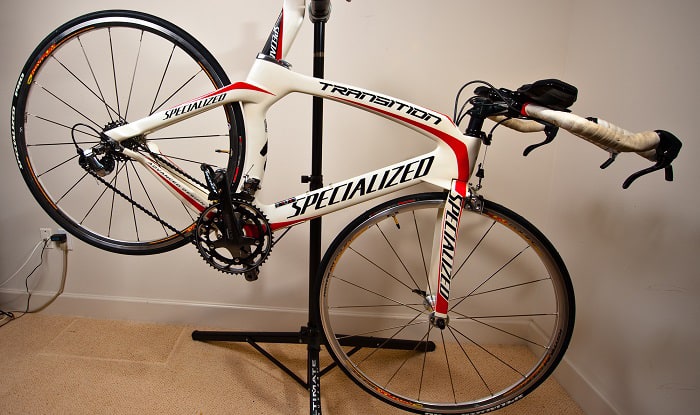
After installing the clamp, your bike repair stand alternative is done. The next thing to do is to clamp your bicycle onto it so you can adjust and tinker it a bit.
Helpful Tips
Another option for the base is using galvanized pipes that you will shape as a square or form as a letter C or U. It’s sturdy, and there’s no need for drilling.
Meanwhile, those who want a bike repair stand design out of PVC will need a hacksaw, lots of fittings, and PVC cement.
Depending on the style of the frame, you will be busy joining the pieces together and splitting the fittings to create a mount for the bike.
Conclusion
To build a bicycle stand from scratch is not being a cheapskate but all about resourcefulness.
With such a fixture, bikers will become more confident on the road knowing they have a reliable bike repair stand DIY at home. Biking, after all, is more than just a long-term hobby but a lifestyle.
Now that you know how to make a bike stand for repair, we hope that you won’t be needing it for big-time servicing but only for routine maintenance. Ride safe and rest easy; you got your trusted rack now.

“I ride my bike to work for years, but is that enough? Our carelessness towards our surroundings has taken a toll on the environment. And now, everyone is responsible for changes; even the most minor contribution is counted. With this hope and spirit, I started with my partner to establish Biketoworkday to help more individuals commute to their work sites on their bikes.”