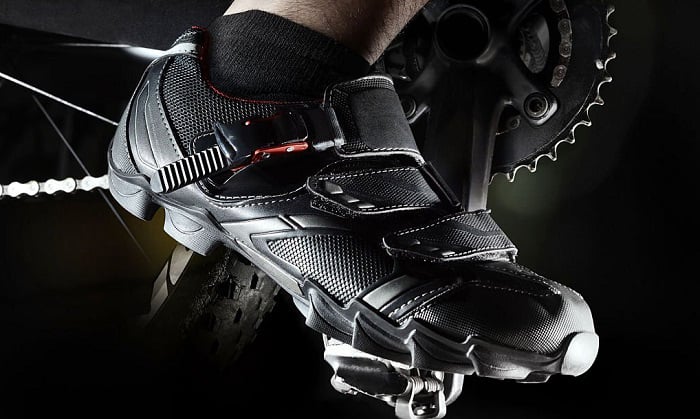
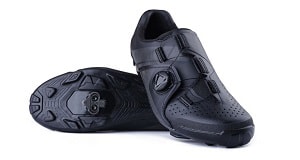
SPD cleats are important accessories that most professional bikers use when they are on the road. They boost the efficiency of pedaling, which, in turn, allow bikers to navigate the road effortlessly. SPD cleats attach to the underside of your mountain bike shoes, so the shoes can connect to the pedal automatically.
The cleats will physically lock you to the bike and you can easily translate your leg movement to the pedal itself. However, pre-installed bike cleats are unavailable in the market today. You have to attach spd cleats to shoes before you can use them.
So, how to install SPD cleats on mountain bike shoes properly? Check out this guide to learn the process:
Table of Contents
Things You Need for This Tutorial
- Mountain bike shoes
- SPD cleats
- Attachments (base plate, cleat bolt, etc.)
- Hex wrench or tightening tool
How Do SPD Cleats Work
Using SPD cleats when you are biking offers you several benefits:
- Ensures stable pedaling without the concern of your feet slipping away from the pedals.
- Lessens mud from getting into your bike shoes when you are riding your mountain bike in muddy and wet terrain.
- Offers more rigid soles than ordinary shoes. With rigid soles, the force of your pedaling can be distributed more evenly throughout your foot. In this way, you have more power in each pedal stroke.
Step-by-step Guide
There are different ways to install cleats to your bike shoes. A Shimano SPD cleats installation may have a specific method for attaching cleats. But for this guide, we will provide you with the most basic method:
Step 1: Removing the bottom plate
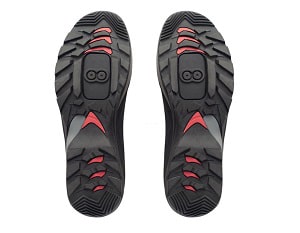
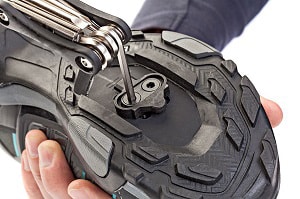
The first step to take for a spd cleats installation is removing the bottom plate from your mountain bike shoes. When you turn over your shoes, you will see a little cut-out in in the middle. Remove it with a hexadecimal wrench.
It is also important to remove the bottom denture for the cutout. It is part of setting up spd cleats to your shoes. The area where you removed the cut-out is where you will attach the SPD cleats.
Step 2: Attach the clear base plate
After you clear out the sole of your mountain bike shoes, you can proceed to the second step by installing the base plate that normally goes with the cleats. You have to inspect the empty slot on your shoes and install the base plate of the cleats properly.
The base plate should be attached tightly to the shoes, so it will not slip off or be removed easily. Check whether it is installed right by trying on the shoes for a walk. The base plate is installed correctly when it does not wobble and move while you are walking.
Step 3: Inspect if you need a spacer or not
Next, you will decide whether your shoes need a spacer. A spacer is an object you insert between the shoes and the cleat, so the two can be joined properly.
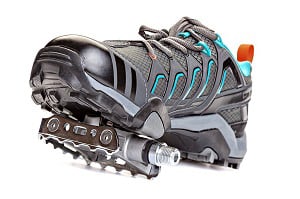
If you noticed that the rubber sole of your shoes catches the pedal cage, making it hard to clip in, you would need to use a spacer. The spacer will prevent your shoes from getting stuck into the bike cage while you pedal roughly up a hill.
Step 4: Position and align the SPD cleats properly
By this point, you have installed the base plate on the sole of your shoes. You can now attach the cleats to the mountain bike shoes properly. It is important that you place the SPD cleats MTB over the metallic portion of the base plate.
Attach it slowly, but do not tighten it right away. This will give you room to make the necessary adjustment to the SPD cleats. With the proper adjustment, you can boost your efficiency when biking.
Step 5: Align the SPD cleats with the bolt holes
Once you make the necessary adjustment, you can insert tightly the cleats into the bolt holes. Align the mountain bike shoe cleats to the bolt holes of the base plate by using a hex wrench. Tighten the cleat with the hex wrench. You should make the necessary twisting and adjusting on the cleats to make sure that the installation is tight.
Step 6: Test and inspect
After you install spd cleats on bike shoes, use them for a test run. Ride your mountain bike and pedal slowly, then increase the pace gradually. Take notice of how your feet feel while you pedal.
If you feel that the cleats are working well, you have properly put cleats on cycling shoes. If the cleats were not installed correctly, there is a possibility that the cleat will turn every time you twist your foot. It is not a good experience and will reduce your efficiency when biking.
Here are the things you should observe when using SPD cleats while cycling:
- The cleats must be aligned under the ball of your foot for maximum comfort. It also allows for better performance and more natural movements. Your ankles are not stressed out every time they create a pedal stroke.
- The cleats must give you the right ‘toe-in’ and ‘toe-out’. It refers to how your foot is pointed when you place your cycling shoes on the pedals. Make sure that your feet are pointed in their natural direction. You should not feel pain or twisting when pedaling, too.
- The cleats must be screwed in tightly. They should be placed nice and snug against the soles of your shoes. The cleats should never shift or rotate when installed.
Step 7: Check the cleats after you ride
To ensure that you did the right job, check your shoes and cleats after a long ride. For instance, make sure that you install Shimano SPD cleats correctly, and that they are staying in place even after you use them.
In case the cleats become misaligned, you have to tighten them again to avoid injuries and road accidents. Re-tighten the bolts to keep them from getting too loose.
Conclusion
SPD cleats are bikers’ best friends when installed properly. They not only increase the efficiency of your cycling but also give you comfort on the road. Properly attaching the cleats to your mountain bike shoes is crucial, especially when going uphill. Each pedal stroke is powerful and can maximize the transfer of energy to the bike when you attach spd cleats to pedals right.
May you find this guide helpful in giving you the necessary techniques on how to install SPD cleats on mountain bike shoes correctly.
Read more other posts about mountain bikes:

“I ride my bike to work for years, but is that enough? Our carelessness towards our surroundings has taken a toll on the environment. And now, everyone is responsible for changes; even the most minor contribution is counted. With this hope and spirit, I started with my partner to establish Biketoworkday to help more individuals commute to their work sites on their bikes.”

