Did you know that grime and dirt on your bike’s disc pads can affect its performance? Yes, it’s no rumor!
Because of all the icky stuff, the friction of the two surfaces lessens. You’re in for a disaster if you’re into gravel racing or mountain biking but have gross, dirty disc brakes.
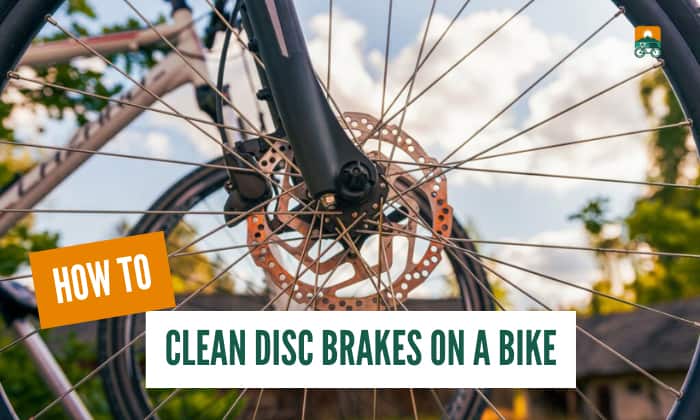
Luckily, you can avoid this at all costs. In this article, we’ll show you how to clean disc brakes on a bike. Cleaning bicycle disc brakes may take some effort, but it’s definitely worth every sweat!
So read on and do what you have to do!
Table of Contents
- Step-by-step to Clean Disc Brakes on a Bike (The Usual Way)
- Step 1: Disassemble the wheel
- Step 2: Unscrew the bolts of the disc rotor
- Step 3: Unscrew and remove the brake pads
- Step 4: Spray your disc brake pads with a disc brake cleaner
- Step 5: Rub the disc brake pads against your towel or rag
- Step 6: Rub the disc brake pads against a sandpaper
- Step 7: Spray some cleaner on the rotor
- Step 8: Spray some cleaner on the brake caliper
- Step 9: Re-install the brake pads and assemble the wheel to the bike
- How to Clean Disc Brakes Without Removing Wheel
- How to Avoid Disc Brakes From Getting Contaminated
- Conclusion
Step-by-step to Clean Disc Brakes on a Bike (The Usual Way)
Before you start, make sure to use nitrile gloves. Touching disc brakes with bare hands can worsen its contamination. The oil of your hands can also affect the disc brake’s function.
Other than nitrile gloves, here are what you need to prepare:
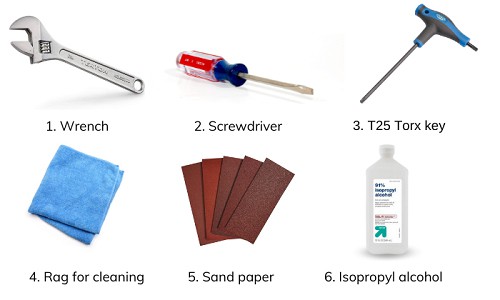
- Wrench
- Screwdriver
- T25 Torx key
- Cloths and rags for cleaning
- Sand paper
- Spray disc cleaner/Isopropyl alcohol
Step 1: Disassemble the wheel
Disassembling the wheel makes it easier to clean the disc brakes, so begin by flipping your bike. Removing the bolts found through the bike axle.
This part holds down the wheel. You may use a wench to rotate the bolt counterclockwise to loosen it, then remove it completely.
Next, carefully dismantle the wheel from the frame.
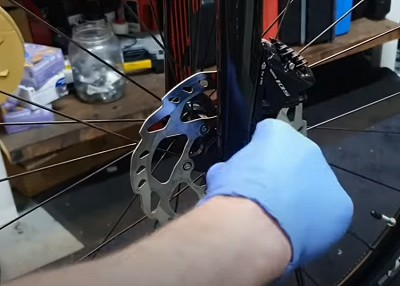
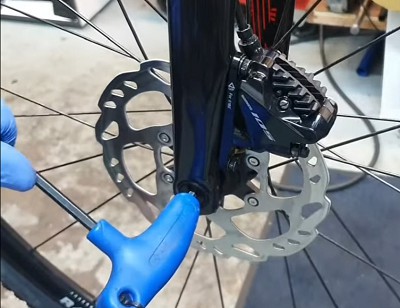
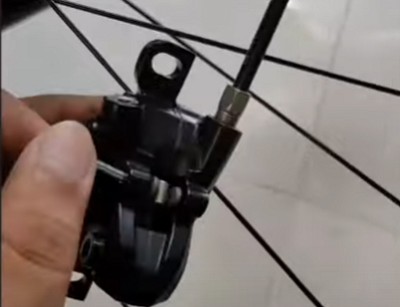
Step 2: Unscrew the bolts of the disc rotor
For this step, you should use a T25 Torx key, a tool that’s specifically made for disc motors. If you have any other tool that does the job, you may also use that.
Remove the bolts one at a time, then dismantle the disc brake rotor apart from the wheel.
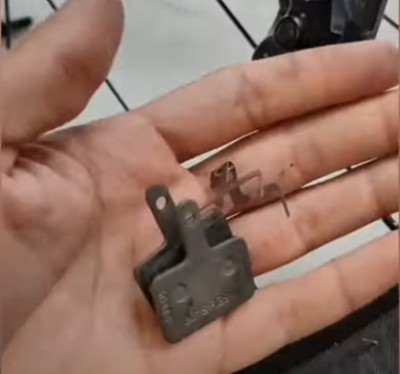
Step 3: Unscrew and remove the brake pads
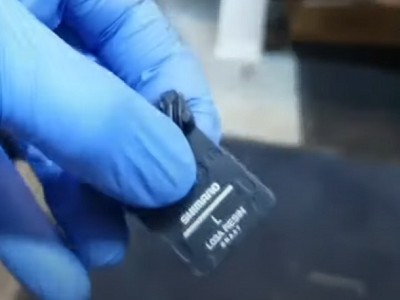
With a screwdriver, remove the screw that holds the brake pads in place. Once removed, you can now feel the brake pads become loose. Completely remove the brake pads.
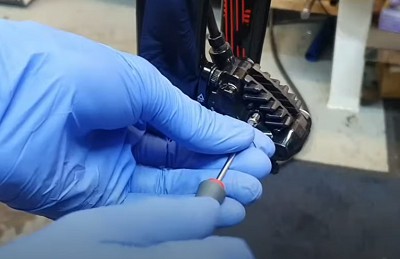
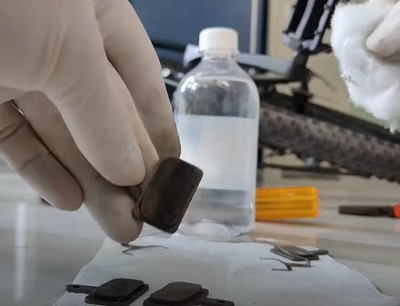
Step 4: Spray your disc brake pads with a disc brake cleaner
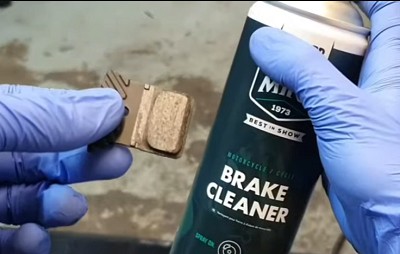
First, lay out your towel or any rag. Next, keep your sandpaper prepared. Grab your disc cleaner and thoroughly spray the product on your brake pads.
Don’t have any disc brake cleaner? Isopropyl alcohol can be a great cleaner alternative.
Step 5: Rub the disc brake pads against your towel or rag
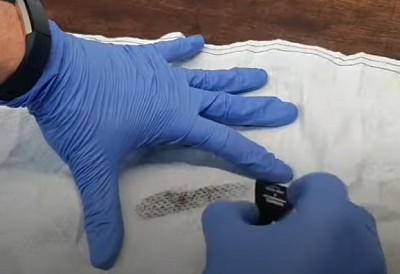
Simply rub it against the towel, and you’ll see that the towel will slowly stain black. This means the dirt is rubbing off. Spray the brake pads again and continue to rub them against the towel.
Repeat the process until there are fewer and fewer stains seen every time you rub the brake pads.
Step 6: Rub the disc brake pads against a sandpaper

Now, get your sandpaper and begin to rub the disc brake pads against it to smoothen the surface. This time, be gentle and make a circular motion when rubbing.
For good measure, simply wipe the dust away using the towel you previously used.
Step 7: Spray some cleaner on the rotor
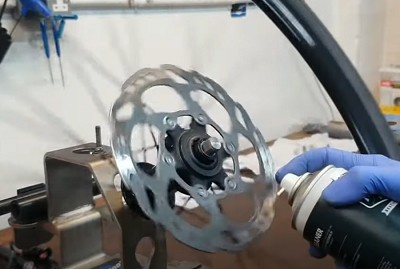
Spray the disc brake cleaner on your bike’s rotor. Don’t forget to get each side. After, wipe it off with a rag or a towel. Spray again, wipe again, and just continue the process until it looks squeaky clean!
Step 8: Spray some cleaner on the brake caliper
Just continue the process of spraying and wiping it off with a rag. Make sure to get to the in-betweens and all the hard-to-reach areas.
Step 9: Re-install the brake pads and assemble the wheel to the bike
After you clean bike brake pads, place them back. Now get the screw that comes with it and screw it back using the screwdriver once again.
Reinstall the wheel by placing it in its right position, then grab your thru-axle by securing it to its hub.
Check the tutorial video here!
How to Clean Disc Brakes Without Removing Wheel
For some bikes, it’s possible to get your disc brakes off without disassembling the entire wheel. If your brake calipers are simply just screwed onto the brake mounts, then you’re lucky.
Here’s what you need to prepare:
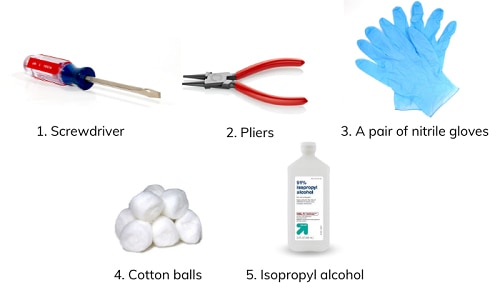
- Screwdriver
- Pliers
- A pair of nitrile gloves
- Cotton balls
- Disc cleaner/Isopropyl alcohol
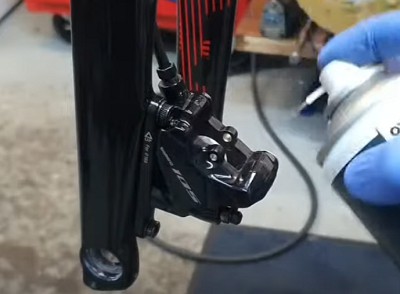
Step 1: Screw off the brake calipers from the brake mounts
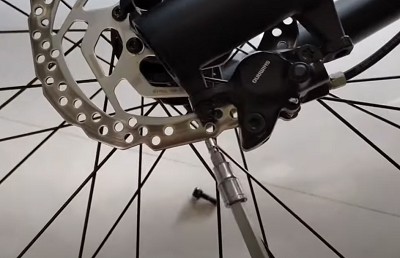
Take your screwdriver, and you should see two slots with screws just around the sides of the brake calipers. Screw off the bolts and uninstall the brake calipers off the brake mounts.
Step 2: Take off the spin
In the middle of the brake calipers, you’ll see a pin inserted in a slot. Use your pliers to straighten it, then pull it out. The spin should be the instrument that locks the brake pads in place.
Step 3: Remove the brake pads
Using your gloved hands, slide off the brake pads carefully.
Step 4: Clean your disc brakes with your cleaner or alcohol.
With a cotton ball, pour cleaner on it then begin to rub on disc brakes. Clean on both sides until they look new again.
Again, you may use isopropyl alcohol as an alternative for disc brake cleaners. Just remember to scrub a little harder to ensure all contaminants are gone.
How to Avoid Disc Brakes From Getting Contaminated
After cleaning your disc brakes, you may want to keep it clean for a long while. To avoid contaminating your disc brakes once again, here are several ways on what to do.
- Tip #1: Don’t use sprays near your bike, and avoid dismantling the wheels when washing or applying lube on your bike.
- Tip #2: Use isopropyl alcohol or any solvent that leaves your rotors crystal clear without any residue.
- Tip #3: Avoid spraying your level and caliper seals.
- Tip # 4: Avoid touching your disc brakes or any part without any nitrile disposable gloves.
- Tip #5: Replace your contaminated brake pads if the situation calls for it.
Conclusion
Usually, when you get your bike cleaned by professionals, service disc brakes cleaning isn’t always part of their offers.
But now that you know how to clean disc brakes on a bike, there are no more worries! The truth is, you can never go wrong with cleaning those brake pads.
If this article will be helpful to others, then why not lend a helping hand and share it with your friends?
Hopefully, this article will give them the kick they need to clean their disc bikes correctly. It’s what every biker needs!

“I ride my bike to work for years, but is that enough? Our carelessness towards our surroundings has taken a toll on the environment. And now, everyone is responsible for changes; even the most minor contribution is counted. With this hope and spirit, I started with my partner to establish Biketoworkday to help more individuals commute to their work sites on their bikes.”