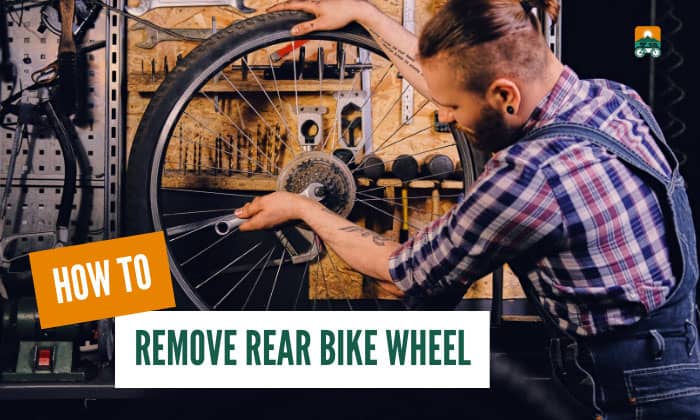
Whether you’re a long-time cyclist or a newbie embarking on a brand-new venture, the basics of your bicycle is one of the most important things you should know.
And yes, this includes how to remove rear bike wheel. You may be surprised, but when detaching the back wheel, it comes in handy 99% of the time.
Plus knowing how meaningful it is when you no longer have to call anyone else for help, you’ve got your own back! And in this article, we’ll teach you the process of what to prepare and how to do it properly!
Table of Contents
Step-by-step to Remove Rear Bike Wheel
What to prepare

- Your bike
- Wrench
Way #1 – A bike with quick release axle
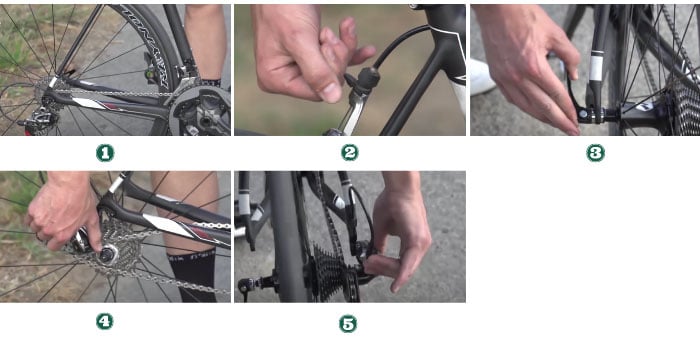
Step 1: First, change your gears into the hardest gear. This means the largest chainring should be at the front and the smallest cog should be seen at the rear cassette.
It is recommended to notice that the wheel would run smoothly as the chain won’t be caught which helps reduce tension.
Step 2: Open the brakes a little bit by turning the brake lever or simply release whichever part holds the brakes.
Step 3: Open the quick-release axle and see if your wheel becomes loose or just drops out. Before doing this, remember that your chain must be located at the smallest cog and your brakes must be open.
Step 4: Next, hold the tube of your bike for better grip on the bike. Extend your hand to the rear wheel derailleur, pull backward, and lift up to take back wheel off bike.
Step 5: Grab the back wheel and unhook your chain to remove the wheel.
Way #2 – A bike with disc brakes and with through-axle
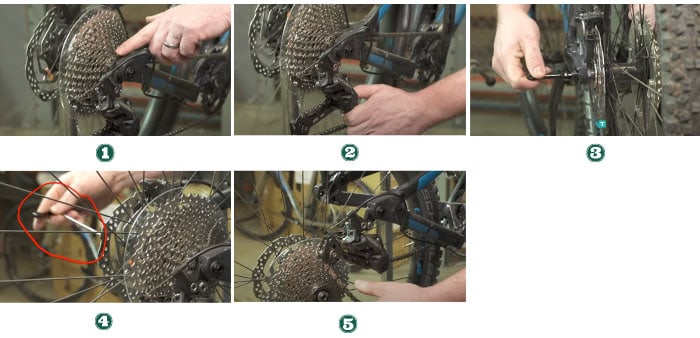
For bike models that have disc brakes instead of a wheel axle, here’s what you need to do:
Step 1: Shift to the highest gear, which is again, the smallest cog to the cassette.
Step 2: Detach the clutch by pushing down on the lever, which can be found just below the cassette. Once you’ve disengaged the clutch, you should notice if the chain is free.
Step 3: Now, open the quick-release. Turn it straight up, then turn sideways just like the photo below.
Step 4: Twist the quick-release lever clockwise while holding the wheel until it’s loose. Once it’s loose, pull and remove it. As you pull, you’ll notice that a long thru-axle is attached to it.
Step 5: Get the chain out of the way and your wheel would fall off.
Way #3 – A bike with no quick release axle
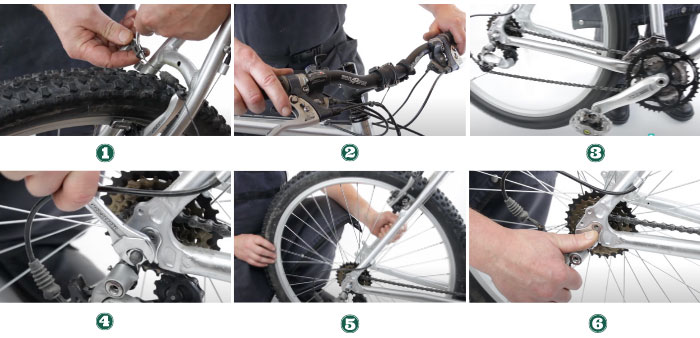
Step 1: Open or release the brakes. This specific example is for bikes that have rim brakes.
Step 2: Select the smallest combination chain wheel or sprocket. The slowest sprocket should be at the front and the fastest should be at the back.
Step 3: Begin to turn or use the pedals to make the wheels spin.
Step 4: Get your wrench, any tool that accurately fits your bike’s axle nuts. Take note of the position of the nuts along with their washers.
Turn one nut just a few degrees just to check if it moves, then for the opposite nut, fully unscrew it.
Go back to your first nut and completely loosen it as well.
Step 5: Turn your position to where your head meets the centerline of your bike. Extend your left hand to the bike’s left side
Step 6: Put your right thumb on the right side nut of the bike
Grab the derailleur using the rest of your right fingers and pull towards the direction that faces you. It should rotate outward the back wheel. Then unhook the chain.
As you do this, the bike frame and the wheel would detach. The bike frame will be lifted up and the rear wheel will stay on the ground.
Tips for Troubleshooting Common Issues

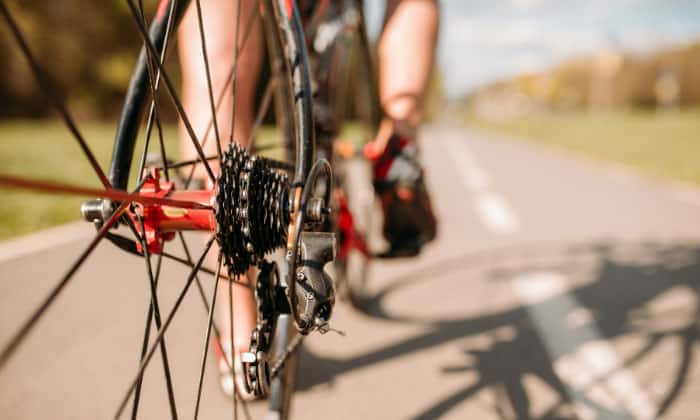
Tip #1 – Familiarize yourself with the rear components of a bike. Here is a simple diagram to get started:
Tip #2 – Lift the bike seat up by holding the rear end of your bike and keeping it off the ground to resolve the bike wheel blocking caused by the derailleur and chain.
Tip #3 – Ensure that the rear wheel is in place before you sit the bike upright. Doing this will avoid putting you at risk of rear derailleur damage.
Tip #4 – If your bike uses disc brakes, there’s no longer any need for pad disengagement.
Tip #5 – If your bike uses hydraulic disc brakes, do not push on the brakes when the disc is disengaged with the bike. This makes it more difficult for you to put back the wheels because the pads are closed.
FAQs
Can you change the rear cassette on a bike?
Yes, you can definitely replace rear bike wheel cassette. This is one of the most common maintenance tasks that cyclists do to ensure that their bike runs smoothly and safely.
Now that you know the process of removing rear bike wheel, changing the rear cassette is usually the next step.
What gear do you put your bike in when you remove the rear wheel?
If you plan to put a back wheel on a bike with gears, make sure that the derailleur is shifted to the outermost gear or also known as the smallest gear. It should also be shifted to the innermost front chain ring.
This allows more space to go through the wheel removal process simply because this gear has fewer teeth than the other gears which makes pedaling faster and smoother.
Can I replace a bike tire myself?
Yes! Once you know the basics of your bike components and how to remove your bike wheel, it’s pretty much simple to change rear bicycle tire.
All you have to do is to remove the bike tire, replace the tube located on the inner part of the tire, and fit it back in. With proper tools, and more detailed steps, this is very easy to learn!
Conclusion
That’s everything to know how to remove rear bike wheel. Whether you’re riding a mountain bike, road bike, or whatever 2-wheeler bicycle you may have, our simple instructions will help you.
Remember that this quick lesson will save you money and hours of trial and error. Say goodbye to costly bike repair shops & hello to the knowledge you have now.
Always keep in mind our tips, practice safety, and of course, share this with your cyclist friends so they won’t worry about such a thing too!

“I ride my bike to work for years, but is that enough? Our carelessness towards our surroundings has taken a toll on the environment. And now, everyone is responsible for changes; even the most minor contribution is counted. With this hope and spirit, I started with my partner to establish Biketoworkday to help more individuals commute to their work sites on their bikes.”