Everyone who is a cyclist will eventually find themselves needing to work on their chain, whether it’s on a dirt bike or a mountain bike. There’s a chain removing tool for that, but it’s important to know how to use a chain breaker as well.
Read below for a step-by-step guide on this tool and more.
Table of Contents
What You Need
- Heavy duty chain breaker tool
- Bike chain
- Spare chain pins or rivet (optional)
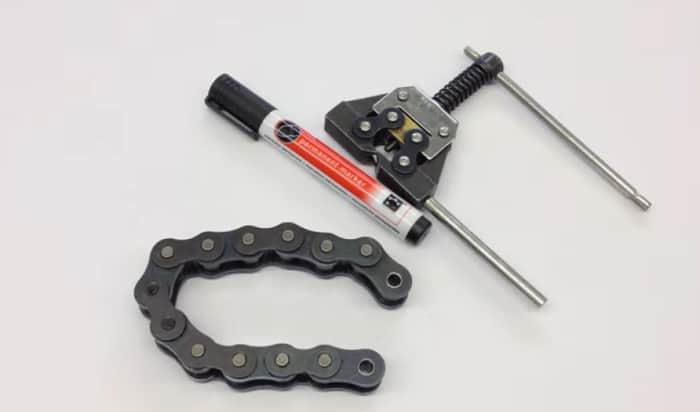
Using a Chain Breaker

A bike chain breaker tool is used both for unlinking and relinking chains and is necessary for length adjustment. This device works by pushing a pin or rivet into or out of the link.
Let’s take a look at how to break a bike chain or link it with another in the detailed steps below.
1. Use a chain tool to break a chain
Step 1: Place the chain on the tool
The tool has a knob for adjusting the tool pin and a slot for placing the chain. There are two sections on this slot, the inner and outer ones, though we’ll only be using the latter for breaking the chain.
Place the link you want to disconnect on the breaker tool and make use of the outer slot; this is the one that is farther away from the knob or handles. Turn the knob to adjust the tool’s pin until it reaches the link.
Step 2: Push the chain pin out slowly
By turning the knob further, the tool’s pin will push the pin or rivet out, resulting in the link being undone. Start turning the knob at half turns, be careful not to push the rivet out too quickly.
At some point during adjustment, you will feel increased resistance while turning the knob of your tool. It is at this point that the chain pin is on the verge of getting pushed out completely.
Step 3: Remove the link
Turn the knob all the way to push the pin out if that’s what you’re after, but it’s better not to do this if you plan on relinking the chain using this specific section later on.
To avoid removing the rivet completely, limit yourself to a half turn after feeling increased resistance from the tool; this should be enough to remove the link.
You may need to manually twist the link a bit to remove it completely, but you’ll find that just a small bit of the pin is hinged into the slot and should come off easily with the force of your hand.
2. Linking a chain
Step 1: Place the chain you want to link on the tool
To relink the chain, start by connecting the two sides. You’ll again need to twist the two ends together to get them to fit, but they should snap into place without much trouble.
Readjust the tool’s pin to clear it from the slot and place the chain onto the outer slot once more. The chain pin should be sticking out on one side of the link and facing the tool pin. Adjust the tool pin until it touches the chain pin.
Step 2: Adjust the knob until the chain pin is in place
Turn the knob to push the chain pin into the link and get it through to the other side. Aim to have a bit of the pin sticking out on both sides of the chain.
Remove the chain from the slot and check the linked section to see if it is loose enough that motion is permitted. If it is too stiff or tight, there is a need to adjust the chain pin, and this is what the inner slot of the tool is for.
Place the chain onto the inner slot and make small turns to adjust it. Check its tightness after every turn. Once the link is loose enough to move, the adjustment is complete.
Additional Information

1. A chain breaker is a universally designed tool
It can also function as a motorcycle chain breaker and can be used for other vehicle types as well. However, it is important to note that incompatibility may arise from an incorrect size or fit.
Moreover, don’t expect a bicycle chain breaker to be able to perform the functions of an industrial chain breaker tool.
2. Check for a master link before breaking
If your chain has a master link or quick link, you may not need to use a chain breaker tool. Turn your pedal and check the entire length of your chain to see if the master link is there; it will be easy to identify because it looks different from the other parts. For more detailed guides on how to remove bike chain without master link, please click here.
Master links are wider than regular ones to enable the pin to slide off and the link to disconnect. As an alternative, bike chains may have a clip instead, and removing it using pliers will allow you to remove the link.
3. Bring a tool kit on long rides
When going on long rides or biking in remote areas, it’s a good idea to bring important tools along with your food and medical kit; the breaker tool is one such item.
It will allow you to deal with certain unforeseen situations, such as if you encounter specific problems with your bike or chain.
Keeping a chain removal tool bike ready will allow you to adjust your chain on the go. Some multi-tools have chain breakers, and those are a good alternative for better portability.
If you have a master link, make sure to bring pliers instead.
Conclusion
Now, you know all about how to use a chain breaker for a bicycle, including some important points regarding its proper use. You no longer have to worry about using the tool, whether it’s a mountain bike chain tool or some other type.
Did you find this guide helpful? Tell us what you think, including any comments or suggestions in the section below. We’ll be waiting to hear from you.
Always ride safely.

“I ride my bike to work for years, but is that enough? Our carelessness towards our surroundings has taken a toll on the environment. And now, everyone is responsible for changes; even the most minor contribution is counted. With this hope and spirit, I started with my partner to establish Biketoworkday to help more individuals commute to their work sites on their bikes.”