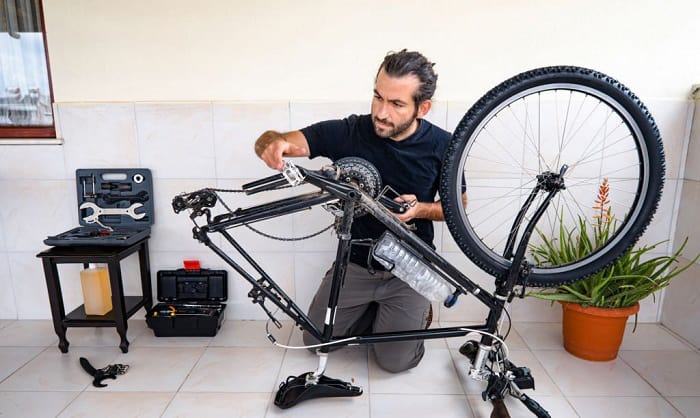
Every bicycle will need to go through adjustment once in a while. However, if you use your bike regularly, you may find yourself needing to do this process more often than you think necessary. In that case, it helps to know how to tune up your bike to reduce cost.
We’ll go over the basic steps with a guide that everyone can follow. Keep reading to learn more.
Table of Contents
What You’ll Need to Tune Up a Bicycle
- Cleaning solution
- Cleaning brush
- Cleaning cloths
- Water (for washing)
- Screwdriver
- Wrench
- Grease
- Chain tool
- Chain breaker (optional)
Step-by-Step to Paint a Bike Without Taking It Apart
Step 1: Clean the bicycle

The important first step in a full bike tune up is a thorough cleaning of the entire vehicle. This is important to remove any grease or patches of dirt that may hinder us from properly inspecting the different parts for signs of wear or damage.
Use a cleaning solution; it will be enough to remove grease, along with mud and dirt from the surface. Be thorough and wipe down the entire bicycle after washing.
It is best to proceed in an organized manner. One way to go is to begin from one side of the bike and move towards the rear until every section has been checked. For this guide, we’ll begin at the front wheel and end at the rear wheel.
Step 2: Check the front wheel
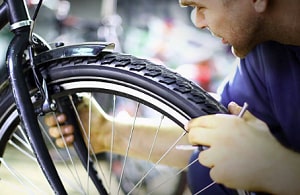
Checking the wheel includes its different components: the tire, rim, spokes, and hub.
- Go over the tread and side of the wheel and look out for signs of severe damage or wear and remove any embedded material. Observe the rotation of the wheel as any wobbling or irregularity in its movement may mean that a replacement is needed.
- Look at the details on the rim, since irregularities here may affect braking. There should be even wear across this component.
- The spokes should be thoroughly inspected as well, and take note of any damage or rusting as these may get worse and lead to bigger problems later.
- The hub should also be maintained; take it apart and clean the bearings. Hubs in good condition should be stable and make no irregular sounds. Grease the bearings and reassemble, then it’s onto the next part.
Step 3: Inspect the front brakes

You may have different types of brakes, but the process of checking them would be similar.
- The brake pads must have enough material left; otherwise, they need to be replaced. There are markers on them that will allow you to determine this.
- The pads must also wear out evenly, and it may be necessary to file the surface and even it out for better braking. Check them for any embedded material as well.
- Follow the cables connecting the clamps to the brake lever and see if there are any traces of damage.
- Use the front brake levers and test for responsiveness; braking should not only be responsive, but the clamps should respond together as well, whether they apply to the rims or discs.
Step 4: Work on the headset and handlebars
Now, go up to the headset, which affects your steering; detach everything from the head tube, including the handlebars.
It is important to clean and regrease the headset bearings — both the top and bottom ones. Clean everything else here; this goes for the handlebars, shifters, and brake levers.
After putting the parts back together, make sure to go over the screws and bolts and tighten everything properly. Worn-out bar tape will lose its grip, so make sure to replace that as well.
Step 5: Bottom bracket maintenance
- Move to the bottom bracket and detach the pedals. Remove the chain and clean it thoroughly along with every other component, then regrease.
- The chainrings need to be inspected as well; check the teeth profile for any signs of wear or damage.
- See whether the cranks still work properly; turn them to see if the rotation is still smooth. This is also a good time to ensure that the chain and derailleurs are still in proper working order.
- Observe how the chain latches from one gear to another and see if the front derailleur is still aligned. The derailleur cables must also be inspected for wear or damage. Replace if necessary to ensure that performance is unaffected.
- For the chain, it is better to use a chain tool to determine its condition; it should be changed as soon as the level of wear reaches 50%. Otherwise, you will end up damaging your gears.
- Be sure to tighten the chainring bolts as well before reattaching the pedals. If the pedals don’t work properly, this would be the time to install new ones.
Step 6: Work on the seat post and saddle
Remove the seat post and clean the tube. Apply grease to the latter before putting it back. It’s also a good idea to check the seat itself to ensure that it is still stable for use.
Step 7: Check the rear wheel and cassette
Now check the rear area of the bicycle; this covers the rear wheel along with all of its parts, as well as the rear derailleur and cassette.
- The rear wheel check will be similar to what was done for the front one, while the rear derailleur can be tested in the same way as the front unit.
- The rear cassette should be inspected thoroughly, including the teeth profile.
- Check the rear brakes as well and you’re done.
It may be more efficient to attend to the chain only after the rear area has gone through maintenance. This is one component you’re likely to replace often, so be sure to give it proper attention.
Additional Tips
1. Make a bike tune up checklist
Different people will prefer varying procedures when tuning up their bike, and a mountain bike tune up may seem somewhat different from a road bicycle tune up.
For example, a mountain bike has one front chainring, while its road counterpart typically has two front chainrings that need checking.
However, what always works is to have a standard process for what you’re doing. This is where a checklist of things to do will help.
2. Take the bike apart
When washing the bike, it helps to disassemble everything right away; this will help save time. However, doing so can be difficult for people who are new to cycling and are yet to familiarize themselves with the parts of a bicycle.
Take the bike apart and place components on a surface relative to their placement on a bicycle. This will help you remember where each part is supposed to go. Labels can be useful as well.
This is a good opportunity to learn the different components of your vehicle. It may also help to take photos of the bike parts before disassembly; you can use these as references when reassembling the bike at home.
3. Bike tune up cost near me
One clear advantage of performing a tune-up yourself is the much lower cost.
However, you may need to ask for professional help at times when a performance bike tune up is needed. A standard tune-up that includes testing for particular issues would range from $100 to $160.
4. When to basic tune up new bike and any other bicycle?
A new bicycle will need to go through a tune-up after being used for a few weeks. This applies to bikes with traditional components, and it is recommended to ask for professional assistance when you service a bike for the first time.
Older regularly used bikes should go through tune-up once every 6 months.
Conclusion
Properly maintaining your bicycle will be easier now that you know how to tune up your bike.
More than just a means to reduce costs, it is a good way to familiarize yourself with your equipment, which can only be beneficial down the road.
Have you tried giving your bike a tune-up on your own? Tell us all about it in the comments section below. We’ll be waiting to hear from you.
Always ride safely.

“I ride my bike to work for years, but is that enough? Our carelessness towards our surroundings has taken a toll on the environment. And now, everyone is responsible for changes; even the most minor contribution is counted. With this hope and spirit, I started with my partner to establish Biketoworkday to help more individuals commute to their work sites on their bikes.”