
It takes a lot of work and effort to keep a bicycle in good working condition – this extends to all of its parts. Bike wheels take a lot of punishment, and it is important to know how to tighten bike spokes, whether it’s to perform routine maintenance or to fix bike spokes.
We’ll cover the steps using a spoke tightening tool while applying the appropriate tension. With our comprehensive guide, you’ll be a pro at this task.
Keep reading to learn more.
Table of Contents
What You’ll Need
- Bicycle wheel
- Spoke wrench
- Spoke tension meter (comes with conversion chart and diameter gauge)
- Wheel stand (optional)
- Pliers (optional)
Bicycle Spoke Maintenance
Wheel spokes are the thin metal rods that connect the rim to the hub. These reinforce the whole structure and ensure that the wheel can retain its proper shape.
You can find spokes on both sides of the rim, and they are available on different bikes, including on a motorcycle rim or a pit bike.
A loose spoke will bend more, meaning it cannot support the wheel properly. Such a problem may cause further damage to the wheel and may even lead to accidents. This is why tightening bike spokes is part of routine bicycle maintenance.
Before working on them, it will be easier for you to place the wheel on a stand, requiring you to remove the wheel from the bike altogether.
Alternatively, you can also just turn the bicycle over to stand on the handlebar and saddle; this allows you to see the details of the spokes more easily.
A Step-by-step Guide to Tightening Bicycle Spokes
Step 1: Determine the proper tension
You will need to use a diameter gauge and a conversion chart that comes with it.
- Check the smallest slot where the spoke fits. Use the smallest reading if the spoke’s diameter changes along its length.
- Once you have the measurement, refer to a conversion chart that should also come with your tool.
- You will find the tension measurement expressed in kilogram-force (or KGF), which will tell you the recommended tension for your spokes.
It is worth noting that proper tension changes depending on your rim. Lighter and thinner ones will need less tension, while heavier ones require more to support the rims well.
Step 2: Measure current tension
Generally, the spokes need to have somewhat similar tension; otherwise, it will affect the wheel’s stability. However, a 20% disparity is acceptable, as each spoke can’t be precisely the same.
- Squeeze the handle of the tension meter and position it horizontally against the middle of the spoke.
- Slowly let go of the handle, and the post on the tool will move.
- Turn the tension meter tool over and check the reading on its scale – the number indicated will be the current tension setting.
Check each spoke on the wheel for both front and rear. For the rear wheel, the ones on the right side will be higher than those on the left.
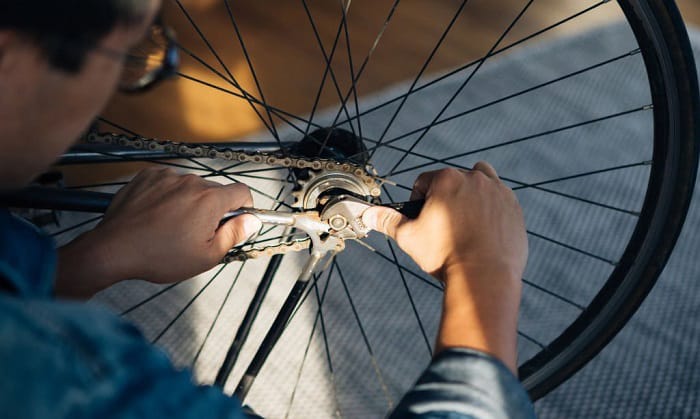
Step 3: Spoke adjustment

Changing the tension is simple; however, the spoke wrench must be compatible with the spoke nipples.
- Take your spoke wrench and place the slot onto the spoke nipple, which connects each spoke to the rim.
- Tighten bike spokes clockwise and turn the wrench in small increments of about a quarter turn; this will allow you to avoid tightening too much.
- When you adjust spokes on a bicycle, you must go back and forth between turning the nipples and measuring the current tension. It’ll be time-consuming as you’ll need to do this for every spoke for both the front and rear will.
It is recommended to adjust all spokes together instead of working on them individually.
Frequently Asked Questions
When is it necessary to tighten bike spokes?
The common indications to tighten bike spokes are a rattling sound in the wheel or visible warping in the rim. When you notice any of these, it’s best to attend to them immediately. However, some types, such as a mountain bike, need it more often.
Nonetheless, tightening spokes should not be something you do only when problems arise. Include checking and tightening them in your maintenance routine to prevent possible issues. A bike spoke won’t tighten on its own; it will loosen more if left unchecked.
Which way should you tighten bike spokes?
When you view the spokes from the hub to the nipples, the proper spoke tightening direction is clockwise, which is from left to right.
How do you tighten spokes without a spoke wrench?
You can also make use of pliers as a spoke wrench alternative to tighten them, although it will be much more difficult to do so. It may also be more challenging to get the proper average tension across all the spokes.
How do I know if my spokes are tight enough?
The best way to find out how tight should bike spokes be is to measure the tension. However, you can also check on the wheel shape; if it is even or does not make noise, it is tight enough.
Another way to check is by pinching spokes by pairs. Every spoke should be identical in tension to all others, so look out for ones that deviate. Those that bend easily will need to be adjusted some more.
What happens if you tighten the spokes too much?
Tightening the spokes too much can cause additional stress on the wheel. In the worst-case scenario, the spokes might even break under excessive tension. Similarly, the nipples and hub flange may also suffer damage from over-tightening.
Do all bikes need to have their spokes tightened?
Yes, every bicycle needs it, whether it’s on a dirt bike or a road bike. In fact, you should tighten spokes MTB rims more frequently, as they take more punishment from off-road tracks.
Conclusion
Performing proper wheel maintenance goes a long way toward ensuring safe bicycle use, and learning how to tighten bike spokes is essential for this. Familiarize yourself with the process, and it will be useful to you in the long run.
Have you tried doing bike maintenance yourself? Tell us about it and what you found challenging. Leave a message in the section below; we’ll be waiting to hear from you.
Always ride safely.

“I ride my bike to work for years, but is that enough? Our carelessness towards our surroundings has taken a toll on the environment. And now, everyone is responsible for changes; even the most minor contribution is counted. With this hope and spirit, I started with my partner to establish Biketoworkday to help more individuals commute to their work sites on their bikes.”