Whether you lack time to go outside or colder months are coming your way, putting up a bike trainer is an excellent option. If you want to continue your fitness goals and would like to maintain your routine over the winter season, setting up a bicycle trainer is the best solution.
So, how to set up a bike trainer? There are steps you should follow before finally converting your outdoor bike into a stationary or indoor equipment. It includes setting up a wheel-on bike trainer or a direct drive bike trainer at home.
Table of Contents
Things You Need for This Tutorial
Before anything else, it is important to prepare the following to successfully put up a bike trainer in your home:
- Bike
- Bike trainer
- Bike trainer stand
- Fan
- Mat
- Block
Step-by-Step Guide to Set Up a Bicycle Trainer
There are two ways you can set-up a bike trainer in your house. You can either use a wheel-on or direct-drive bike trainer for this process. But as a general rule, here are the things you should follow first:
- Ensure that you have a clean bike to use for the bike trainer setup. This will prevent messing up your room and avoid unnecessary dirt and debris coming into your house. You should brush the chain, pedals, and bike frame for this. Then, you can proceed to lubricating or oiling your bike chain properly.
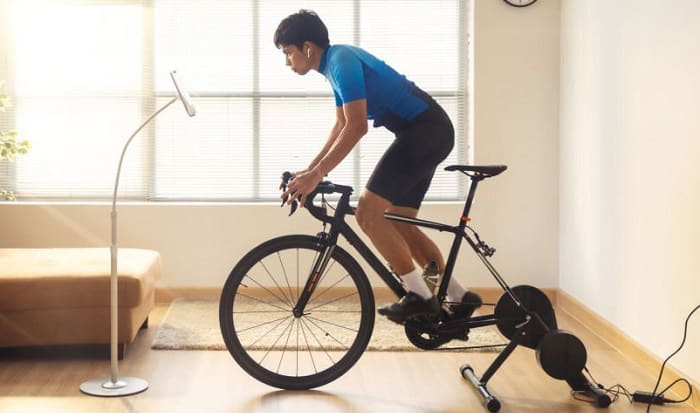
- Look for a desirable space to set up your indoor bike. I recommend looking at a level floor near a window for the proper ambiance. You can also use a fan to cool down the area and make it more conducive for exercising.
- Prepare a bike trainer mat to protect your floor from any scratches or sweat. Avoid setting up your stationary bike on a tiled floor, as this will cause accidents and injury in the process.
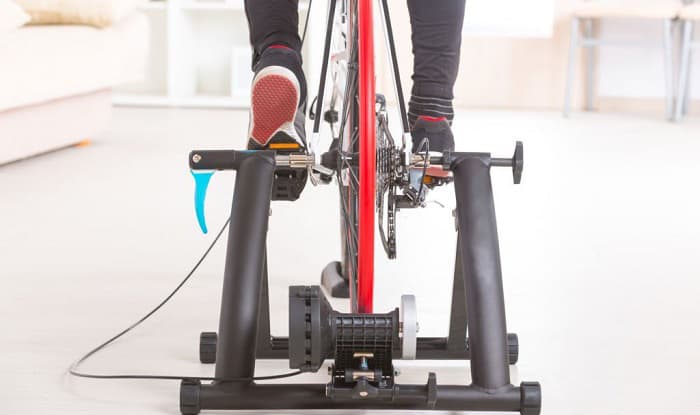
Setting up a wheel-on bike trainer
Wheel-on bike trainers are a budget choice when setting up a bike trainer at home. They are more affordable than direct-drive bike trainers.
With wheel-on bike trainers, the rear wheel of your bicycle will stay attached, and will be set up against a roller. This trainer offers an adjustable resistance intended for pushing round the pedals.
For this setup, follow the steps below:
- Step 1: If you want your routine to be quieter and last longer, it is important to change your bicycle rear tire for a bike trainer tire.
- Step 2: Inflate your bicycle tire to a tire pressure that will let you squeeze the tire a little bit. It is crucial to not inflate it too hard in order to obtain more traction when biking.
- Step 3: Then, you have to change the rear quick release trainer skewer with the device found with the bike trainer package. This device is typically made of steel to hold the energy transferred from the bike frame to the rear triangle. In case you have a disc brake bike, you should have a supplied adapter during the setup.
- Step 4: Next, you can mount the bicycle trainer into the trainer and proceed to locking it. You can use a front wheel rise, a block or a stock of books to balance the level of the front wheel.
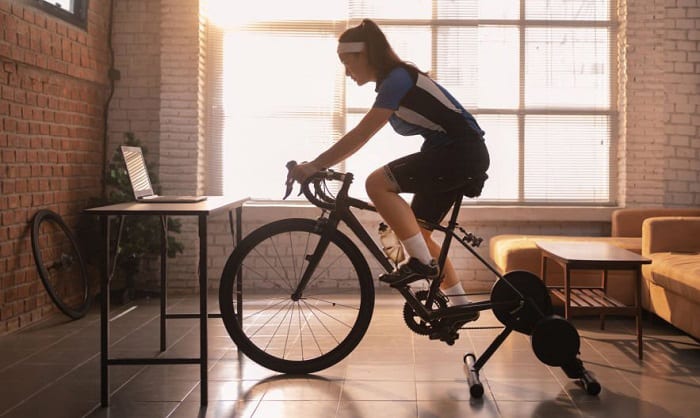
Setting up a direct-drive bike trainer
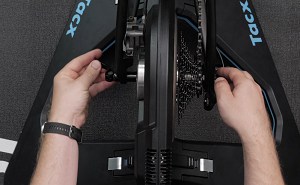
Direct-drive bike trainers or wheel-off turbo trainers may be more expensive than the wheel-on bike trainer, but they offer a more realistic training experience. With this stationary bike trainer style, the rear wheel is being removed, so the bike trainer will be able to replace it.
The bike itself will be attached to the trainer at the rear dropout as well as the bicycle chain drive cassette, which is also connected to the bike trainer.
For this setup, follow the steps below:
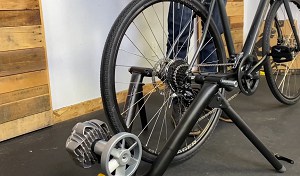
- Step 1: You need an extra cassette for this indoor cycling setup. Some products come with a cassette to prepare you to convert your bicycle into a stationary bike. You should mount this cassette onto your newly purchased direct drive trainer.
- Step 2: Then, you have to switnch gears to the smallest sprocket and remove your original rear wheel off the bicycle. If you have a disc brake bicycle, it is important to utilize a brake pad spacer to avoid the brake pads from rubbing each other.
- Step 3: Next, you are ready to mount your bike onto the bicycle trainer and proceed to locking the quick-release adaptor. Make sure to tighten the skewer to keep the bike in place and stable.
After you have set up either a wheel-on bike trainer or direct-drive bike trainer, you should also consider the following steps:
Step 1: Get the power source
In order to operate and start up your bike trainer, you need to attach a power source to it. It can be an electrical outlet or a battery pack, which you can purchase from a hardware store. Ensure that you get the correct power source: usually runs between 6 and 12 volts.
Step 2: Configure your indoor bicycle
It is essential that you configure it according to your specific needs. You have to adjust major settings like biking speed, resistance level or heart rate monitor. You can refer to bikemate indoor bike trainer manual or indoor bike trainer manual for this process, as the configuration varies depending on the equipment.
Step 3: Wear safety gears
Even though you are training indoors, you must not forget to wear the necessary safety gear. It can be a padded cycling shorts, helmet, or biking gloves.
Step 4: Protect your floor from damage
When installing a bike trainer in your house, make sure to consider protecting your floor. Place an exercise mat on the ground below the bike to avoid friction when you use a bike trainer.
Conclusion
Setting up a bike trainer is easy and will not require too much technical skills. It is crucial to prepare the necessary equipment before you start the process. Then, you can always refer to this guide on how to set up a bike trainer properly in your house. The instructions are simple and easy to follow, and can be done by anyone.

“I ride my bike to work for years, but is that enough? Our carelessness towards our surroundings has taken a toll on the environment. And now, everyone is responsible for changes; even the most minor contribution is counted. With this hope and spirit, I started with my partner to establish Biketoworkday to help more individuals commute to their work sites on their bikes.”