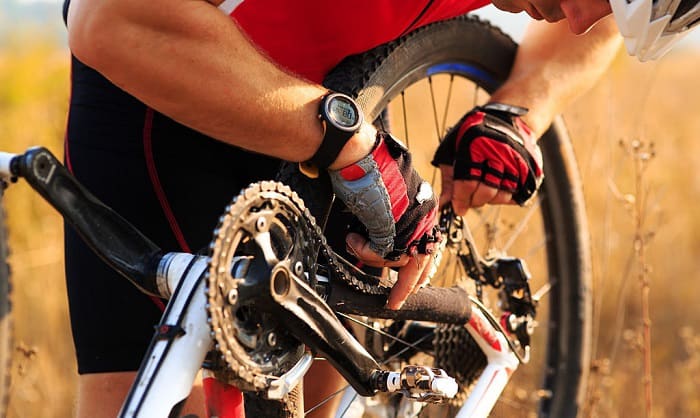
No matter how frequently you use your mountain bike, there will come a time that you need to replace the bike chain. The chain can either break or lose upon months or years of usage. It is a regular repair and maintenance routine to keep your bike at its optimal level of performance.
You can consult a professional mechanic or put the chain on the bike by yourself. Of course, for people who want to cut costs while learning a new skill, it is ideal for them to do it themself.
So, how to put a chain on a mountain bike by yourself? Well, here is our easy-to-follow guide that includes identifying the master link, adjusting, removing the old chain, and getting the right chain length, among others.
For full details, read on as we provide you this simple guide.
Table of Contents
- How Often Does Your Bike Need Chain Replacement
- Ways to Replace the Chain of Your Mtb
- 1. Use a bike stand or hold the bike steadily
- 2. Search for the master link
- 3. Adjust and remove the chain
- 4. Use new and reliable chain for replacement
- 5. Get the right measurement of the chain
- 6. Put the chain in the bike gear mechanism properly
- 7. Join the loose ends
- 8. Test your new chain
- 9. Lubricate the chain
- Taking care of your bike chain
- Conclusion
How Often Does Your Bike Need Chain Replacement
Among the bike components that require frequent replacement is the bike chain. It is one of the most used and often abused parts of your bike that requires regular check-up and repair. Bike chains are very important as it transports energy from the pedal to the wheels.
Thus, it is essential to frequently check whether your bike chain is damaged or loose. If you have been using an MTB chain for ten or fewer gears, you have to replace the mountain bike chain when it reaches 0.75% mark.
On the other hand, for eleven and twelve-speed chains, a replacement is needed when the 0.5% mark approaches. In the case of two-sprocket or single-speed bikes, the 1% mark is your indicator.
Once you already determined that your chain needs to be replaced, here are the steps you need to consider:
- Use a bike stand or hold the bike steadily
- Search for the master link
- Adjust and remove the chain
- Use new and reliable chain for replacement
- Get the right measurement of the chain
- Put the chain in the bike gear mechanism properly
- Join the loose ends
- Test your new chain
- Lubricate the chain
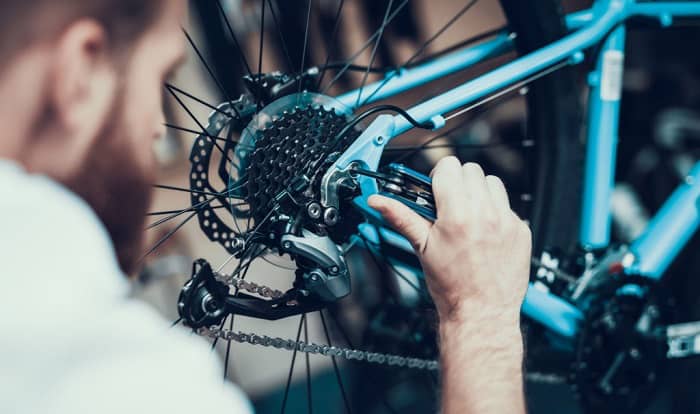
Ways to Replace the Chain of Your Mtb
1. Use a bike stand or hold the bike steadily
In order to have a clear view of how damaged your bike chain is, use a bike stand. It will prevent your bike from slipping or falling during your inspection. You can take a good look at your bike if it is properly positioned.
If you do not have a bike stand, you can also turn your bike upside down. The bike should sit on the seat and the handlebars. In this way, you can check your bike more thoroughly.
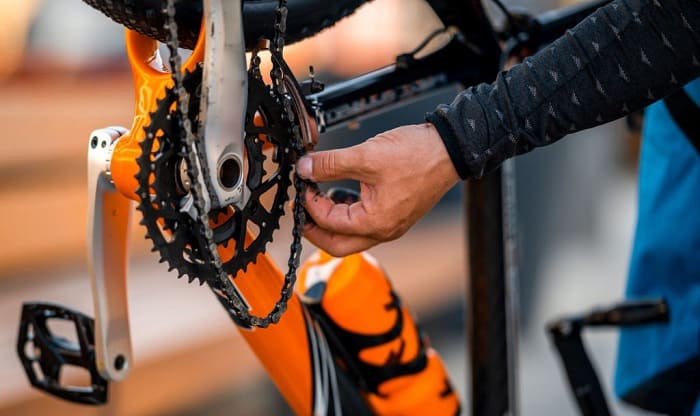
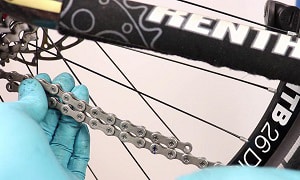
2. Search for the master link
Upon checking, you should locate the chain master link initially. The chain master link looks different from the rest of the chain link. It can look darker or lighter depending on the manufacturer. Once you locate it, take note of its position for immediate removal.
3. Adjust and remove the chain
After you locate the master link, it would be easier for you to remove it. Using your hands and a chain tool, press the pin to the master link and squeeze the two ends of the master link in an inward direction. Ensure that the pins are being removed from the slot so you can easily detach the chain.
Pro Tip: If you are using a chain tool, you should hear a popping or snapping sound indicating that you already disengaged the connection. It is an indicator that you already loosened the master link.
4. Use new and reliable chain for replacement
Once you have disengaged the chain connection, prepare the new chain you will use for replacement. Be sure that you are using a new chain for replacement. An old one might not still resolve the problem of a loose and damaged chain in the process. Using a newly bought chain ensures that your biking experience will be elevated.
5. Get the right measurement of the chain
Commercial bike chains come in different sizes. It is important that you get the measurement of your old chain first as a guide when cutting the new bike chain.
Before making your chain purchase, ensure that the chain is compatible with your bike. If you are using an 11-gear bike, you must get an 11-speed bike chain as well. It ensures that your bike will run as smoothly and evenly as possible. If the new chain is longer than your old chain, you should count the number of links and remove the excess accordingly.
Pro tip: You can cut the excess chain after you fill the new chain to your MTB’s drivetrain.
6. Put the chain in the bike gear mechanism properly
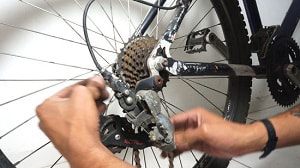
Once you fit the chain into the drivetrain, ensure that you put a chain back on a mountain bike securely. You must pull the chain around the overall drivetrain until the ends meet at the bike wheel’s middle point.
Check that you place the ends of the chain at the middle of the bike’s wheels to distribute balance when you are riding. The ride will be smoother if you place the chain in its right position.
7. Join the loose ends
At this point, you have not exactly secured the attachment of both ends of the chain. Using the master link, slip the link into the chain slot to ensure that the ends are securely fastened.
Pro tip: For better results, make sure you hear a click or pop once you place the master link in the right place. As an alternative, you can pull the chain on either side of the link and place the central link accordingly.
8. Test your new chain
Now that you already completed the mountain bike chain replacement, you are ready to test drive your new bike chain. Initially, you can use your hand and manually run the bike chain through the drivetrain. You should feel the chain running smoothly with your hands. If you observe that some parts are tight or loose, adjust them accordingly using a chain tool and pins.
9. Lubricate the chain
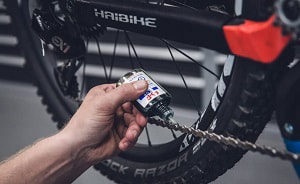
Once you are satisfied with how the new chain runs, you can choose to lubricate it as well. It will improve the chain and display a smoother ride. The lubricant can also protect the chain from dirt and other damaging substances.
Taking care of your bike chain
A good bike chain is an investment. In order to ensure the longevity of your bike chain, you should know the proper ways of taking care of it. By doing so, you can prevent the chain from severe wearing out, and save you resources as well.
After the mountain bike chain installation, you should clean the bike chain regularly. Meaning, you should check any stubborn debris that can build up to the chain. Use a brush and lubricant when taking care of the bike chain. In case you observe dryness, it is advisable that you oil it. Keep the oil in moderation to not over smoothen the bike chain.
Conclusion
The bike chain is a very important component of your MTB. Without it, there will be no successful transfers of energy from the pedals to the wheels. To ensure smooth ride and easy pedaling, it is critical that the drivetrain works properly.
To do so, regularly inspect your bike chain, and if it requires, opt for replacing the mountain bike chain immediately. Changing your bike chain does not require consulting a bike mechanic. In fact, you can do it all by yourself.
With the tips and guide on how to put a chain on a mountain bike we provided, we are confident that you can replace your bike chain on your own. We kept the steps simple and easy to follow so even a beginner can understand.

“I ride my bike to work for years, but is that enough? Our carelessness towards our surroundings has taken a toll on the environment. And now, everyone is responsible for changes; even the most minor contribution is counted. With this hope and spirit, I started with my partner to establish Biketoworkday to help more individuals commute to their work sites on their bikes.”