
Have you ever noticed something unusual about your bike? For example, is it still performing at the optimum level like it did before? Or you find your bike a little off, and riding on it seems to be bothering you?
Well, it might be a bike chain issue. Your bike might be experiencing a loose chain, making your ride seem to be off-balance. In order to bring it back to its best performance, your bike chain must be tightened. For this process, you just need to follow our guide on how to tighten a bike chain.
It includes loosening the bike nuts and rear axle, pulling the rear tire backwards, and setting the right amount of tension to the chain. For a more detailed approach, continue to read on this page.
Table of Contents
What is a Bike Chain
A bike chain is one of the most important components of your bike.
It gives your bike its sole purpose – mobility. The bike chain has the ability to transfer energy and power into the drive wheel, making your bike move at different speeds. It turns the wheel go round and round, while absorbing the power you make with the pedal.
In case your bike chain has a loosening issue, it will reduce the level of power and efficiency your bike can deliver. There are several reasons for a loosening bike chain. It can be an incompatibility of newly replaced bike chain to chain bands and cogs, loosening a bottom bracket, or lack of derailleur gear.
Nevertheless, whatever the reasons might be, the bike chain issue is very resolvable. All you need to do is follow the step-by-step process we listed below:
- Preparation (Pro tip: Using a bike stand will make your work easier)
- Loosen the nuts and rear axle (Pro tip: Use a reliable wrench in this step)
- Drag or pull the rear tire back
- Test the tension you put on the bike chain
- Put the rear tire to its original position
- Test your bike chain and tire
The Process of Tightening a Bike Chain

- Preparation
Of course, the key to any successful bike repair and maintenance activity is preparation. So before going into the hard part of tightening your bike chain, it is crucial to prepare the tools needed for the activity. For this process, you need a socket wrench, bike stand (not necessary), lubricant, and gloves. (Another way is to use the chain breaker tool, learn more)
Next, it is essential to set your bike in the correct position. On this part, you can use a bike stand or any flat surface to get a better view of the bike chain. Then, you need to flip your bike until the saddle and handlebars are facing down.
You must be facing the bike wheels to give you a good angle and access to the chain and rear area of the bike. In case you are worried about scratches and damage to the handlebars and saddle, using a bike stand is ideal. It will not only hold your bike into a proper position, but gives you a comfortable height level, too.
In case you lack the bike stand, you can lay flat cardboard, a cloth or newspaper, as well.
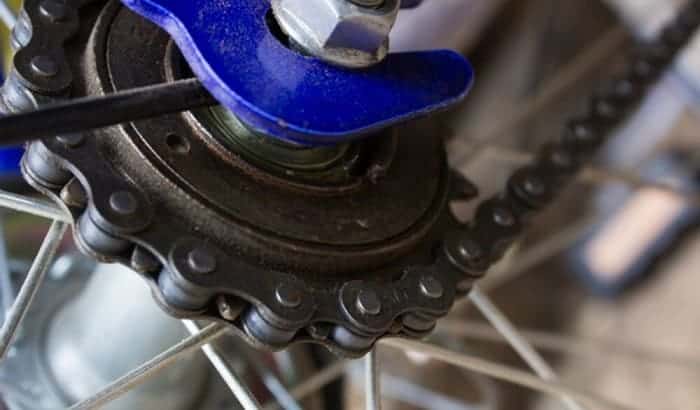
- Loosen the nuts and rear axle
Now that you have already set the position of your bike, the next step is releasing the nuts and rear axle. You will need to use a reliable socket wrench for this process. It is necessary to get access to the chain and adjust it according to your desired tightness.
In doing so, you have to slightly loose the nuts that are connecting the tire to your bike. Then, with your socket wrench, turn the nuts into a counter clockwise direction. If you feel that the nuts are already loose on both sides, you can now stop turning the wrench counterclockwise.
(Pro tip: You do not need to remove the nuts from the bike completely. It is only vital to loosen them a little to allow you to play around with the chain, and check for its tightness)
- Drag or pull the rear tire back
After slightly loosening the nuts, it is now easier to drag or pull the rear tire backwards. In this process, you have to loosen the hold of your tire onto the wishbone. You can do this by pulling the rear tire backwards, depending on how the tire holds to the bike frame.
This is one of the most crucial steps in tightening your bike chain. So, it would be best if you did this in a controlled and gradual manner. By dragging the rear tire backwards, the chain’s tension is slowly increasing, reducing the chain sagging.
You do not have to be aggressive in pulling the tire because it might only damage the bike chain. An abrupt move might cause your chain to crack, as well. It is essential to create a gradual movement when pulling the tire backwards.
- Test the tension you put on the bike chain
Similar to step 3, you need to create tension to the chain by pulling the rear tire backwards. Afterwhich, you can now move the chain around to ensure that it is now being tightened. With the tension you put, the chain should move around by approximately half an inch in opposite directions.
If the chain is moving more than half an inch, it is an indication that the bike chain is still sagging and loose. Repeat the process of dragging the tire backwards, until you are able to move the chain for about half an inch.
(Pro tip: You have to be careful putting tension on the chain, too. If the chain can move around for less than half an inch, the chain will become too tight. You might not want this to happen, as this means pedalling will be more difficult. Or worse, the pedals will not be able to turn)
- Put the rear tire to its original position
Once you already set the right tightness of your bike chain, you can now proceed to much easier steps.
Meaning, you are ready to put the rear tire back to its original position. Make sure that the rear tire is set at the center of the wishbone. After that, you can now tighten the nuts on both sides using a wrench socket.
- Test your bike chain and tire
Now that all your bike components are back to their original locations, you can already test your bike chain. As we have mentioned, the chain should only move around half an inch forward and backward. It means that the bike chain is now properly tightened.
Also, in this step, you need to check whether the rear tire has been positioned in a proper and secured manner. To do this, you can give the rear tire a spin, and ensure that it does not touch the chain, or the frame while moving.
If you want to make the speed at the optimum, you can use a lubricant on the bike chain, as well. Also, when tighten your bike chain, you should also clean it. Click here to learn the trusted bike chain cleaner and the most popular bike chain degreasers.
Conclusion
After going through this quick and easy guide, we hope that we were able to help you with your bike chain concerns. Of course, it is normal to experience a loosened bike chain from time to time. Thus, we made this guide simple and quick to understand. May the steps we mentioned are clear and concise, which you can easily follow through.
Next, if you have something in mind, we love to hear your thoughts. So, do not hesitate to comment below for additional insights and suggestions. Also, if you find this article helpful, you are very much welcome to like and share.

“Bike commuting should be the trend for the next few years, and it is a convenient and eco-friendly way for us to travel. And we are here to make it a bit less troublesome for people who want to maintain their vehicle for a long time. So, the content I expect to put out here is offering help for bikers who are facing issues with parts of their bikes once in a while. Let’s have fun and protect the environment together!”