Do you notice a significant stretch to your bicycle chain? If you do, your worn-out chain might need replacement. However, the steps are a bit challenging because you have to consider the chain type of your bike.
Regular link chains have links that look the same, while master link chains come with a link that’s distinguishable from the rest.
To know how to remove a link from a bike chain, you’ll also need the right tools that go along with a good set of instructions. When you are fully equipped, every step flows smoothly, and you can finish the task in no time.
Table of Contents
Tools you need
For a regular bike chain link:
To remove a link on a Master Link Chain:
- Master Link Plier
- Needle Nose Plier
I know how hard it is to follow the wrong steps, so I made it easier for you by specifying the right process for each chain. In this way, you will not have a hard time removing a single link out of this bike part.
Removing a Link From a Regular Bike Chain
Follow these steps to remove a single link using a handheld chain tool.
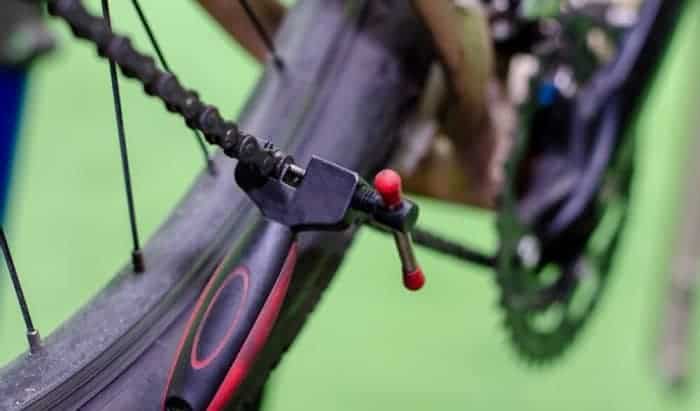
Step 1: Get your chain tool.
Few people would ask the definition of this device. But it is just a little handheld device with a spinning handle and a metallic pin. The metal pin pushes out the chain’s rivet so it would come apart.
This tool can be easily found at a bike shop near you. But, you can save the hassle of going out by buying a chain tool online.
Step 2: Put the pin in one of your Links into the Chain Gadget.
Did you see the small metal pin? Next to it are two prongs that can fit one of your bicycle chain links. This is where you can slip the link to put it in place. These prongs must perfectly fit the space on one part of the bike link.
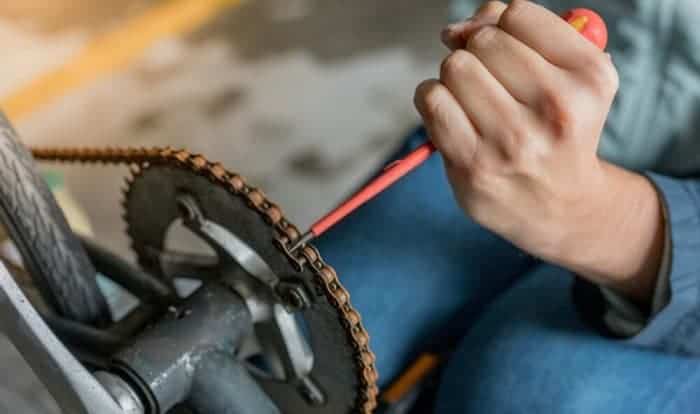
Step 3: Nudge the Pin into the Link
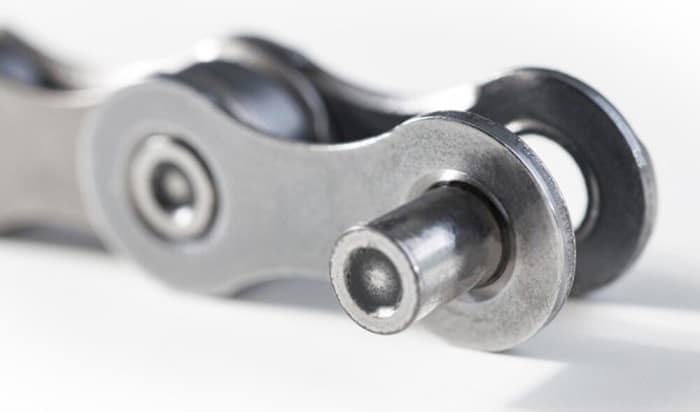
A bike chain comes with inner and outer plates, pins, and rollers. Use your chain tool to push the pin from the rollers, making the whole chain undone.
For this to happen, the pin must contact the chain link’s center first. Once this is done, you must maintain the clockwise rotation of the handle. This process requires a bit of strength due to some resistance. You have to ensure that the device has not slipped off the pin.
Ensure that the rivet is moved towards the link’s other side as you rotate the handle. You should stop spinning when you notice that the rivet has almost gone out the link. If the rivet drops off, reinstalling the bike’s pin is almost impossible.
If you unintentionally shove your pin out entirely, try to eliminate that link and shorten the chain to make everything intact. But this process can make it challenging to shift certain gears.
The remaining option includes visiting a bike store and asking for a brand new pin that you can add to your chain, or better yet, replace the whole thing.
Step 4: Remove the Chain from the Tool and Pull it away.
Hold the bike’s chain on every link side using your hands and pull it apart by wiggling it to and fro until the chain link breaks out.
After separating a part of the chain links, you can remove them from the cogs or sprockets and take them out from your bicycle. When you assemble the chain again, you will need the chain device to shove the pin back to the part you detached.
Removing a Link From a Unique Link Chain
I will now teach you how to take one link from a Master Link Chain.
Step 1: Look for the Chain’s Most Vital Part (Master Link)
A master link chain is usually put on modern and multi-speed bikes.
In your bicycle chain, a master link comes with a unique look that differentiates it from the rest of the chain. It usually comes with a different color on one side, and other times it comes with rounded metallic pins at the middle of the bike links.
There are also times that your bike’s master link comes with a dart or arrow on it, which makes it easier to spot.
Step 2: Use Master-Link Pliers to Press the Link
A Master-link plier is a special type of pliers specifically intended to fit the crimps of the chain link. If you’re wondering where to find this incredible tool, you can click on the photo above or find one at a local bike store.
You must place the pliers in a way that puts the two jaws in the holes on the link’s sides. Make sure the master link is between the pliers’ jaws.
When you are done positioning the link, you can put pressure on the pliers to bind the jaws. After that, squeeze the link.
One alternative for master link pliers is needle-nose pliers. However, this tool is more difficult to use compared to the previously-mentioned tool.
Step 3: Let go of the Master Pliers to Detach the Link.
Separate the link and the master pliers’ jaws by pulling them apart from the side portion of the link.
Step 4: Remove the Bike Chain from your bike
This is the last step for this tutorial. So, carefully tug the chain away from the sprockets. Since the link is already detached, this process is just a piece of cake.
When you want to put the chain back, you can just relink the rivets found at the chain’s end and secure it in place.
If you want a more visual lesson, you can also watch this video or check out this tutorial here.
Pro Tips:
- Don’t insert your chain tool in other parts of the chain other than the pins, as this can damage the chain.
- When separating the link, do it carefully so you would not bend the link. The chain needs to be replaced if it gets broken or twisted.
- Riding at high cadence is usually more efficient and more cost-effective. Avoid pedaling in tougher gears and cross-chaining because these two things put more stress on your bicycle chain.
- One tip to make master link extraction easier is to give the chain some slack. You can do this by simply putting the chain on the tiniest cog at the back and putting the tiniest ring in the front.
Conclusion
And there you have it! Now you can make your ride more efficient and extend your bicycle chain’s life by removing a link from it. Do not forget to bring the right tools, like the Oumers Universal Bike Chain Tool and the Park Tool Master Link Pliers.
What do you think about the tutorial? Did you have fun following the simple steps? Tell us more in the comments, and help us out by sharing this article with your friends. It would really mean a lot!

“Bike commuting should be the trend for the next few years, and it is a convenient and eco-friendly way for us to travel. And we are here to make it a bit less troublesome for people who want to maintain their vehicle for a long time. So, the content I expect to put out here is offering help for bikers who are facing issues with parts of their bikes once in a while. Let’s have fun and protect the environment together!”