
Did you have problems fixing your bike chain? If you do, then we’re on the same boat. Years of cycling made me realize that to extend your bike’s life, you must know a few things about its maintenance, which is challenging.
Chains are commonly the trickiest part of our bike and learning how to put bike chain back on derailleur includes constant caution.
Luckily, you can do it in the comfort of your own home with the right gears and knowledge. Just avoid putting your fingers in the chain and always wear protective gloves when you’re at it.
Table of Contents
- Prepare the Things You Need
- Put the Bike Chain Back
- Step 1: Raise the Bike Wheel
- Step 2: Thread the Chain to Your Back Derailleur
- Step 3: Thread the Bike Chain to the Back Cassette
- Step 4: Weave the Bike Chain through the Front Derailleur
- Step 5: Work the Bike Chain to the Fore Sprocket
- Step 6: Join the Two Ends of the Bike Chain
- Step 7: Pedal Forward Until the Bike Reaches the Correct Gear
- Step 8: Do Some Final Go-through
- Conclusion
Prepare the Things You Need
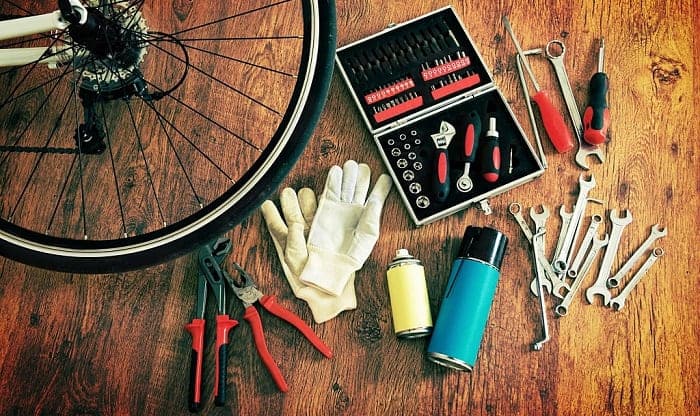
All the tools you will need mostly depend on the type of bike chain which you would only use during the removal process. However, given that you’re done with tweaking and all you have to do is to put back the bike chain, you will only need the following:
- Protective Gloves
- Chain Tool
Before you start putting your bike chain on the derailleur, let me give you a thing or two about derailleurs and chains.
To be keen on speed, bikers really like to invest in high-quality bike gear, including a derailleur. A bike derailleur is a device that changes gears and shifts the chain from one sprocket to another. These two play a fundamental role in your bicycle’s performance.
Put the Bike Chain Back
Step 1: Raise the Bike Wheel
Elevating the bicycle wheel is a good practice as it allows you to see your bike from a better angle. This way, you can put the chain back with less struggle and it also stops the bike from shifting as you do the job.
Turn the bicycle and allow it to sit on the seat and the handlebars. You need to hold and assess it carefully to keep your bike from scratches and dents.
You might be asking about the bike stands. Well, the bike stand works by placing your bicycle upside down, facing the air. It may be a weird position, but since chains are susceptible to road slip-offs, this one becomes an ideal position when fixing.
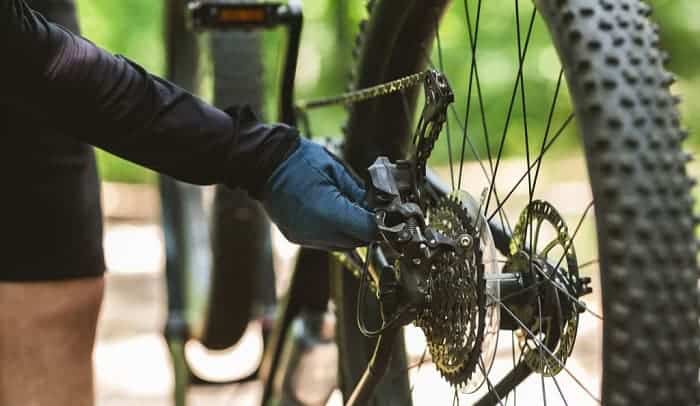
Step 2: Thread the Chain to Your Back Derailleur
Next, thread your bike chain through the bike’s rear derailleur and around the frontal sprocket. In this process, you would be required to rotate the rear wheel, which is an easier act if the bike is somewhat elevated and not directly on the ground.
Most of the bike’s back derailleur is loaded with a spring that maintains the chain’s tightness as you ride. You should use this advantage by pushing the back derailleur’s arm forward and offer looseness in the bike chain.
Then, work this opportunity to thread one end of the bicycle chain over the tiniest part in the frontal sprockets. Let go of the rear derailleur’s arm and ensure a snug bike chain.
Doing this part is highly essential if you want a smooth and safe ride.
It is also important to take note of the derailleur’s arrangement, which is crucial in changing gears. If your back derailleur comes with a cable attached to the shifting structure, you should switch to the highest gear or the tiniest cog at the back.
And if the fore derailleur comes with a cable attached too, you should switch to the lowest gear.
Some bicycles, like the fixed-gear ones known as fixies, do not usually have a derailleur. This also goes the same for bicycles with a hub-gear shifting system.
These types of bikes would only require you to thread the bike chain onto the back sprocket. You should also turn the bike wheel as necessary.
The chain must also go to the middle of the small metallic tab smoothly, located between two small pulleys in the derailleur.
You know you did this part correctly when the bike chain creates a smooth and aligned S-shaped path that goes back through the bike derailleur.
Also, ensure that your bike chain is not resting or taking on anything aside from the pulleys. Because if it does, your backward ‘S’ will be likely to have a bump.
Step 3: Thread the Bike Chain to the Back Cassette
For a geared bicycle, you will see the cassette as a simple bundle of various sprockets installed to the bike’s back wheel, which is where you thread the chain.
When you have done this step correctly, you can then pull the chain up and around the smallest sprocket in the bike’s cassette. You should also ensure that the bike chain is snugged and perfectly threaded into the back derailleur going to the sprocket.
Afterward, you can pull it thoroughly to have slack at the front end of the bike chain.
Step 4: Weave the Bike Chain through the Front Derailleur
Most modern and geared bicycles come with a metallic system near their front sprocket. This part is responsible for shifting the bike chain from one gear to another and it is where you thread one lead end of the bike chain.
As you thread it onto the front derailleur, make sure to turn the back wheel and have the right slack you need.
And since fixies do not have a front derailleur, you can just easily thread the bike chain over the lead sprocket.
Step 5: Work the Bike Chain to the Fore Sprocket
Adjust your bike chain with the tiniest part of the front cogwheels. You should stretch it properly so it would engage safely with the front sprocket’s teeth.
After that, you should pull it over the sprocket as you rotate the pedals. Rotating the pedals is an important thing if you want to give yourself some slack.
Step 6: Join the Two Ends of the Bike Chain
Once the chain safely passes through your bike gear mechanism, you can now connect the chain’s two ends and start cycling again. However, you should first align the male and female ends using a chain tool like the Oumers Universal Bike Chain Tool.
Ensure that the two edges rest firmly on the tool’s groove and that the teeth are hooked properly. You can then rotate the handle to run the pin to the chain, joining the two links.
Just ensure that the bike pin juts out an even distance from every part of the link. Because even a small misalignment can result in the structural vulnerability of the chain. No one wants to result in another patch-up, right?
Step 7: Pedal Forward Until the Bike Reaches the Correct Gear
We are almost at the end! For this part, you must work gently until the bike comes to the suitable gear. To make this work easier, I highly suggest getting on your bicycle and pedal forward slowly.
If your bicycle is geared, the bike chain may return or jump back to the previous gear during its slippage. You would need patience as you have to change gear constantly until you can pedal the bike smoothly.
Remember that fixed-gear bikes have a more dangerous and tricky chain slippage. It is the symptom of a really loose chain. So, what you can do to fix this is to adjust the tension in your bike chain by shifting the wheel to the rear before you start cycling again.
Step 8: Do Some Final Go-through
Before you go back to your normal biking session, it is important to have secure and comfortable gear after your bike goes through some fixing.
Once you ride it down for a final check and notice that your bike still produces noise, you should change gears again, which you can do from the front and rear derailleurs.
To give yourself more understanding, check out my favorite video guide that’s extremely detailed.
Pro Tips:
- I highly recommend cleaning off the gear before you fix it, especially when you’re not on the road by the time it becomes undone. You can easily examine the problem when the bike chain and derailleur are clean.
- Keep in mind some chains are directional. Putting a directional chain in the wrong way can affect its efficiency and lifespan.
- Before you proceed to fix your bike chain, it is important to knot and tie up any loose and hanging clothes. If you have long hair, it is best to tie them up too.
Doing so will help you encounter unwanted events before repairing your bike chain. You do not want to risk the dangers of your hair that may tangle with the bike chain.
Conclusion
Did you enjoy this guide on how to put bike chain back on derailleur?
To recap, it’s important to bring a handy tool, like the Oumers Universal Bike Chain Tool, with other essentials anywhere you go. Do yourself a favor too, and know the basics of repairing.
It can save you a few bucks from minor repairs and the dangers of long rides. Plus, it even keeps you going even when the chain slips off.
Tell us what you think in the comments and share this incredible hack with your friends to keep them going on the road.

“Bike commuting should be the trend for the next few years, and it is a convenient and eco-friendly way for us to travel. And we are here to make it a bit less troublesome for people who want to maintain their vehicle for a long time. So, the content I expect to put out here is offering help for bikers who are facing issues with parts of their bikes once in a while. Let’s have fun and protect the environment together!”