
Riding bikes has been the recent fad, with people wanting to sneak more exercise in their routine, or cutting off from their carbon footprint. It is easy, cost-efficient, and without a doubt convenient…but can you draw it?
Don’t worry, you definitely do not need an art degree for a simple bicycle drawing. All it takes is a clean sheet of paper, a pencil, and a handful of determination. Read on as we make drawing a bike easy with this guide on how to draw a bike step by step.
Table of Contents
What You Will Need for This Tutorial
- A clean sheet of paper
- A pencil
- An eraser
- A pen (optional)
- A ruler
- Coloring materials (optional)
How to Draw a Bike

Follow this step-by-step guide to achieve an easy drawing of a bike:
Step 1: Draw a grid
A grid can serve as your guide in drawing the bike and its parts. This can be a real timesaver, especially if you are a beginner.
To do this, take your pencil and ruler and draw a rectangle. From the middle, draw one vertical and one horizontal line, making a cross.
Draw another horizontal line to divide the upper half of the rectangle. Then, draw a vertical line in a similar manner. Do this again for the bottom half of the rectangle, and voila—you have a grid.
Draw the grid lines very lightly. This will make erasing easier after the process. Alternatively, you can fold the paper into four columns and rows.
Step 2: Plotting the width and height of the bike
Using your pencil, mark off the width and height of your bike. Draw light lines to mark its general proportions and draw two circles for the wheels.
Step 3: Outline the frame of the bicycle
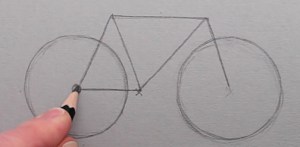
Begin drawing the bike structure. To do this, draw a narrow, horizontal rectangle above the rear wheel.
NextA, draw a pair of diagonal lines parallel from each of the wheels, and connect them by drawing another set of parallel lines.
Lastly, draw an additional set of parallel and diagonal lines crossing in the opposite direction where the diagonal lines meet the horizontal lines.
Step 4: Add details for the frame, handlebars, and saddle
You do not need complicated details, just add some lines and simple shapes. Check a good reference photo and try your best to replicate their positions in your bike drawing.
Step 5: Draw the rims and chain rings
A real bike will not function without the rims and chain rings. Draw two small circles in the center of each wheel, one inside the other. Extend a short pair of parallel lines from the innermost circle for the front wheel, then extend a second set of lines upwards from the first.
Draw a circle between the wheels and enclose a teardrop-like shape where it connects to the small circles in the rear wheel. This serves as the bike’s chain.
Step 6: Draw the bike seat, pedals, and handlebar grips
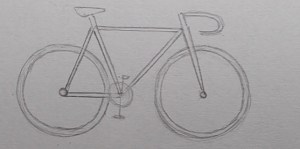
Draw the bike seat by overlapping a circle and elongated oval. Give it dimension by drawing a curved line across it.
Draw a small rectangle and add vertical and straight lines for the pedal. For the handlebar grips, draw an irregular shape like a backwards “C”.
Step 7: Adding final details
Unleash your inner artist. Take your pen and contour the details of the bike. Add flowers or a basket. Once you are happy with the lineart, you may erase the pencil marks and the grid. You may also color your drawing.
If you are a beginner in biking, it can also help to draw a bicycle and label its parts for reference.
Drawing a Bike With Extra Elements
Now that you know how to sketch an easy to draw bike, you may step up your cycling drawing by adding more components to it.
1. How to draw a bike with a person riding it
Using the same bike sketch, draw a C with its base touching the seat part of your drawing. This will serve as the person’s back arch. Draw two short parallel lines for the neck and a circle for the head.
Add elongated diagonal lines reaching the handlebars to illustrate the arms, and end with a grip-like shape for the hands.
On the bottom half, add a “>”-like shape towards the pedal for the leg. Finally, add an irregular oval-like shape touching the pedal for the foot.
Now that you have outlined the shape of a person riding a bike, put in details that will define it further, like clothes, shoes, and a helmet.
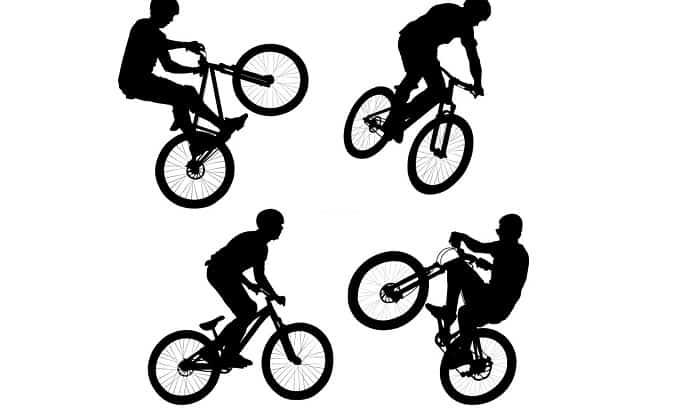
2. How to draw a bmx bike
A bicycle motocross, more commonly known as BMX, is designed to complete jumps, tricks, and stunts. These are less suited for on-road rides and more commonly seen in skate parks or pump tracks.
- Step 1: Create a grid as shown in the tutorial above.
- Step 2: Mark off the width and height of the sketch. Put into consideration the biker’s body and the BMX. Lightly draw an oval on the upper half of the grid for the rider’s head and two small circles on both sides of the bottom grid for the wheels.
- Step 3: Add a frame to the bicycle and draw the body and the neck of the cyclist. Do this through a combination of straight, curvy, and diagonal lines.
- Step 4: Outline the rider’s arms, legs, and facial features.
- Step 5: Add more details to the rider. Sketch features in his helmet, sport shoes, and overall clothing. Draw circles for the bicycle’s hubs.
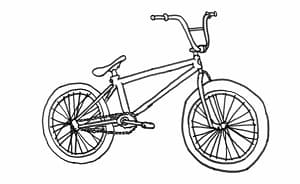
- Step 6: Work on the overall figure and pay extra attention to small details, such as the biker’s clothes and the frame of the bike. You may also add a saddle.
- Step 7: Add finishing touches. Contour the BMX and the rider by applying varying thickness from light to dark in the line. Adding details like shadow and ground texture can help in the overall finish. Once you are done, erase the grid.
Conclusion
While riding a bike can be intuitive to long-time riders, drawing one is an altogether different matter. This tutorial about how to draw a bike step by step aims to make a simple bike drawing easy for basically anyone, and we hope this worked for you, too.
If that is the case, please do not forget to engage with us by subscribing to our content or by sharing your experience in the comments below.

“I ride my bike to work for years, but is that enough? Our carelessness towards our surroundings has taken a toll on the environment. And now, everyone is responsible for changes; even the most minor contribution is counted. With this hope and spirit, I started with my partner to establish Biketoworkday to help more individuals commute to their work sites on their bikes.”